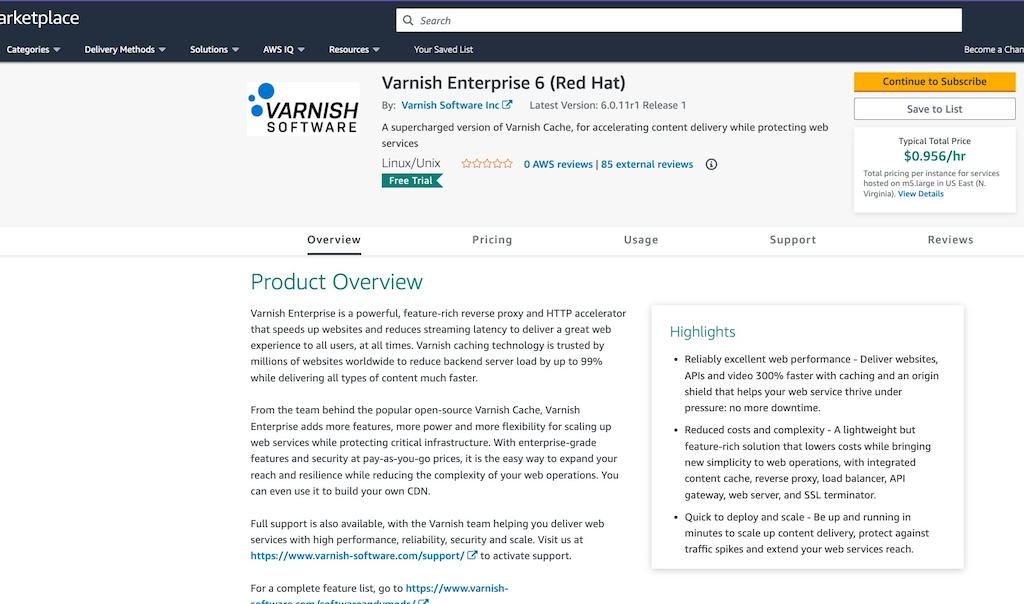
Choose one of our products from the AWS Marketplace page (search for Varnish Software Inc.) and click on “Continue to Subscribe”
Next you will be prompted to login to your AWS account.
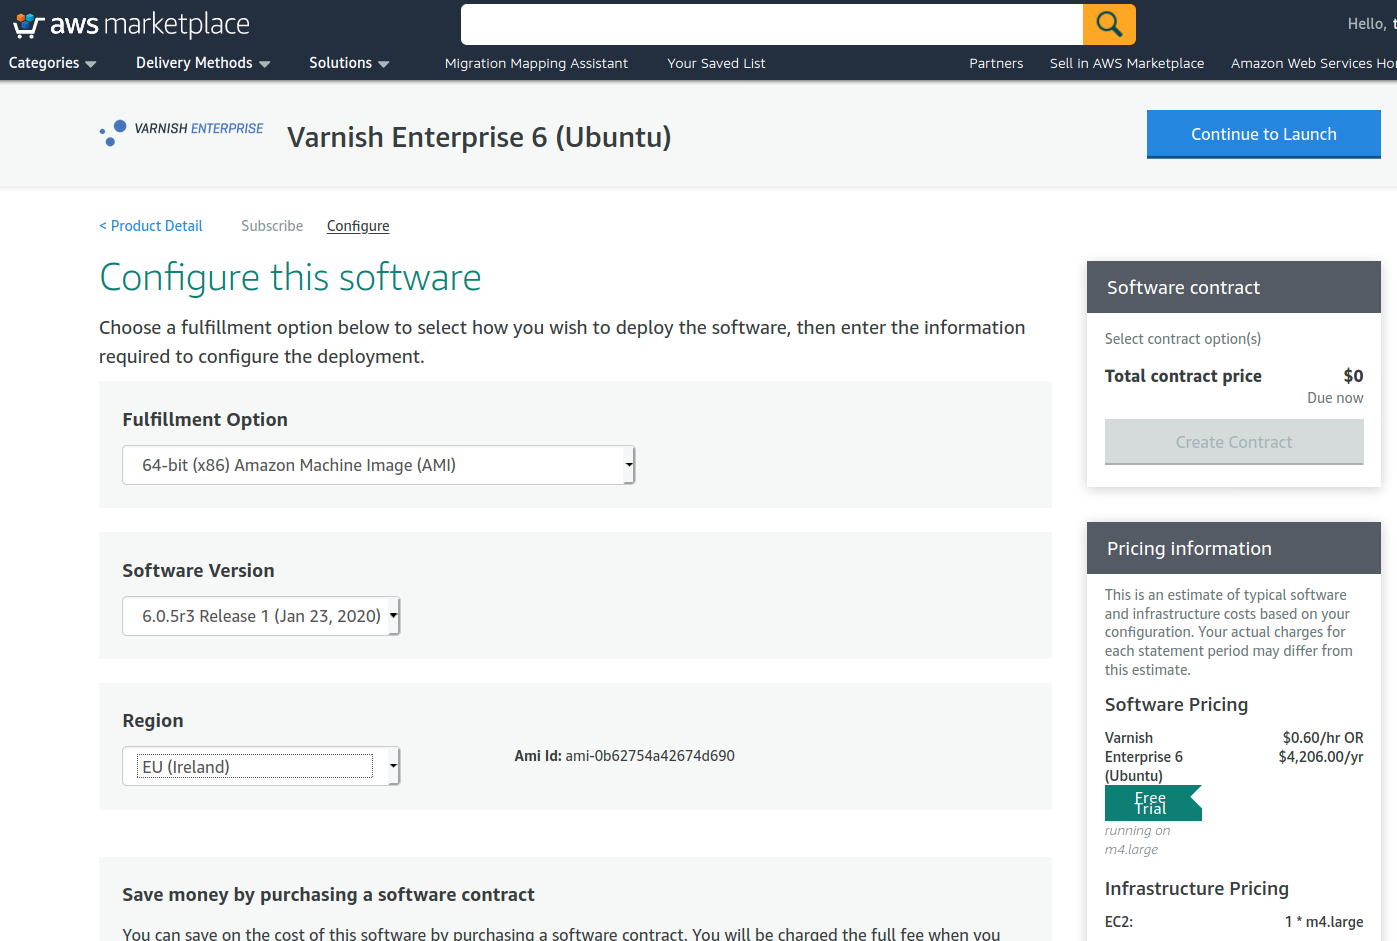
After login, you will see Terms and Conditions and the software offer from Varnish Software Inc. (Pricing/Available EC2 instance types). You may want to select to subscribe an annual license to save cost approximately 20% of the total software price. Once you satisfy the information, click on “Continue to Configuration” button.
(First time users, may need to click on “Accept Terms and Conditions” button before being able to click on the “Continue to Configuration” button.)

Next you choose a fulfillment option. Mostly is about software versioning and a region to run the product. Then you click on the “Continue to Launch” button. You can view pricing details on the right-hand side of the page.
On this page, under “Choose Action”, there are 3 options to launch the software.
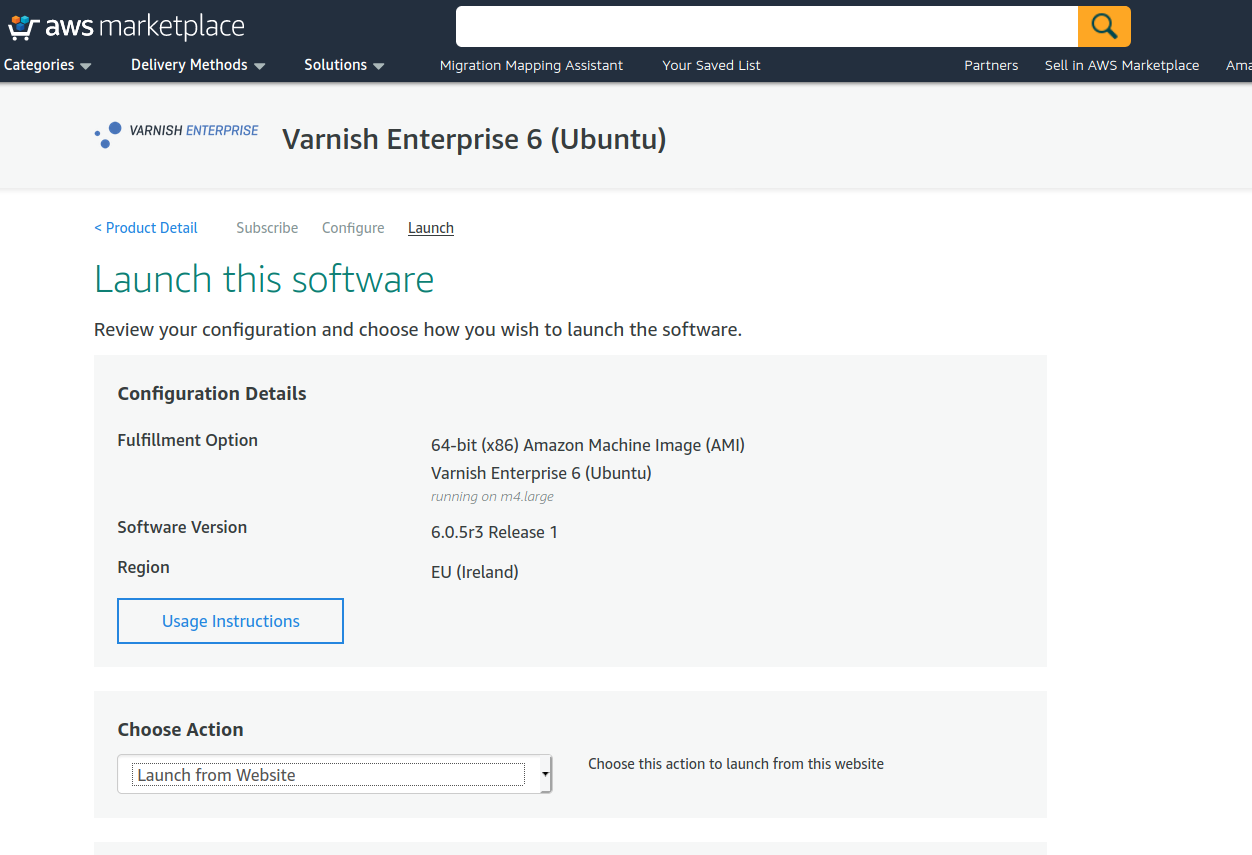
To launch from Website, you select “Launch from Website” and scroll down to select EC2 Instance Type, VPC Settings, Subnet Settings, Security Group Settings and Key Pair Settings before clicking on “Launch” button to run an instance.
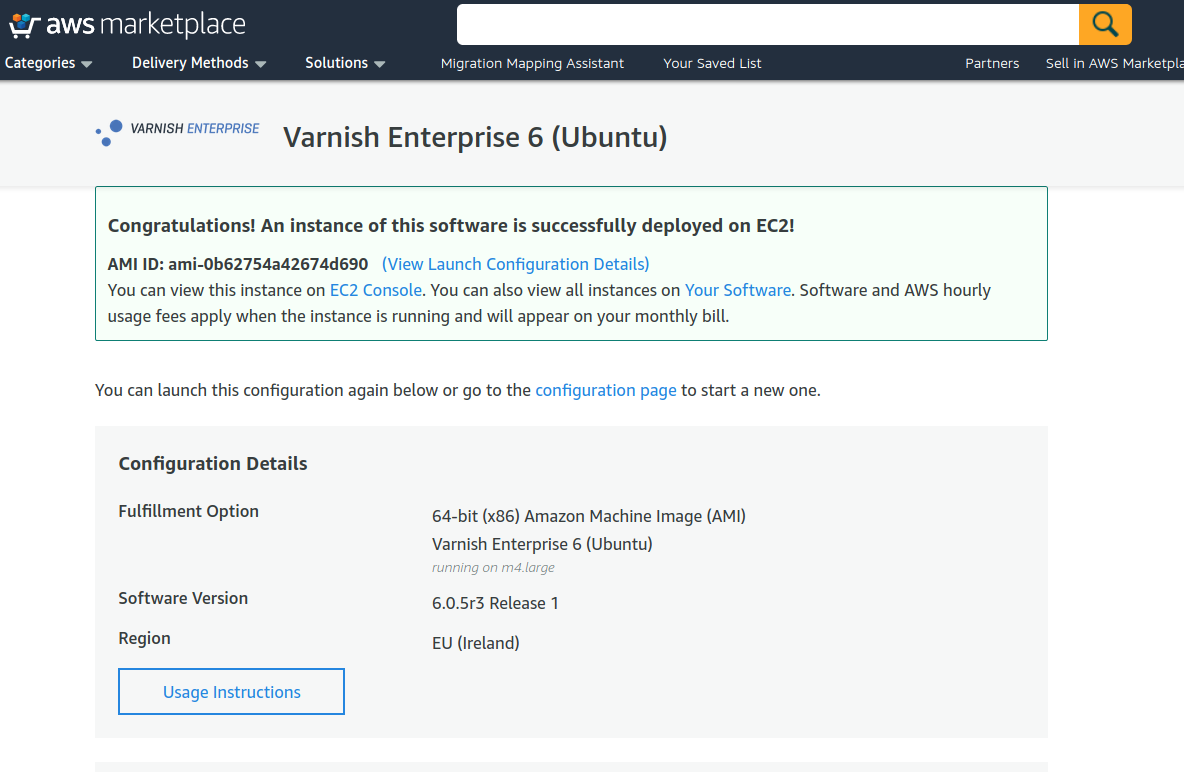
That’s it. Your Varnish Software instance is up and running. Next, please tune up your configuration and start enjoying the product benefits.
The 2nd option is to start the instance manually with more flexible options from AWS EC2 console. Select the option “Launch through EC2” and click on “Launch” button.

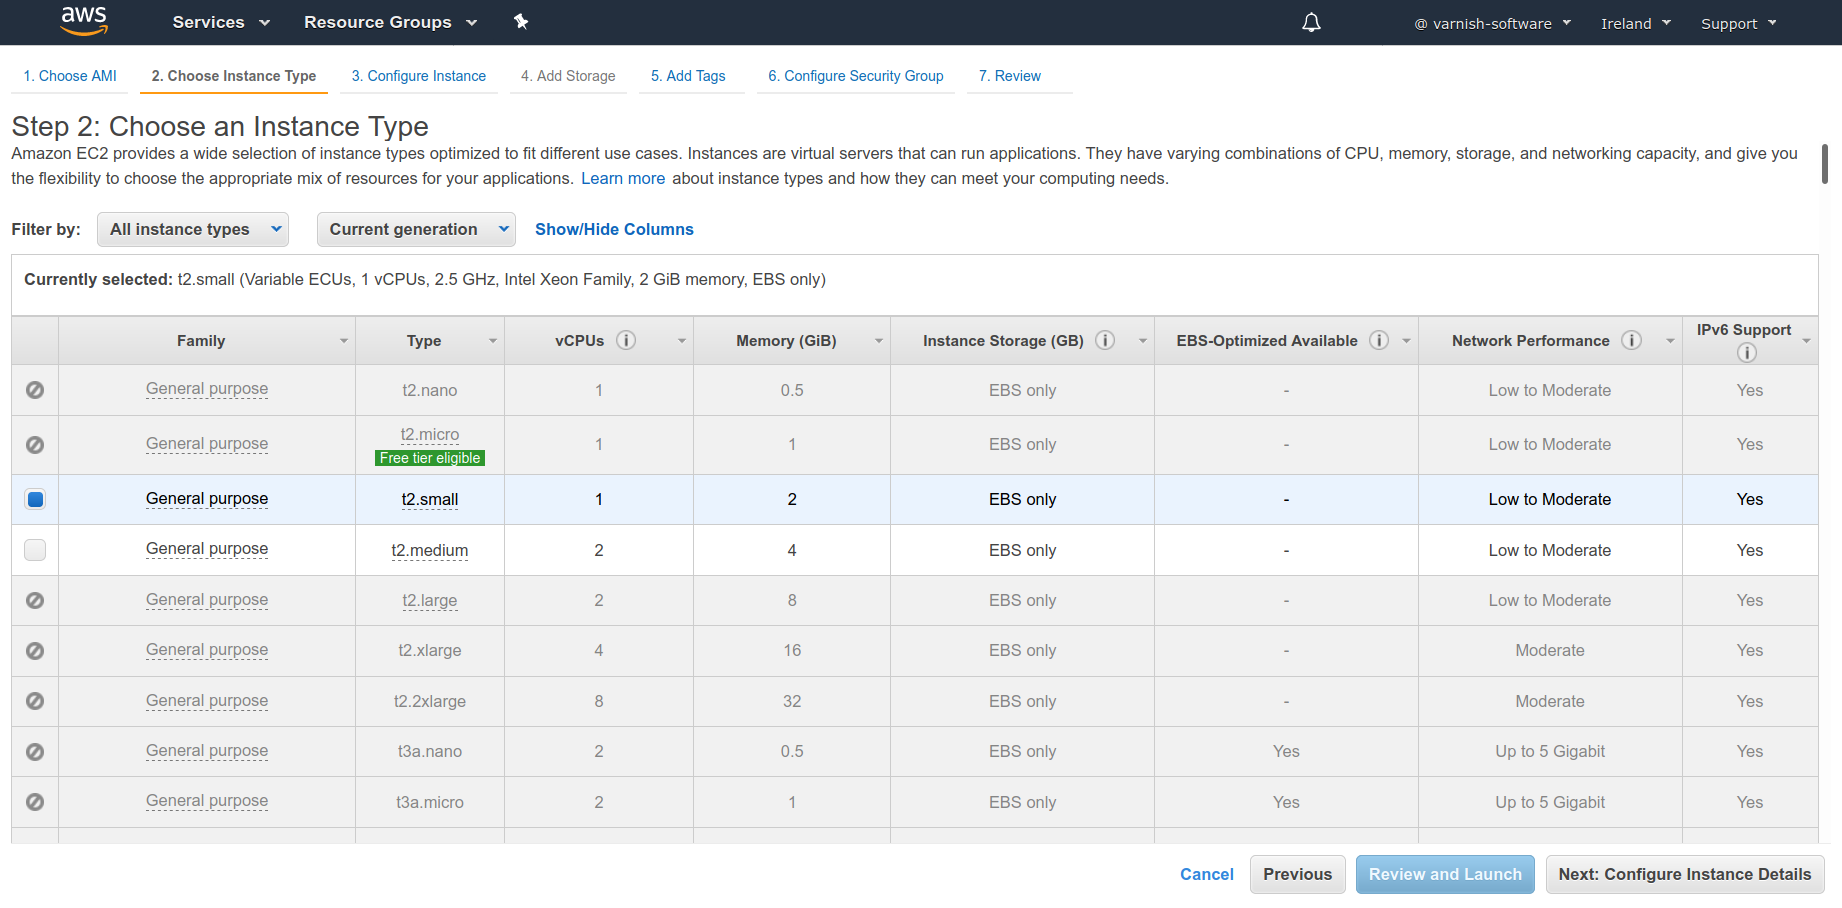
Next the Request Instance Wizard will be displayed. On the first screen (Step 2), you will be prompted to choose an appropriate instance type. Select one and click Next.
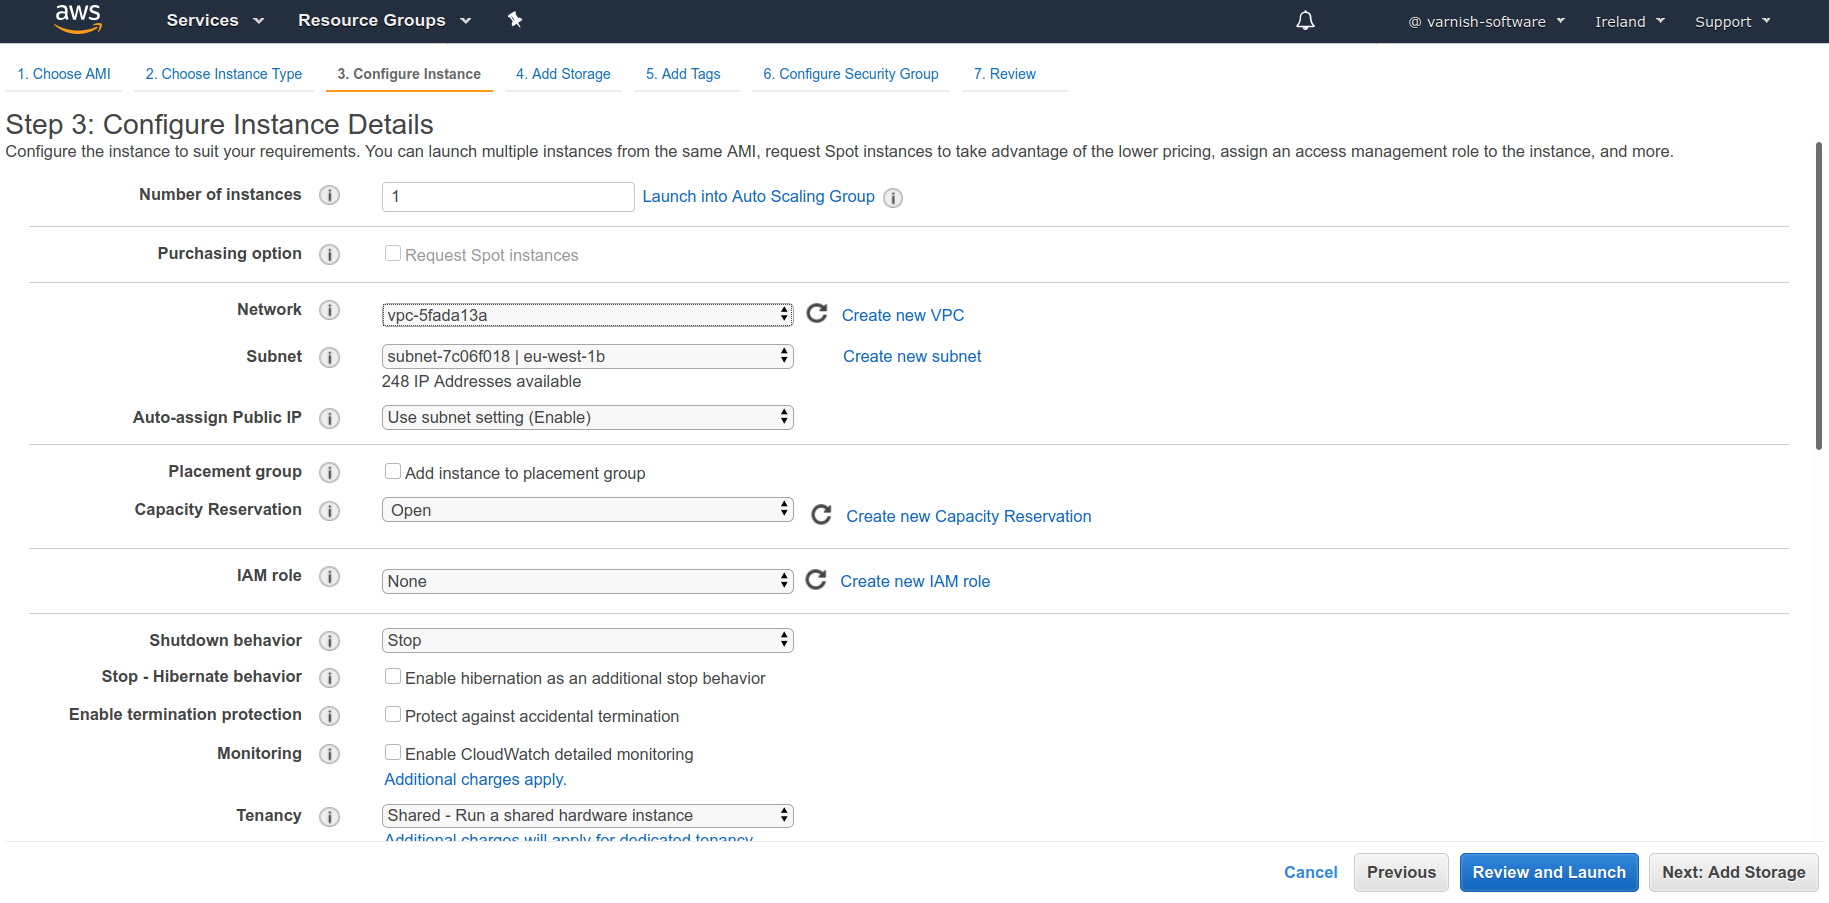
Step 3, asks you to configure your instance details, such as Number of instances, Network information and Availability Zone. If you intend to automate your setup, you can run your “User Data” script once the instance is fully booted up on this page as well. Once you’re done, click next.
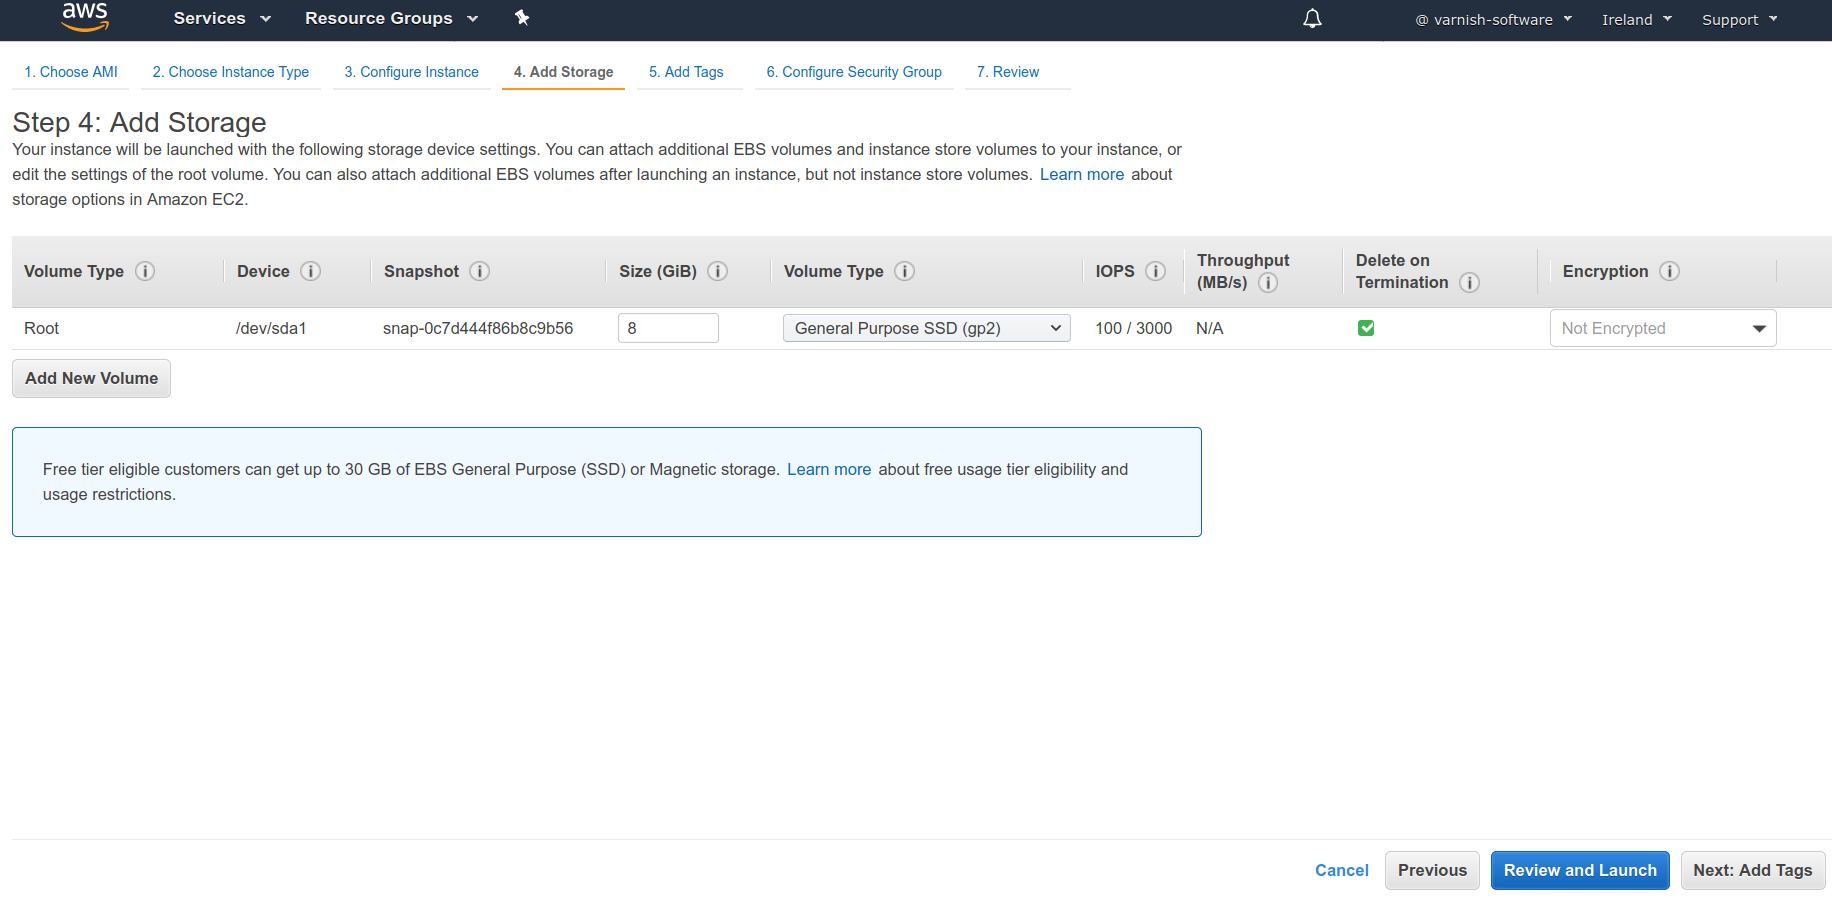
Step 4, is trivial for VCS and Varnish Cache instances as they don’t require additional storage. However, it can be relevant for Varnish Enterprise because it comes with the Massive Storage Engine (MSE). MSE is useful when you need a persistent cache stored on your local SSD disk, instead of in memory. Once you are done, click next.
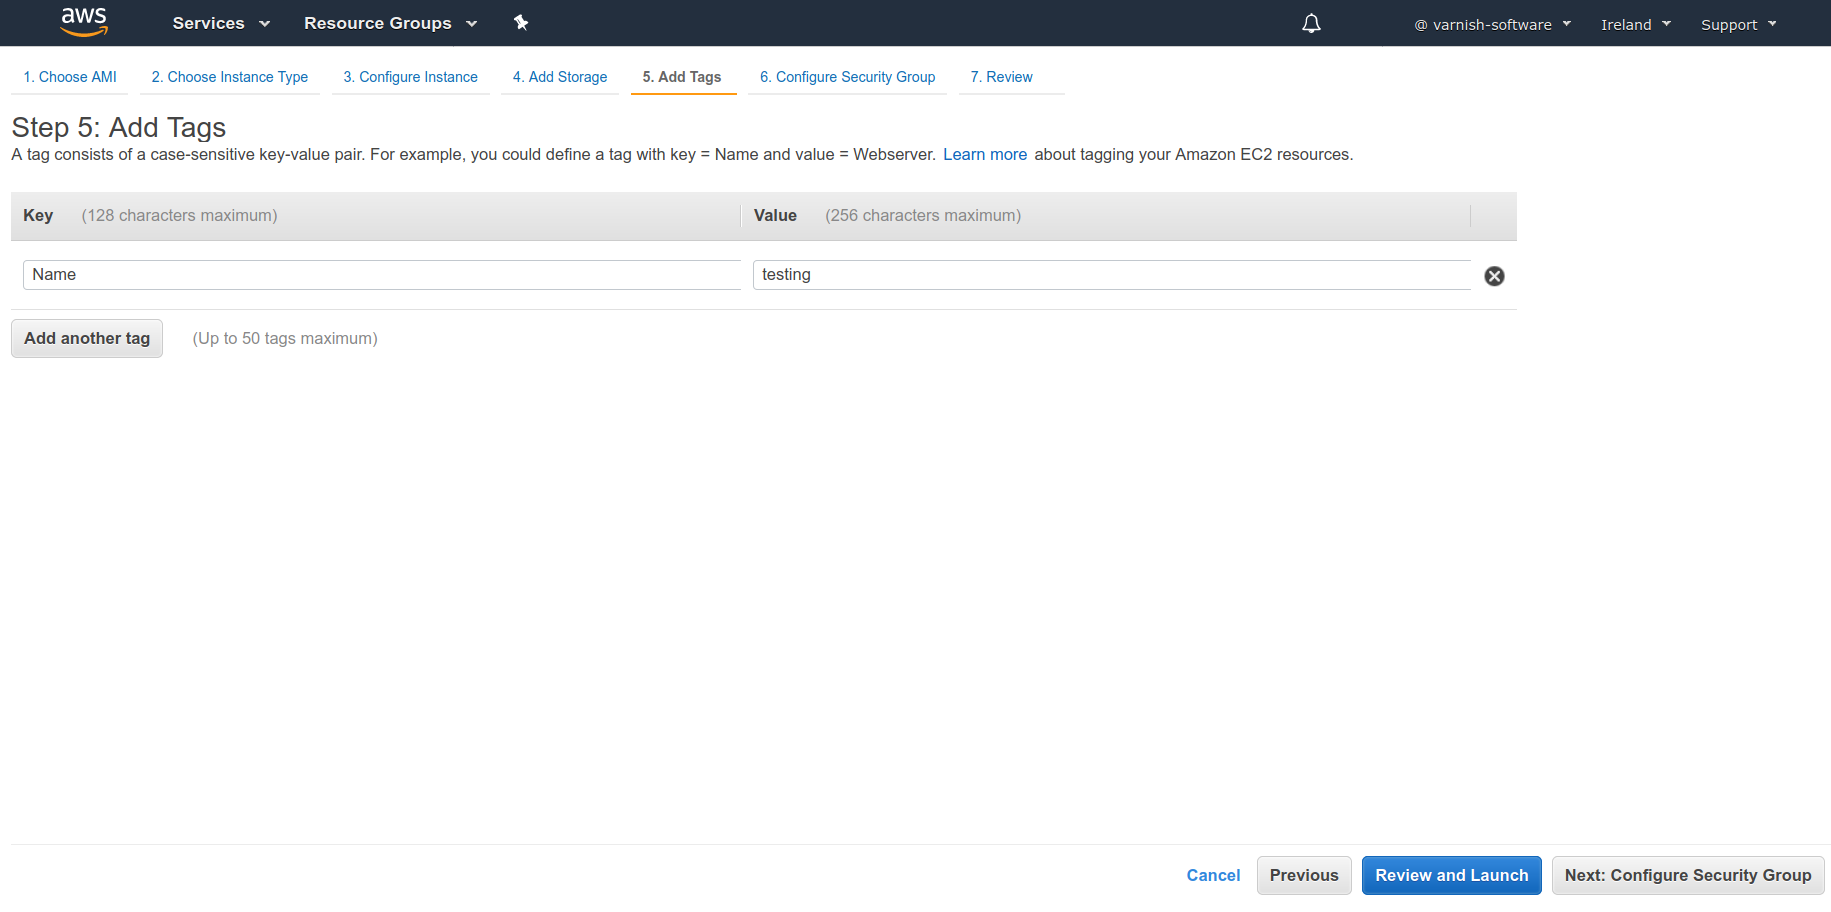
Step 5, asks you to create instance reference tags. You may leave it for now because it can be created at any time on EC2 running instance page.
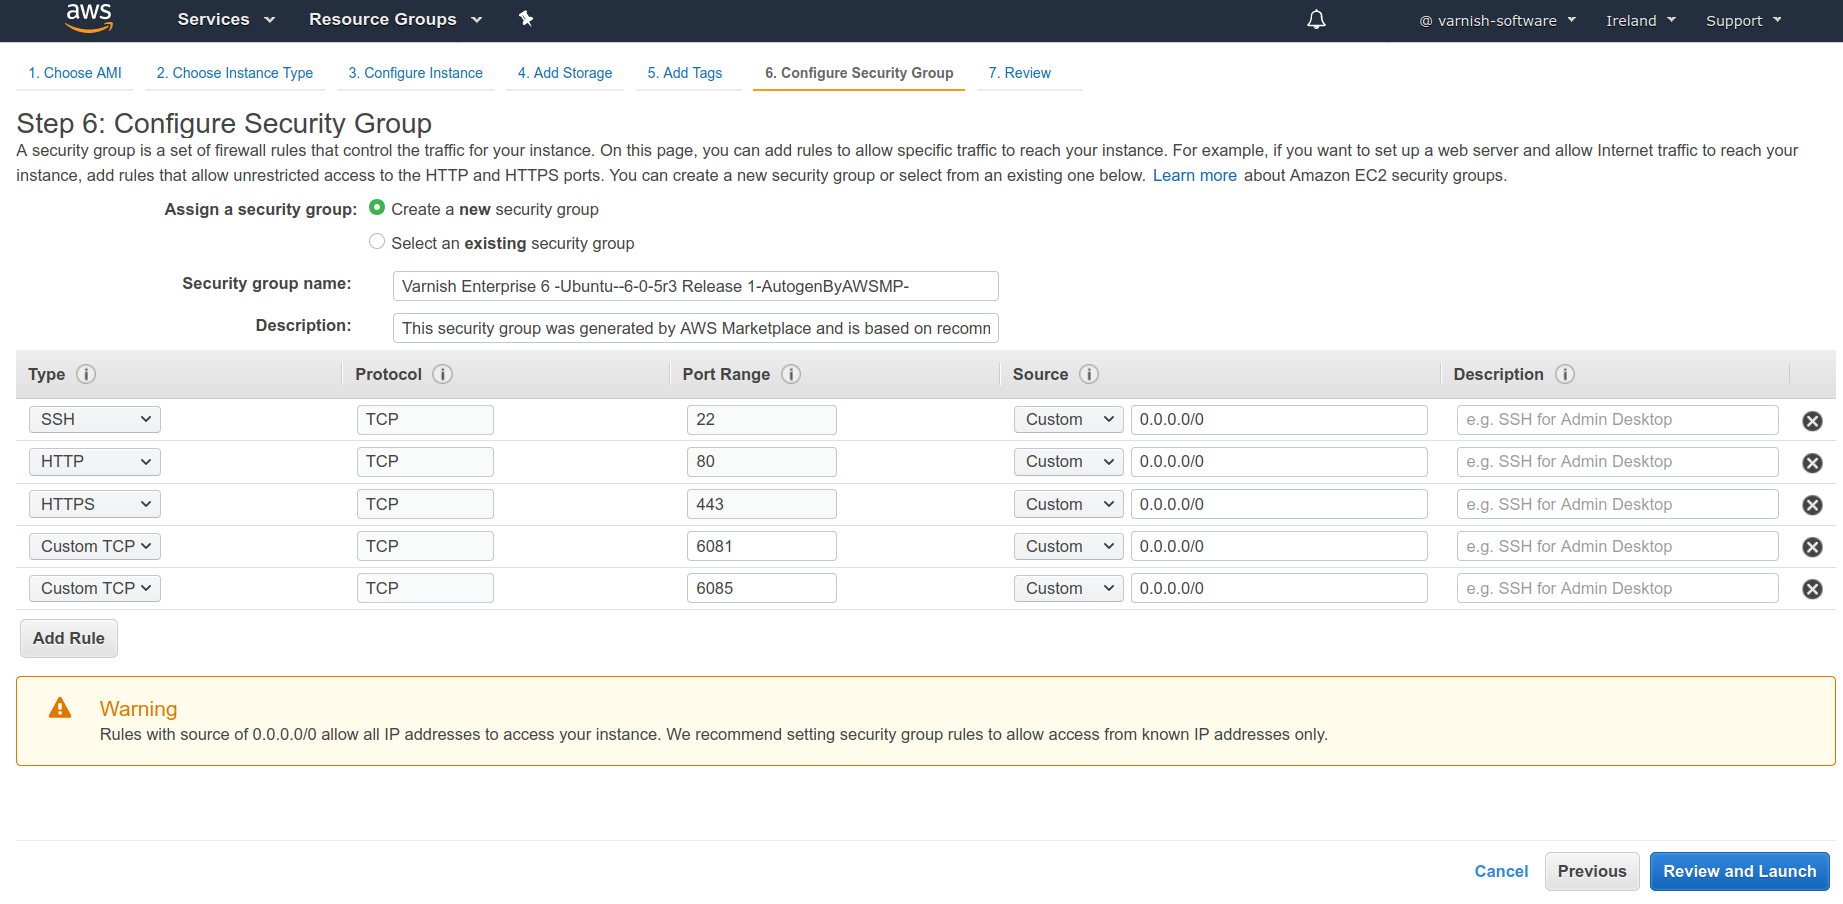
Step 6, allows you to configure “Security Group” to control network access to your instance. If this is your first Amazon Machine Image (AMI), select “Create a new security group”, provide a name for the security group and fill in a description of the group, and then click on “Add Rule”.
We recommend using the following security group policies for each Varnish Software instance. This is based on default configurations of the instances. You can choose to configure the different ports later on. (For example, running Varnish Enterprise on TCP 6081 instead of a default TCP 80.)
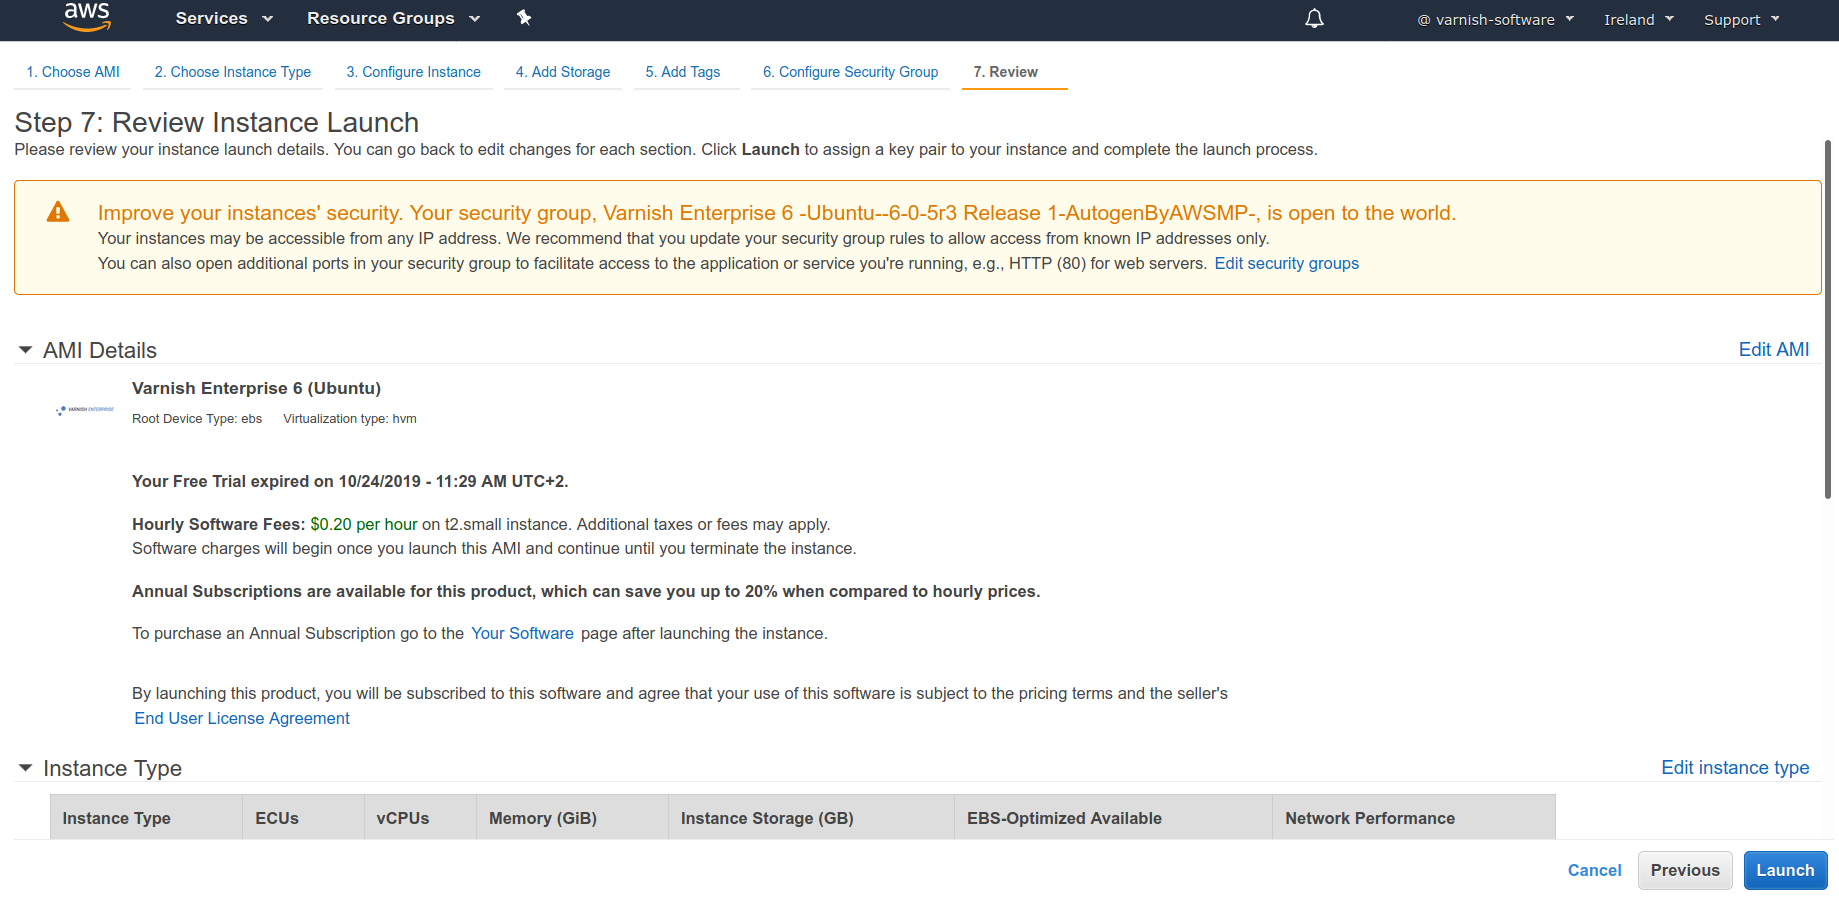
On the next screen, verify the settings and click on “Launch” to start the instance.
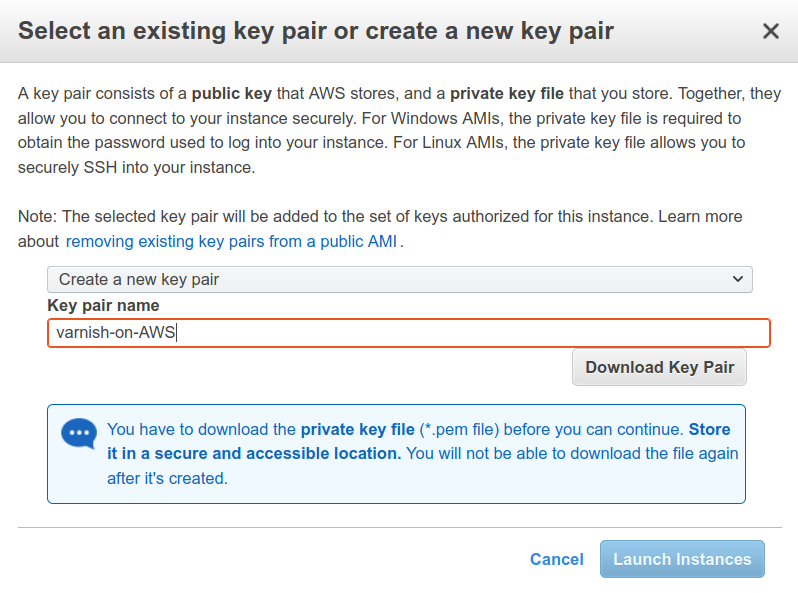
When you select “Launch”, you will be prompted to create a new “Key Pair”. The key is used to connect to your Varnish Software instance. If this is your first AMI or you wish to use a different key pair for this particular instance, select “Create a new Key Pair”, provide a name for it (we suggest “varnish-on-AWS”) and then click on “Download Key Pair”. You will be prompted to save the key on your computer, and then click on “Launch instances”.
That’s it. Your Varnish Software instance is up and running. Next, please tune up your configuration and start enjoying the product benefits.
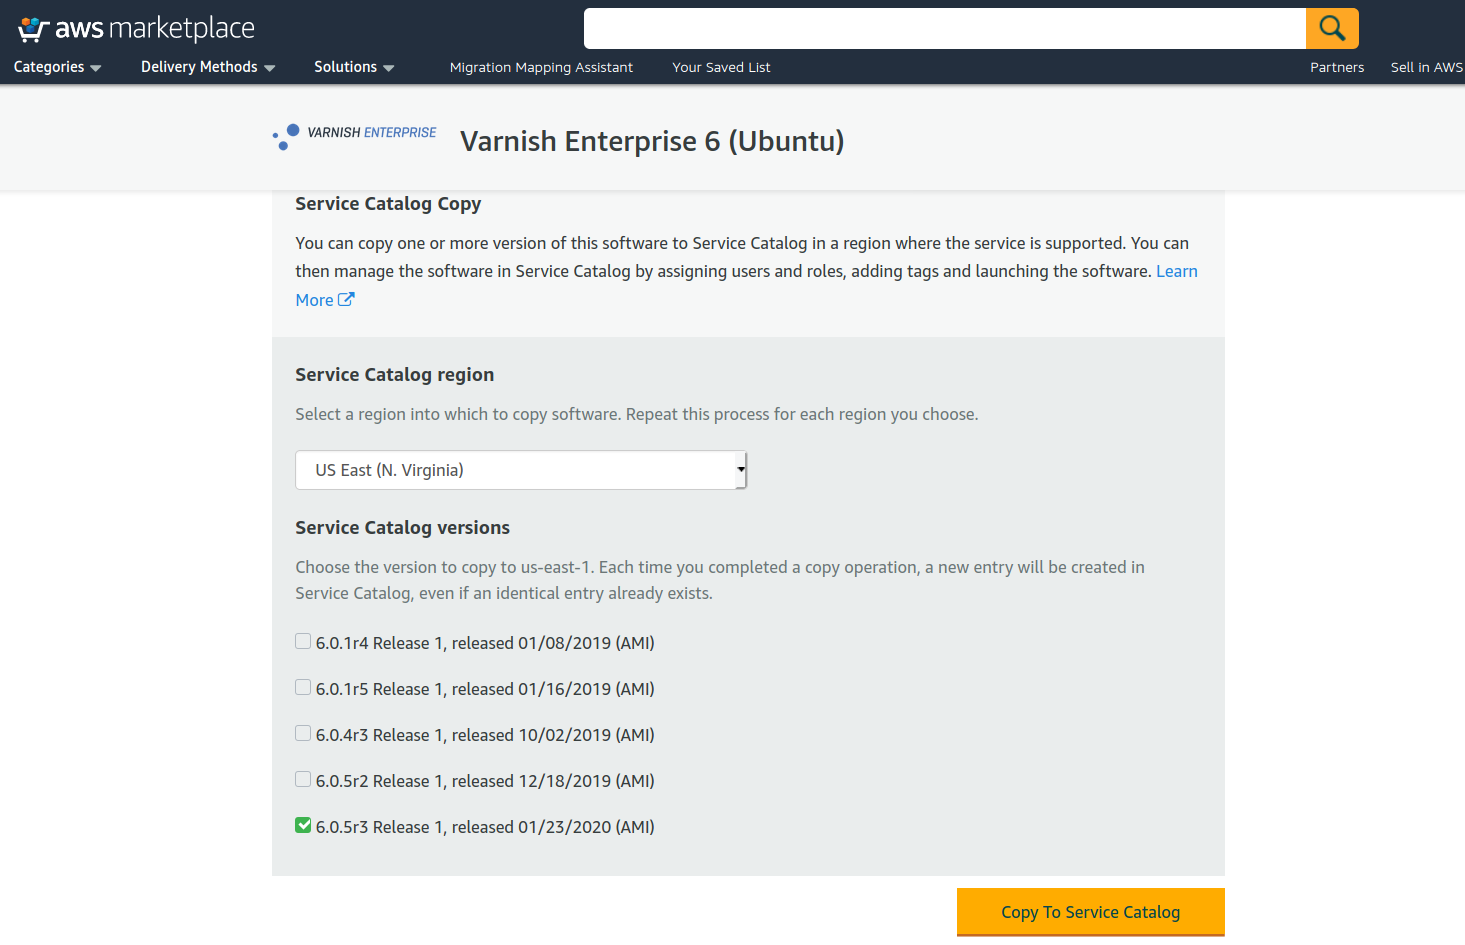
The 3rd option is to use AWS Service Catalog to run an instance. You select “Copy to Service Catalog” from a drop down menu with a proper region and an available software version and click on “Copy to Service Catalog” button.
This tutorial will not cover how to deploy Varnish Software products on Service Catalog.
For more information, please visit
For Windows SSH client, you may use Putty. For Linux and Mac users, you may use your favorite SSH client.
For more information on how to access your Linux instance on AWS, please see;
The configuration files are located in different places based on what kind of AMIs you are running, that is: VCS, Varnish Cache or Varnish Enterprise.
In this section, we cover the configuration basics. For more details and advanced configuration possibilities, please refer to the materials in the following links
VCP or VE is the enterprise version of Varnish Cache. Apart from ease-of-use improvements and performance enhancements, VCP also provides additional functionality, such as Varnish Massive Storage Engine (MSE), Varnish High Availability (VHA) and SSL/TLS backend support. Customers can also enable frontend SSL/TLS by using Varnish Plus Addon SSL (Hitch), which is also included with the image.
By default, the varnishd process should be running on TCP 80 and 8443. Hitch will be running on port 443.
/etc/varnish/default.vclYour Varnish instance has been pre-configured with the default settings, which suits most Varnish users. We advise you to have a look and update the configuration according to your needs.
Our documentation site has a reference section with all available runtime options. This will help you to properly configure the Varnish process.
To look at the system parameters run this command:
sudo systemctl cat varnish.service
To change the runtime options, run the following command on your Varnish instance so that you can override the default values:
sudo systemctl edit varnish.service
Edit accordingly and save the file.
And finally, restart Varnish by running the following command:
sudo systemctl restart varnish.service
You can do the same for hitch.service
VCS should be running out of the box without any additional effort. The default password for username vcs is your AWS instance id. Use it when browsing to an instance hostname/ip address.
/etc/varnish/vstatd.params/etc/default/vstatdFirst of all, find your network information regarding your running instances on the AWS EC2 Running Instances page, AWS EC2 Dashboard -> Running Instances.
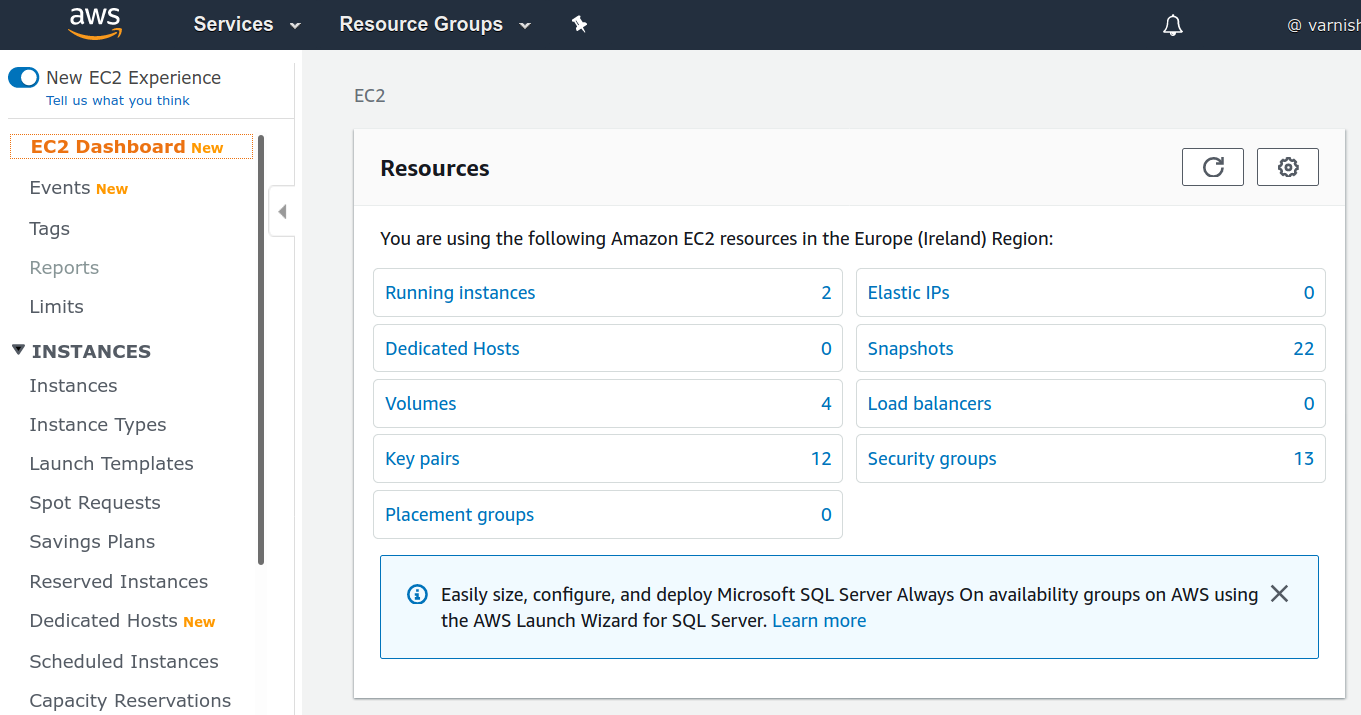
Select an instance, and you will see all related information in the “Description” tab.

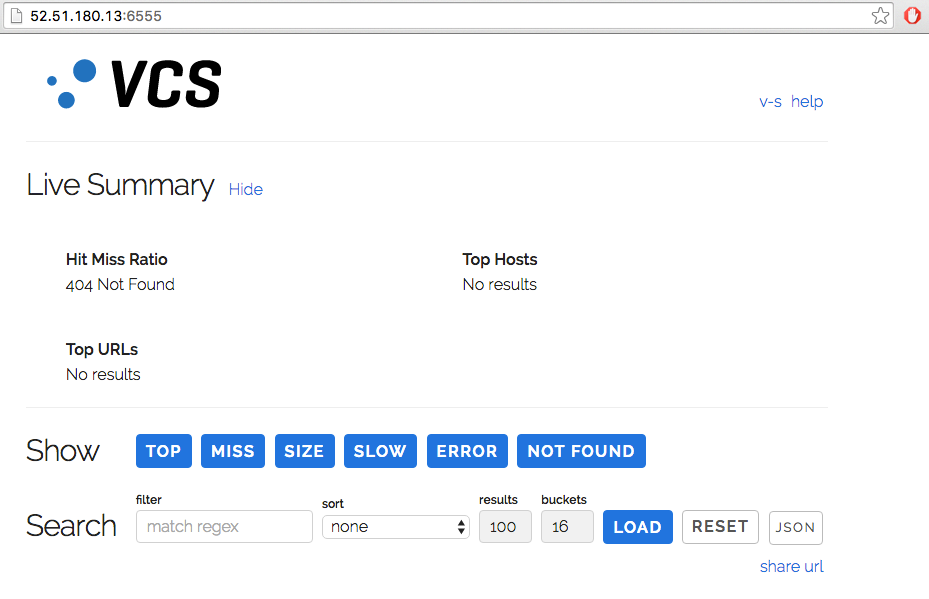
To verify that VCS is running, point your browser to the hostname/ip address to the TCP 6555 (http://52.51.180.13:6555 from an example above). The default username is vcs and the default password is an instance id. Once you input credentials correctly, you can see the VCS dashboard without any issues or problems.
In VC and VCP instances, there should be two varnishd processes running out of the box, if you SSH to the instances to verify the process table. However, you can simply verify the process status by pointing your browser to http://[ip-address] or https://[ip-address]. You will then see this welcome page.
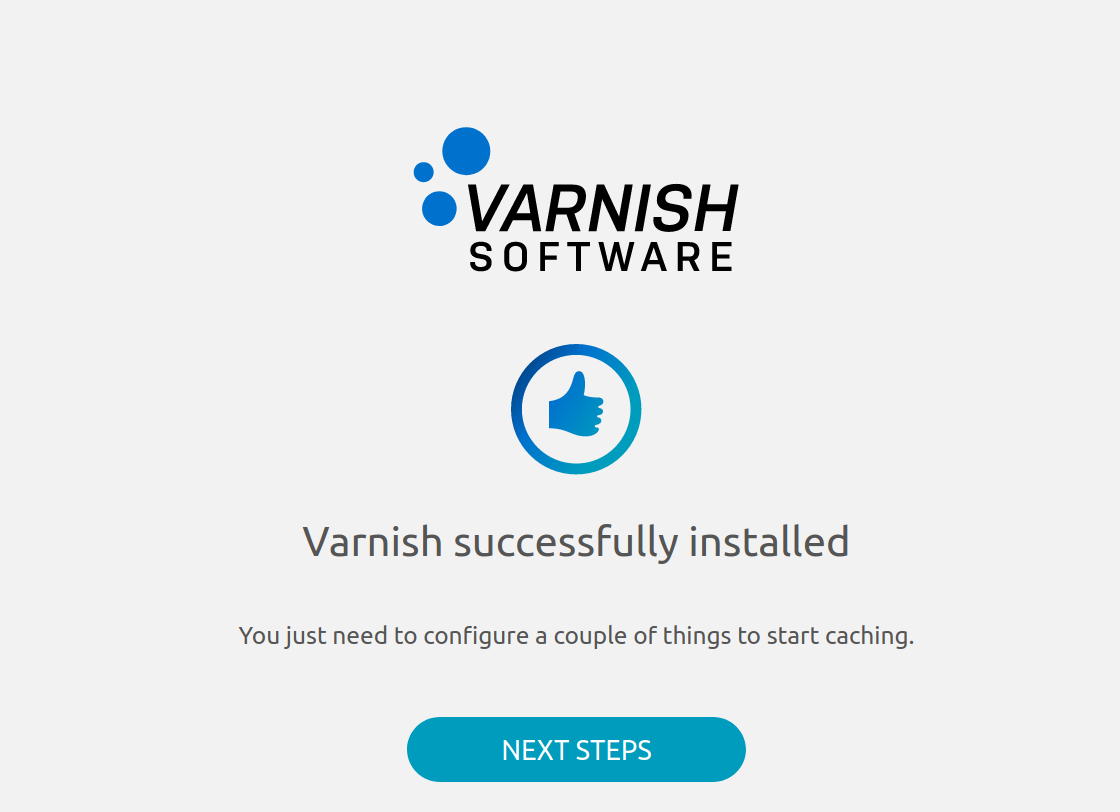
Congratulations! Your varnishd is now running nicely. You can now assign a running web server backend to a default VCL configuration, located at /etc/varnish/default.vcl.
If you do not see the welcome page, that means that the process is not running for some reason or that you don’t have port 80 and 443 open to the instance.
If you log into the instance with ssh you can check the status on varnish with this command:
terminal$ sudo systemctl status varnish.service
 varnish.service - Varnish Cache, a high-performance HTTP accelerator
   Loaded: loaded (/lib/systemd/system/varnish.service; enabled; vendor preset: enabled)
  Drop-In: /etc/systemd/system/varnish.service.d
           └─override.conf
   Active: active (running) since Mon 2020-05-04 14:19:24 UTC; 3min 39s ago
  Process: 9904 ExecStart=/usr/sbin/varnishd -a :80 -a 127.0.0.1:8443,proxy -S /etc/varnish/secret -T localhost:6082 -f /etc/varnish/default.vcl -s malloc,256m (code=exited, status=0/SUCCESS)
 Main PID: 9919 (varnishd)
    Tasks: 217
   CGroup: /system.slice/varnish.service
           ├─9919 /usr/sbin/varnishd -a :80 -a 127.0.0.1:8443,proxy -S /etc/varnish/secret -T localhost:6082 -f /etc/varnish/default.vcl -s malloc,256m
           └─9938 /usr/sbin/varnishd -a :80 -a 127.0.0.1:8443,proxy -S /etc/varnish/secret -T localhost:6082 -f /etc/varnish/default.vcl -s malloc,256m

May 04 14:19:23 ip-10-0-1-88 systemd[1]: Stopped Varnish Cache, a high-performance HTTP accelerator.
May 04 14:19:23 ip-10-0-1-88 systemd[1]: Starting Varnish Cache, a high-performance HTTP accelerator...
May 04 14:19:24 ip-10-0-1-88 varnishd[9904]: Debug: Version: varnish-6.0.6 revision 29a1a8243dbef3d973aec28dc90403188c1dc8e7
May 04 14:19:24 ip-10-0-1-88 varnishd[9919]: Version: varnish-6.0.6 revision 29a1a8243dbef3d973aec28dc90403188c1dc8e7
May 04 14:19:24 ip-10-0-1-88 varnishd[9904]: Debug: Platform: Linux,4.15.0-1065-aws,x86_64,-junix,-smalloc,-sdefault,-hcritbit
May 04 14:19:24 ip-10-0-1-88 varnishd[9919]: Platform: Linux,4.15.0-1065-aws,x86_64,-junix,-smalloc,-sdefault,-hcritbit
May 04 14:19:24 ip-10-0-1-88 varnishd[9904]: Debug: Child (9938) Started
May 04 14:19:24 ip-10-0-1-88 varnishd[9919]: Child (9938) Started
May 04 14:19:24 ip-10-0-1-88 varnishd[9919]: Child (9938) said Child starts
May 04 14:19:24 ip-10-0-1-88 systemd[1]: Started Varnish Cache, a high-performance HTTP accelerator.
To show what process is listening on what port you can use netstat (hitch should listen on 443 and varnishd should listen on port 80, 8443 and 6082)
terminal$ netstat -peanut
Active Internet connections (servers and established)
Proto Recv-Q Send-Q Local Address           Foreign Address         State       User       Inode      PID/Program name
tcp        0      0 0.0.0.0:80              0.0.0.0:*               LISTEN      0          45162      9919/varnishd
tcp        0      0 127.0.0.53:53           0.0.0.0:*               LISTEN      101        15837      653/systemd-resolve
tcp        0      0 0.0.0.0:22              0.0.0.0:*               LISTEN      0          19211      978/sshd
tcp        0      0 127.0.0.1:8443          0.0.0.0:*               LISTEN      0          45164      9919/varnishd
tcp        0      0 0.0.0.0:443             0.0.0.0:*               LISTEN      0          19342      992/hitch
tcp        0      0 127.0.0.1:6082          0.0.0.0:*               LISTEN      0          45187      9919/varnishd
tcp        0    356 10.0.1.88:22            46.9.119.82:52976       ESTABLISHED 0          25997      2291/sshd: ubuntu [
tcp6       0      0 :::80                   :::*                    LISTEN      0          45163      9919/varnishd
tcp6       0      0 :::22                   :::*                    LISTEN      0          19222      978/sshd
tcp6       0      0 :::443                  :::*                    LISTEN      0          19343      992/hitch
udp        0      0 127.0.0.53:53           0.0.0.0:*                           101        15836      653/systemd-resolve
udp        0      0 10.0.1.88:68            0.0.0.0:*                           100        46003      638/systemd-network
Next:
Configure a location of web server backend, you have to SSH to the instance and edit /etc/varnish/default.vcl, adding a backend and define your VCL caching rules.
terminal$ sudo vi /etc/varnish/default.vcl
Restart varnishd service to active the current configuration.
terminal$ sudo systemctl restart varnish.service
Update your site’s DNS record to be a hostname/ip address of the running Varnish Cache or Varnish Enterprise instances. After making changes in the DNS record (allowing for DNS ttl expiry), traffic will start coming to this instance.
For more advanced features and usage for VCP, please refer to the following documentation:
Please contact Varnish Software The Cloud Team, if your instance is not running as expected. We are eager to help you to fix you your issue/problem as early as possible.
Customers who purchase VCP, VCS or VE AMIs on AWS are eligible for Varnish Cloud support and software updates provided by the Varnish Software, Inc. engineering team. To contact support, please submit the Varnish Cloud Support Activation form.
Please visit the Post Configuration for more information about what you can do with Varnish Cloud products. For example:
vstatdprobe to forward data to VCS for analysis