 Search
In the 6.0 release, reloadable certificates were introduced to the controller. This tutorial covers two main steps: loading certificates into Varnish and integrating them with the router.
Before diving into this tutorial, ensure the following prerequisites are met:
The varnish instances needs to support reloadable certificates.
Deployed VCLGroup: Confirm that a VCLGroup has been deployed in your environment. Tutorial regarding VCLGroup configuration can be found here.
Active Router with Routing Rule (For Router Users Only): If you are using a router, make sure there is an active router configured with a routing rule connected to the deployed VCLGroup. This requirement specifically applies to users utilizing the router feature. Routing related tutorial can be found here.
The most important thing when configuring a certificate is which storage option should be used, more information regarding these can be found here.
databaseAdd a database certificate:
$ vcli certificate add mycert --cert example.com.pem --key example.com-key.pem --database
+----+--------+-----------------------------------------+-------------+---------------------------+---------------------+----------+----------------+---------+
| ID |  Name  |                 Serial                  | Common name |           SANs            |       Expiry        | Storage  |  Organization  | Creator |
+----+--------+-----------------------------------------+-------------+---------------------------+---------------------+----------+----------------+---------+
| 3  | mycert | 211485368710345410671346364777094460753 | N/A         | example.com,*.example.com | 2224-04-22 08:35:47 | Database | [System Admin] | test(1) |
+----+--------+-----------------------------------------+-------------+---------------------------+---------------------+----------+----------------+---------+
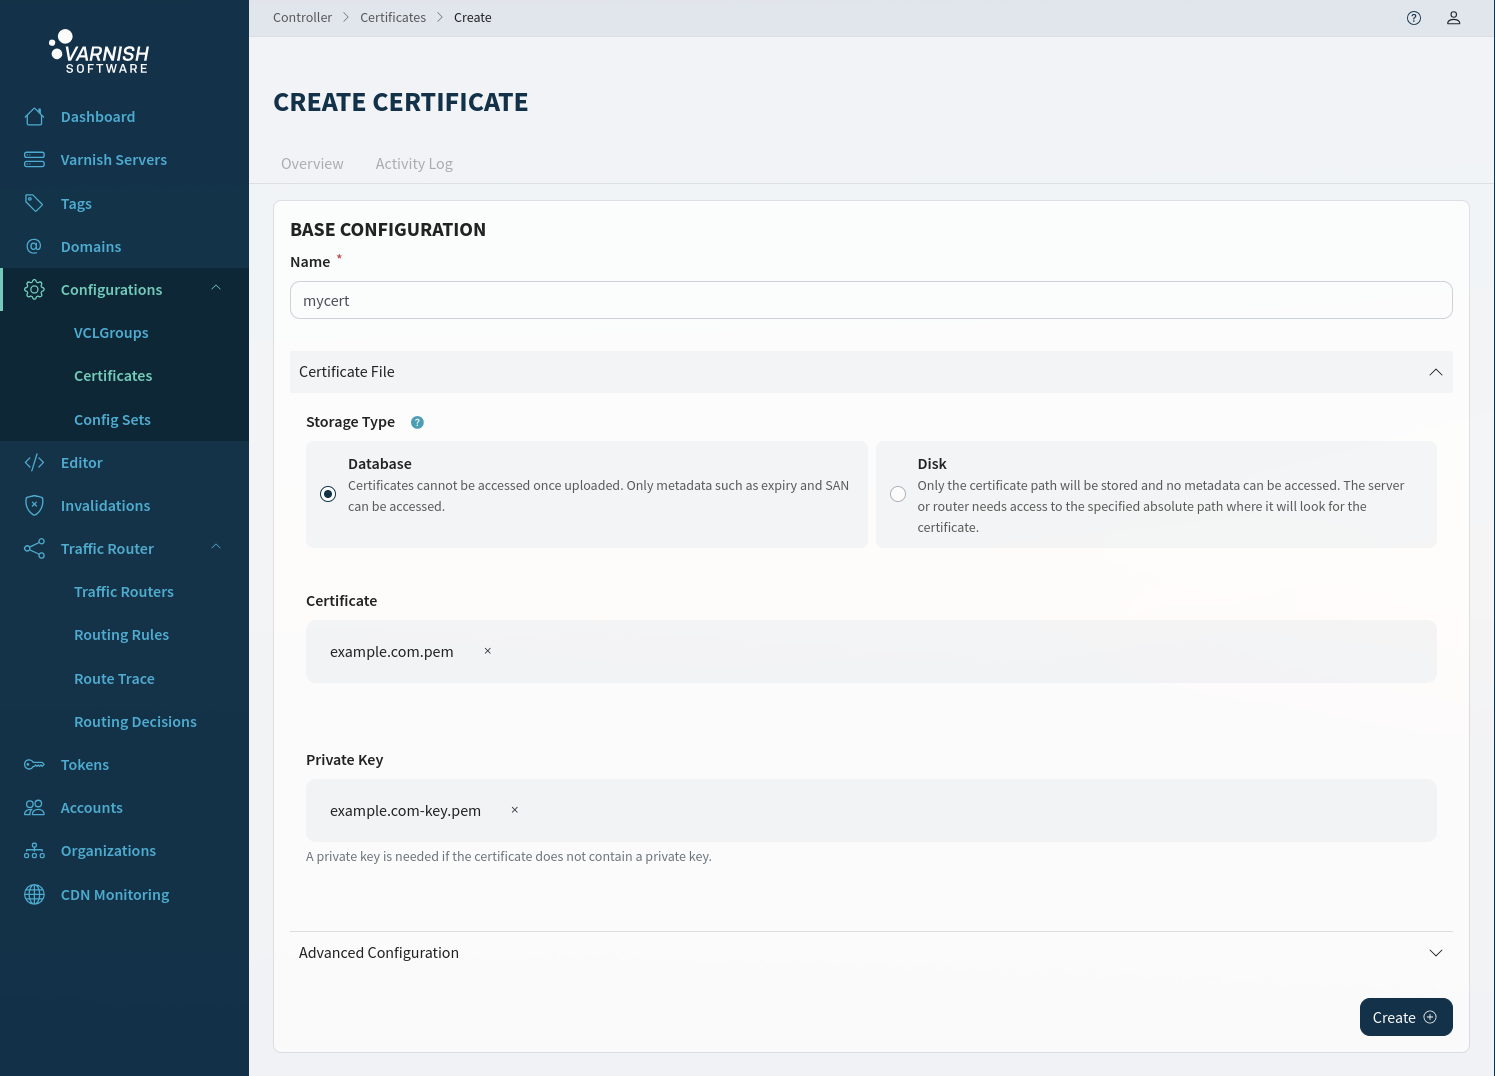
In the UI we can create a database certificate by first selecting Database as storage type. Thereafter upload either a combined certificate that contains the private key or
upload a certificate and a private key by clicking Add private key.
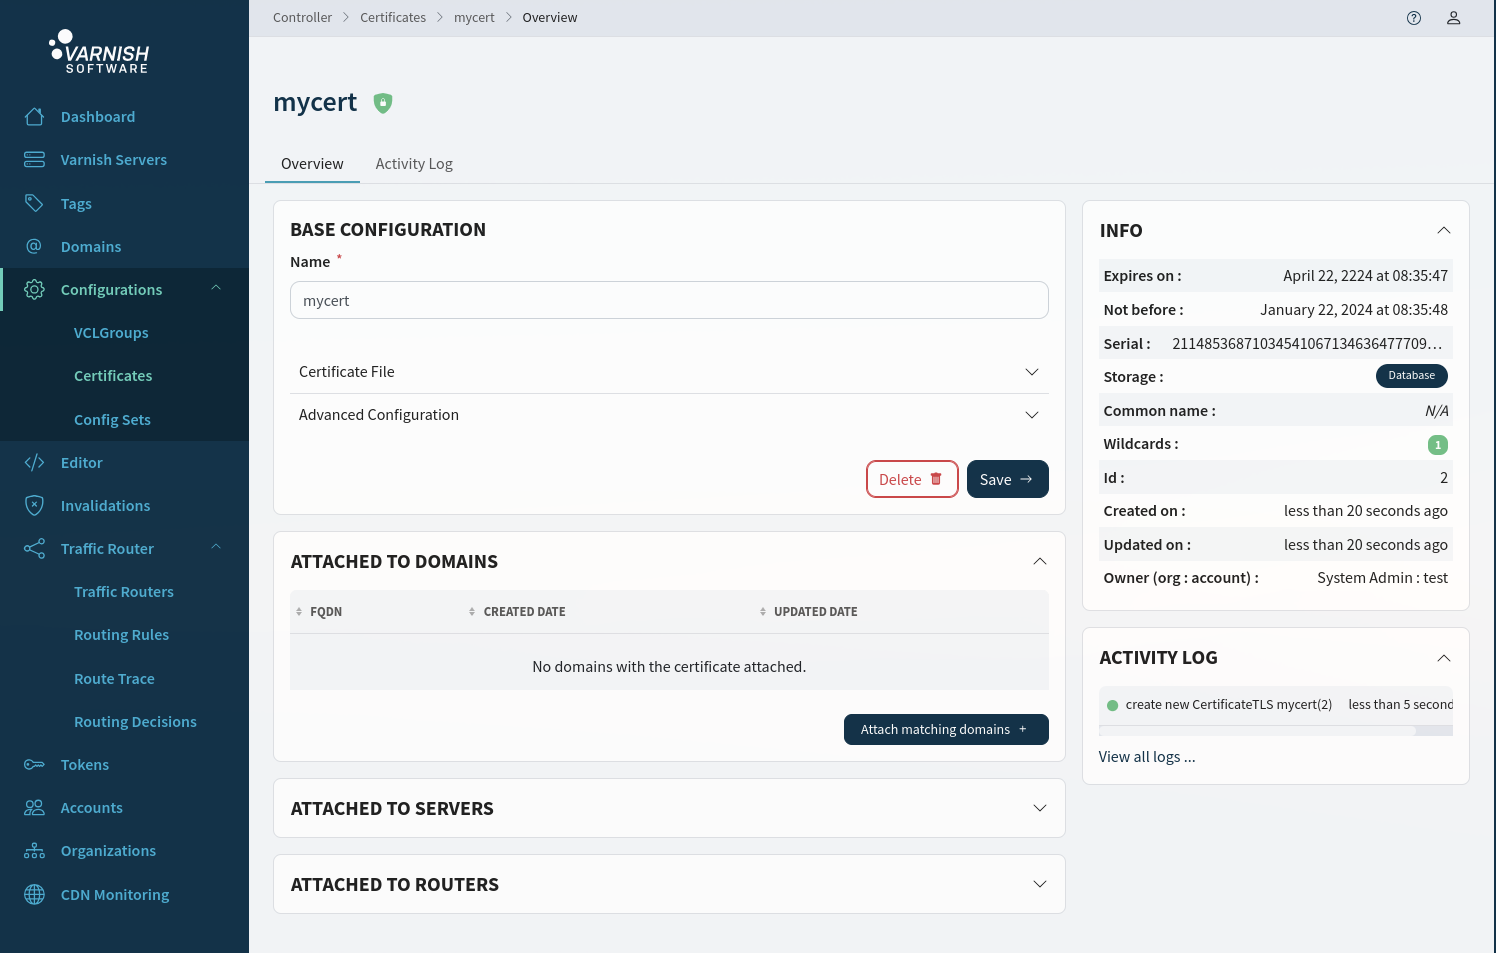
After sucessfully creating a certificate, you can view information such as expiration date, wildcards etc. You can also attach a certificate to domains, agents & routers from here.
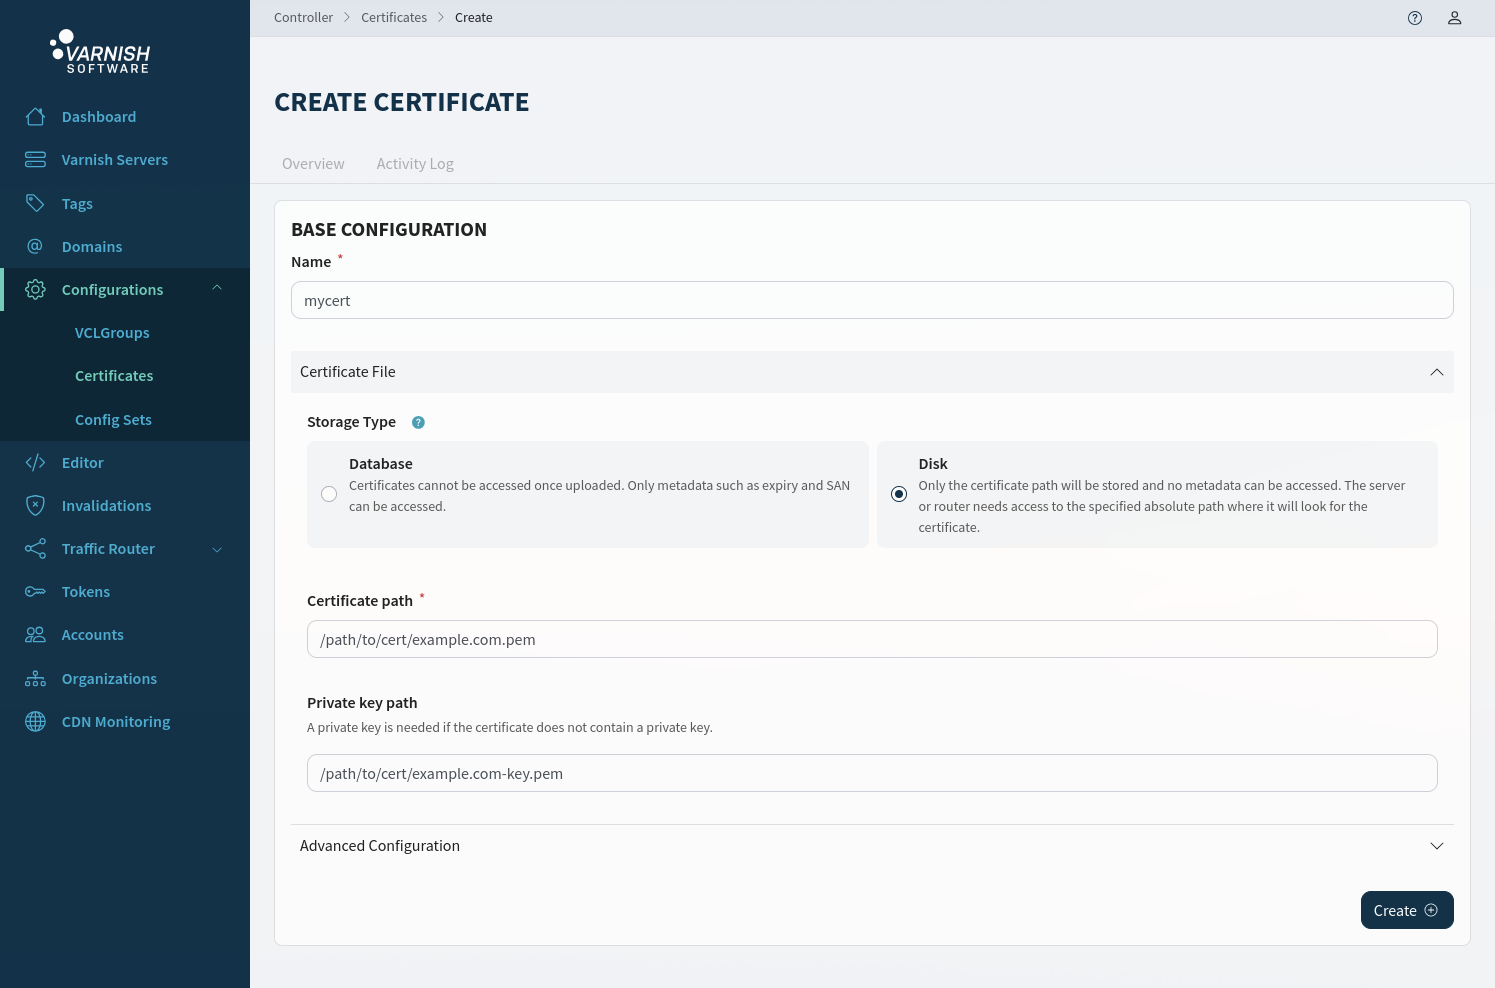
diskThe disk option only requires a path to the certificate and private key. This path must be accessible by the agent and varnish and the router if the router is used.
This is a passive approach where the controller does not fetch context from the certificate and its up to the user manage it. There is no pre-validation of the certificate
in the controller. The certificate context for disk certificates will be indicated as Unmanaged when displayed.
Add a disk certificate:
./cli certificate add mycert --cert ~/example.com.pem --key ~/example.com-key.pem --disk
+----+--------+-----------+-------------+-----------+-----------+---------+----------------+---------+
| ID |  Name  |  Serial   | Common name |   SANs    |  Expiry   | Storage |  Organization  | Creator |
+----+--------+-----------+-------------+-----------+-----------+---------+----------------+---------+
| 1  | mycert | Unmanaged | Unmanaged   | Unmanaged | Unmanaged | Disk    | [System Admin] | test(1) |
+----+--------+-----------+-------------+-----------+-----------+---------+----------------+---------+
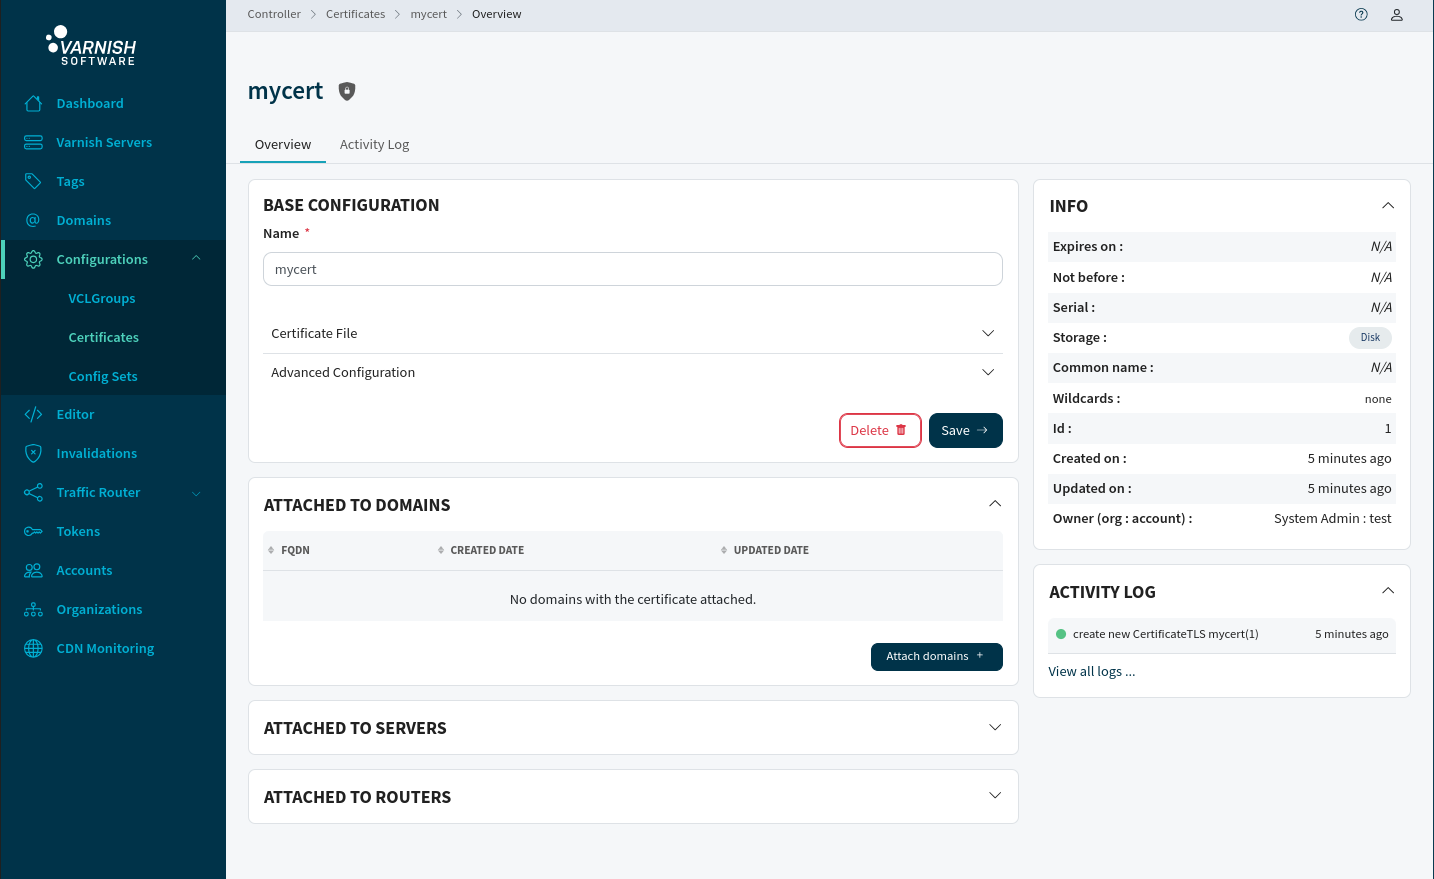
In the UI we can create a disk certificate by first selecting Disk as storage type and manually enter an absolute path to the location of the certificate
and private key.
After sucessfully creating a certificate, you can view a few information details about the certificate. You can also attach a certificate to domains, agents & routers from here.
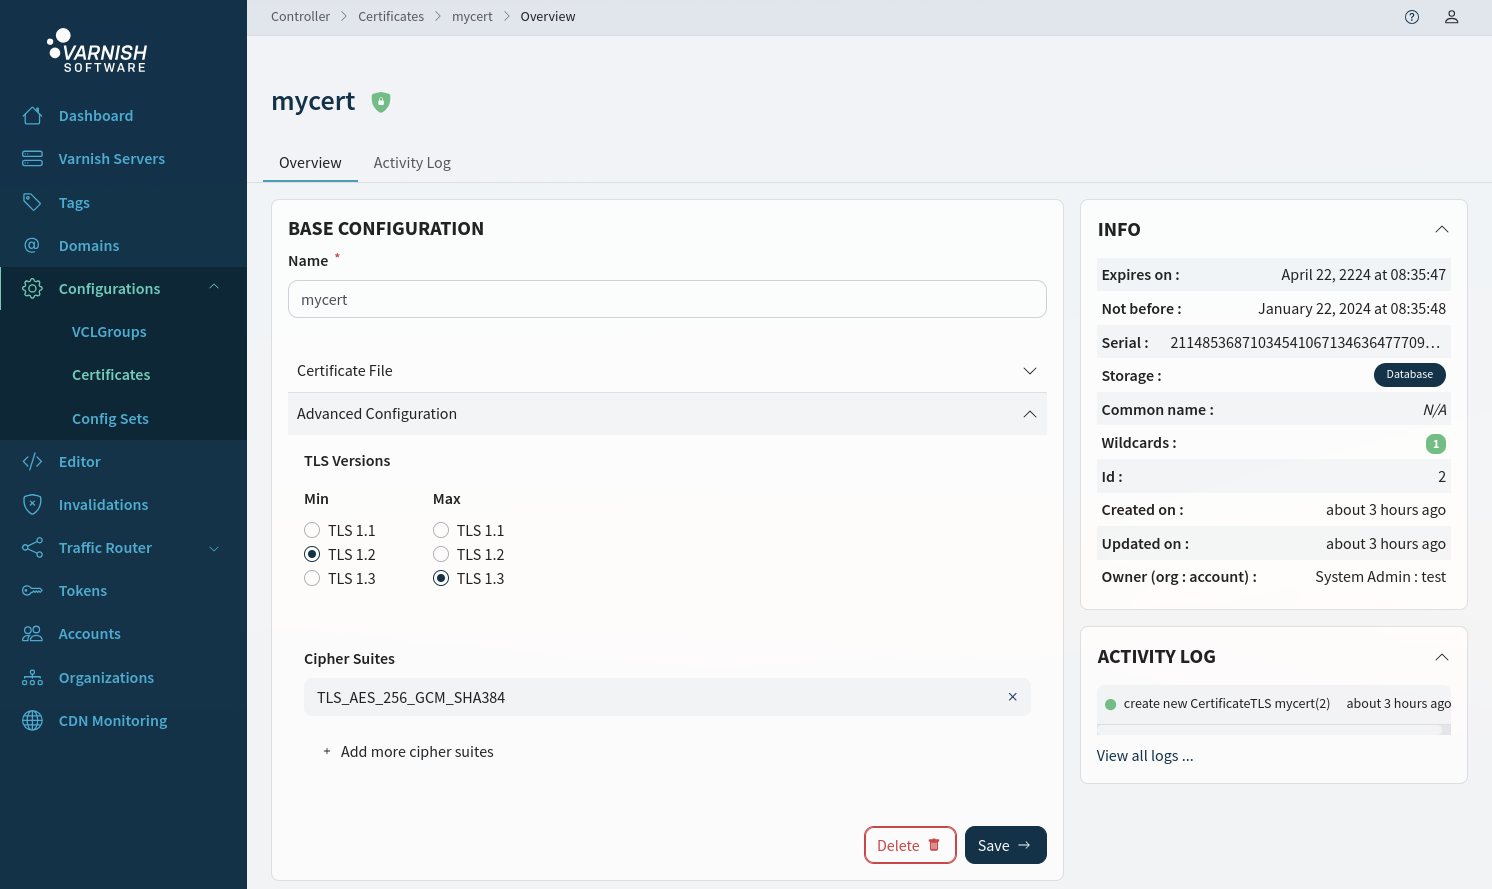
There is the possibility to configure TLS version and cipher suites.
$ vcli cert update 1 --min-version TLSv1.2 --max-version TLSv1.3 --cipher-suites TLS_AES_256_GCM_SHA384
Configuration can be displayed by -v/--verbose command:
$ vcli cert ls -v
+----+--------+-----------------------------------------+-------------+---------------------------+---------------------+----------+---------------------+---------------------+------------------------+---------------------+---------------------+----------------+---------+
| ID |  Name  |                 Serial                  | Common name |       SANs                |       Expiry        | Storage  | Minimum TLS version | Maximum TLS version |     Cipher suites      |       Created       |       Updated       |  Organization  | Creator |
+----+--------+-----------------------------------------+-------------+---------------------------+---------------------+----------+---------------------+---------------------+------------------------+---------------------+---------------------+----------------+---------+
| 1  | mycert | 301374988262570072766083128217647218615 | N/A         | example.com,*.example.com | 2224-04-04 09:27:59 | Database | TLSv1.2             | TLSv1.3             | TLS_AES_256_GCM_SHA384 | 2024-01-22 13:55:31 | 2024-01-22 15:19:37 | [System Admin] | test(1) |
+----+--------+-----------------------------------------+-------------+---------------------------+---------------------+----------+---------------------+---------------------+------------------------+---------------------+---------------------+----------------+---------+
In the UI we can configure the certificates TLS versions and add cipher-suites from a dropdown with predefined values. If the cipher-suites don’t match the min/max versions you will be notified by the UI.
The certificate can be linked to domains that align with the Subject Alternative Name (SAN) list specified in the certificate. Wildcard certificates, such as *.example.com, will only match on one level down. For instance, cache.example.com matches the wildcard, but one.cache.example.com will not be a match.
$ vcli domains update 1,2 --cert 1 -y
+----+-------------------+-----------------+----------------+---------+
| ID |       FQDN        | TLS Certificate |  Organization  | Creator |
+----+-------------------+-----------------+----------------+---------+
| 1  | example.com       | mycert(1)       | [System Admin] | test(1) |
| 2  | cache.example.com | mycert(1)       | [System Admin] | test(1) |
+----+-------------------+-----------------+----------------+---------+
If one of the updated domains is already attached to a deployed VCLGroup, this action will trigger a redeployment, after a successful deployment the VCLGroup will use your certifcate for the updated domains.
If the domains isn’t connected to a VCLGroup, or if the VCLGroup is undeployed there are two more measures that needs to be taken.
Ensure that the domains is assigned to the VCLGroup.
$ vcli vg update 1 --dom 1,2
Changing 1 VCLGroup(s) are you sure? (y/N): y
+----+-------+-------+------------+---------------+---------------+---------------+----------+----------------------+---------------------+-------------+----------------+---------+
| ID | Name  | Root  |   State    | Compile State | Last Deployed |    MainVCL    | Includes |       Domains        |     Deployments     | RoutingRule |  Organization  | Creator |
+----+-------+-------+------------+---------------+---------------+---------------+----------+----------------------+---------------------+-------------+----------------+---------+
| 1  | test1 | false | Undeployed | Successful    | N/A           | [empty]       | [empty]  | (1)example.com       | (1)test1 [Inactive] | (1)myrr     | [System Admin] | test(1) |
|    |       |       |            |               |               | --- Draft --- |          | (2)cache.example.com |                     |             |                |         |
|    |       |       |            |               |               | (1)main.vcl   |          |                      |                     |             |                |         |
+----+-------+-------+------------+---------------+---------------+---------------+----------+----------------------+---------------------+-------------+----------------+---------+
Deploy the VCLGroup.
$ ./cli vg deploy 1
+----+-------+-------+----------+---------------+---------------------+-------------+----------+----------------------+-------------------+-------------+----------------+---------+
| ID | Name  | Root  |  State   | Compile State |    Last Deployed    |   MainVCL   | Includes |       Domains        |    Deployments    | RoutingRule |  Organization  | Creator |
+----+-------+-------+----------+---------------+---------------------+-------------+----------+----------------------+-------------------+-------------+----------------+---------+
| 1  | test1 | false | Deployed | Successful    | 2024-01-22 09:36:49 | (1)main.vcl | [empty]  | (1)example.com       | (1)test1 [Active] | (1)myrr     | [System Admin] | test(1) |
|    |       |       |          |               |                     |             |          | (2)cache.example.com |                   |             |                |         |
+----+-------+-------+----------+---------------+---------------------+-------------+----------+----------------------+-------------------+-------------+----------------+---------+
In the UI you can attach a certificate to a domain in several ways, from the domain itself, from the certificate and from a VCLGroup. In this example the certificate is attached to both
domains via the certificate page certificates/<CERTIFICATE-ID>. By clicking Attach matching domains you will get a pop-up modal that let’s you select from matching domains and attach the certificate to them.
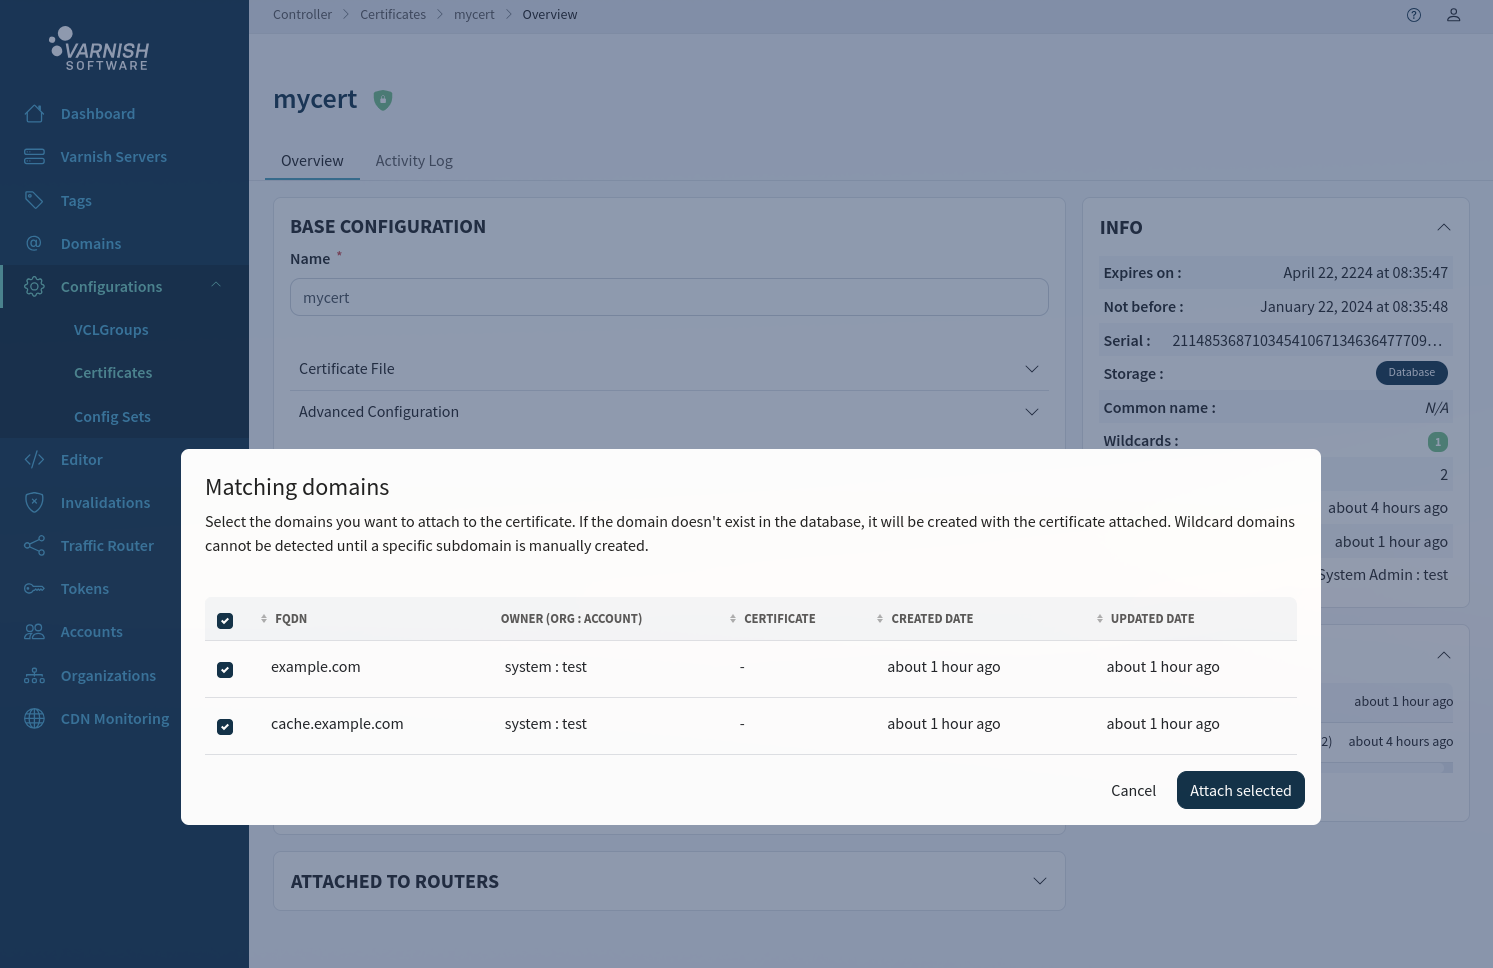
If one of the updated domains is already assigned to a deployed VCLGroup, this action will trigger a redeployment, after a successful deployment the VCLGroup will use your certifcate for the updated domains.
If the domains isn’t connected to a VCLGroup yet, or if the VCLGroup is undeployed there are two more measures that needs to be taken. If the domains is not already assigned to your VCLGroup,
click the button with Add more domains. From here you can either pick domains by name, create new domains or pick domains by a specific certificate. To deploy the VCLGroup just click the
Save and deploy button.
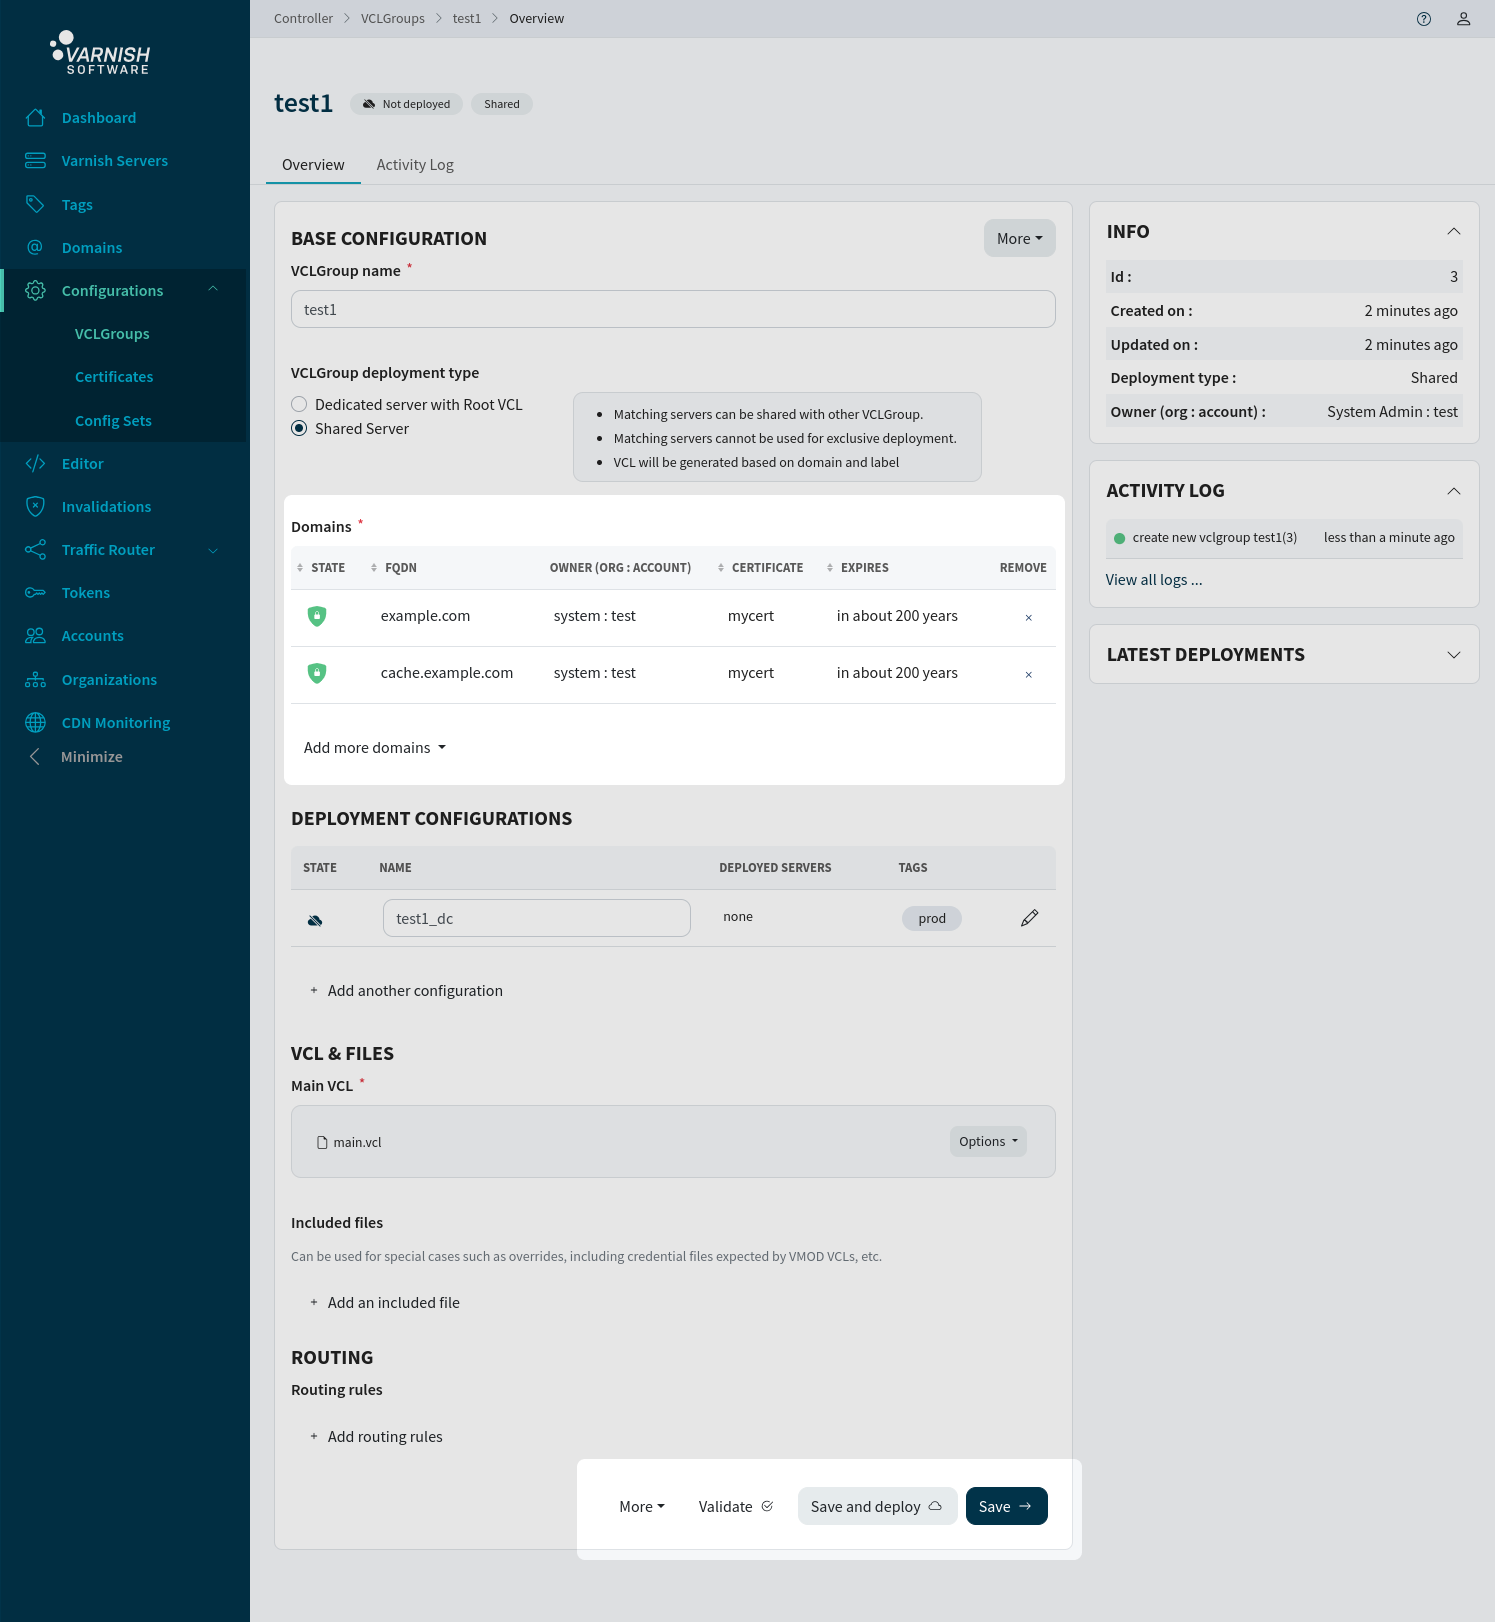
Your enviroment should now have active certificates.
An active VCLGroup, along with its associated certificates, is automatically deployed to the router. The router, in turn, routes based on the agent’s configured BaseURL. In cases where TLS is desired for a specific domain associated with the agent’s BaseURL, there is an option to directly assign the certificate to the agent for that particular BaseURL. Its however important that the BaseURL of the agent matches one of the certificates SAN entries.
Configure the BaseURL to use HTTPS.
$ vcli config update -f flag=base-url -v 'https://baseurl.example.com'
$ vcli agent certificate 1 --cert 1
+----+--------+--------------+---------+---------------+--------------+-----------------+---------+-----------------+
| ID |  Name  | Access Level |  State  | Varnish Host  | Varnish Port | Varnish Version |  Tags   | TLS Certificate |
+----+--------+--------------+---------+---------------+--------------+-----------------+---------+-----------------+
| 1  | agent1 | system       | Running | 172.25.255.41 | 8081         | plus-6.0.12r5   | (1)prod | mycert(1)       |
+----+--------+--------------+---------+---------------+--------------+-----------------+---------+-----------------+
In the UI you can update the configuration details for a agent either by setting it’s configuration variables from the single page servers/<AGENT-ID>/config or by creating a config-set that matches agents by tags.
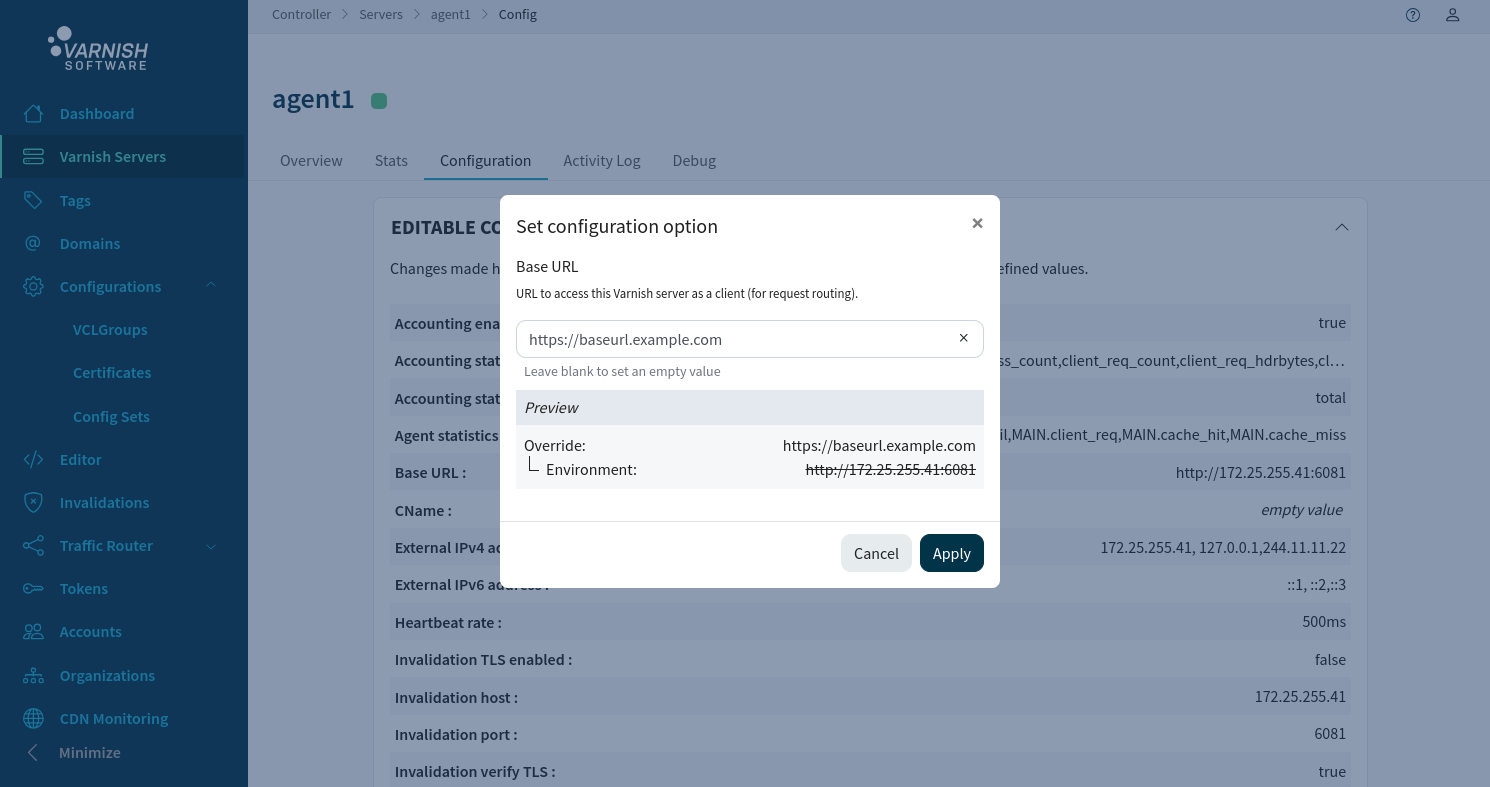
From the the agents single page, click the pen icon next to the Base URL value, this will trigger a modal with a input field. Enter your BaseURL and click apply, then save the configuration at the bottom of the page.
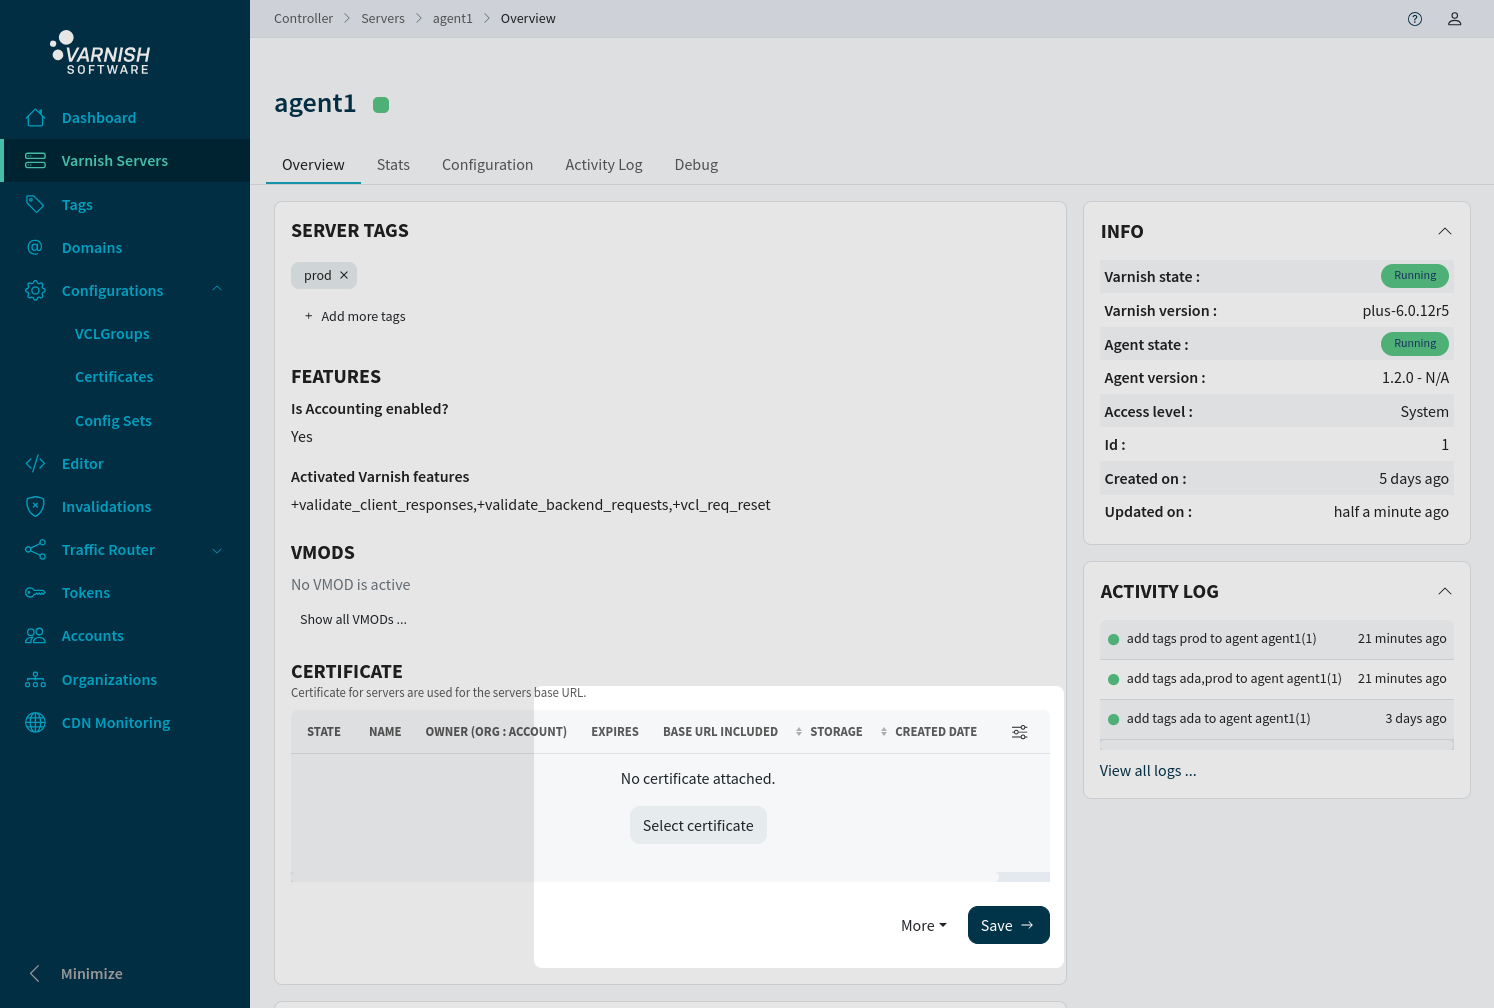
To set a specific certificate on a agent navigate to the overview page, and click Select Certificate if nothing is attached, or Add new if an existing certificate is already attached to replace it.
You should now be able to connect to your domain connected to the router.
In previous versions, the command line allowed configuration for a single certificate, which served both the management interface and router requests. To accommodate this, a new feature allows the addition of this certificate to the router at runtime. It’s important to highlight that this certificate is only presented to client requests in the absence of a Server Name Indication (SNI) match with the configured certificates linked to domains. Furthermore, the certificate is served to requests on the mangement port.
$ vcli router certificate 1 --cert 1
Configuring certificate for a router will result in the certificate being deployed directly, are you sure? (y/N): y
+----+---------+--------------+---------+-------+------+-------+------+-----------------+
| ID |  Name   | Access Level |  State  |  DNS  | HTTP | HTTPS | Tags | TLS Certificate |
+----+---------+--------------+---------+-------+------+-------+------+-----------------+
| 1  | router1 | system       | Running | false | true | true  |      | mycert(1)       |
+----+---------+--------------+---------+-------+------+-------+------+-----------------+
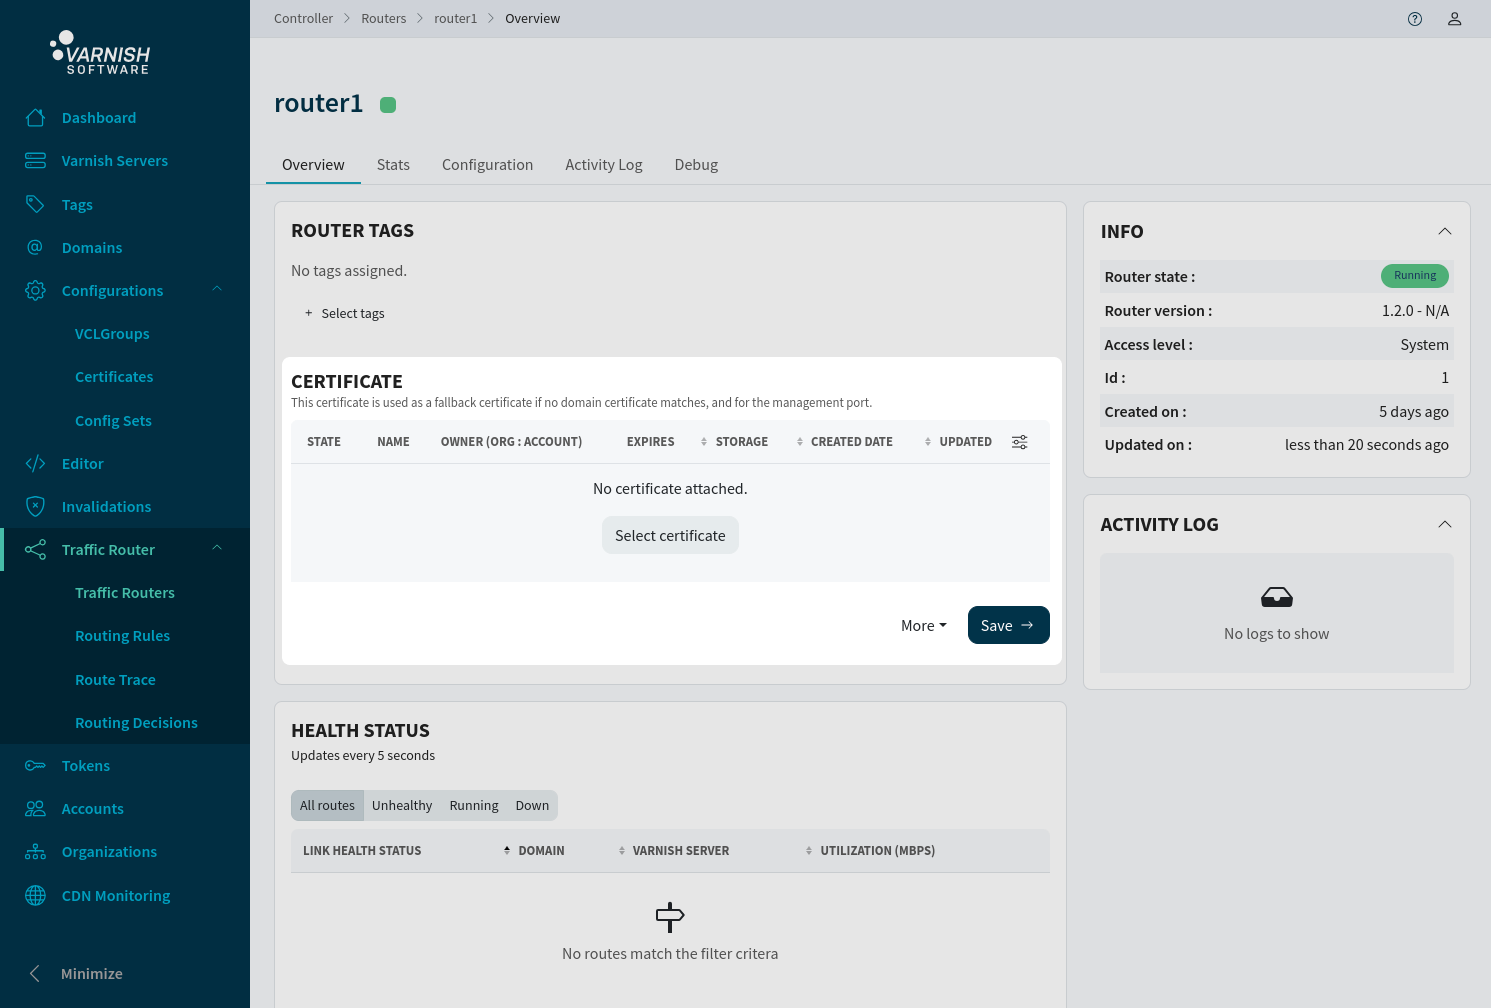
To attach a certificate on a router, navigate to the overview page /routers/<ROUTER-ID> and click Select Certificate if nothing is attached or Add new if an existing certificate is already attached to replace it.
