Varnish Controller
This tutorial expects you to have setup a working VCLGroup, if you have not please follow the Deploying VCL files tutorial. The purging and banning in the Varnish Controller makes use of HTTP purging and banning, meaning you need to have additional configuration in your VCL. Please make sure you have setup the purging over HTTP correctly, here is an example.
In these examples we will purge 5 paths. In the UI you can enter the paths manually, the paths in the CLI will be defined in a paths.txt file. Each path needs to be on a new line.
$ cat paths.txt

/images/1.png
/images/2.png
/images/3.png
/images/4.png
/images/5.png
In this example we have a VCLGroup deployed to 2 agents. The VCLGroup has ID: 1.
$ vcli inv new --vg 1 -f ./paths.txt -m PURGE
This invalidation request will be send to all agents that have VCLGroup 1 deployed, the Varnish Controller Agent will send a HTTP request for each path and for each domain configured in the VCLGroup to Varnish with the defined HTTP method (in this case PURGE).
| Argument | Description |
|---|---|
--vg 1 |
Defines the VCLGroup ID to invalidate, the Varnish Controller will send the purging request to all agents connected to the VCLGroup. |
-f ./paths.txt |
Defines the path to the paths file. In the paths file you’ll need to define the paths to invalidate, each path on a new line. |
-m PURGE |
Defines the HTTP method, it needs to correspond with the method you defined in your VCL. Here we use the method PURGE. |
Go to the Invalidations page and click the button New invalidation.
PURGE.Invalidate button.Within a few seconds or less depending of the size of invalidation you will see if it succeeded or failed. To inspect why it failed, click the invalidation request. You will see the error code or possible error message.
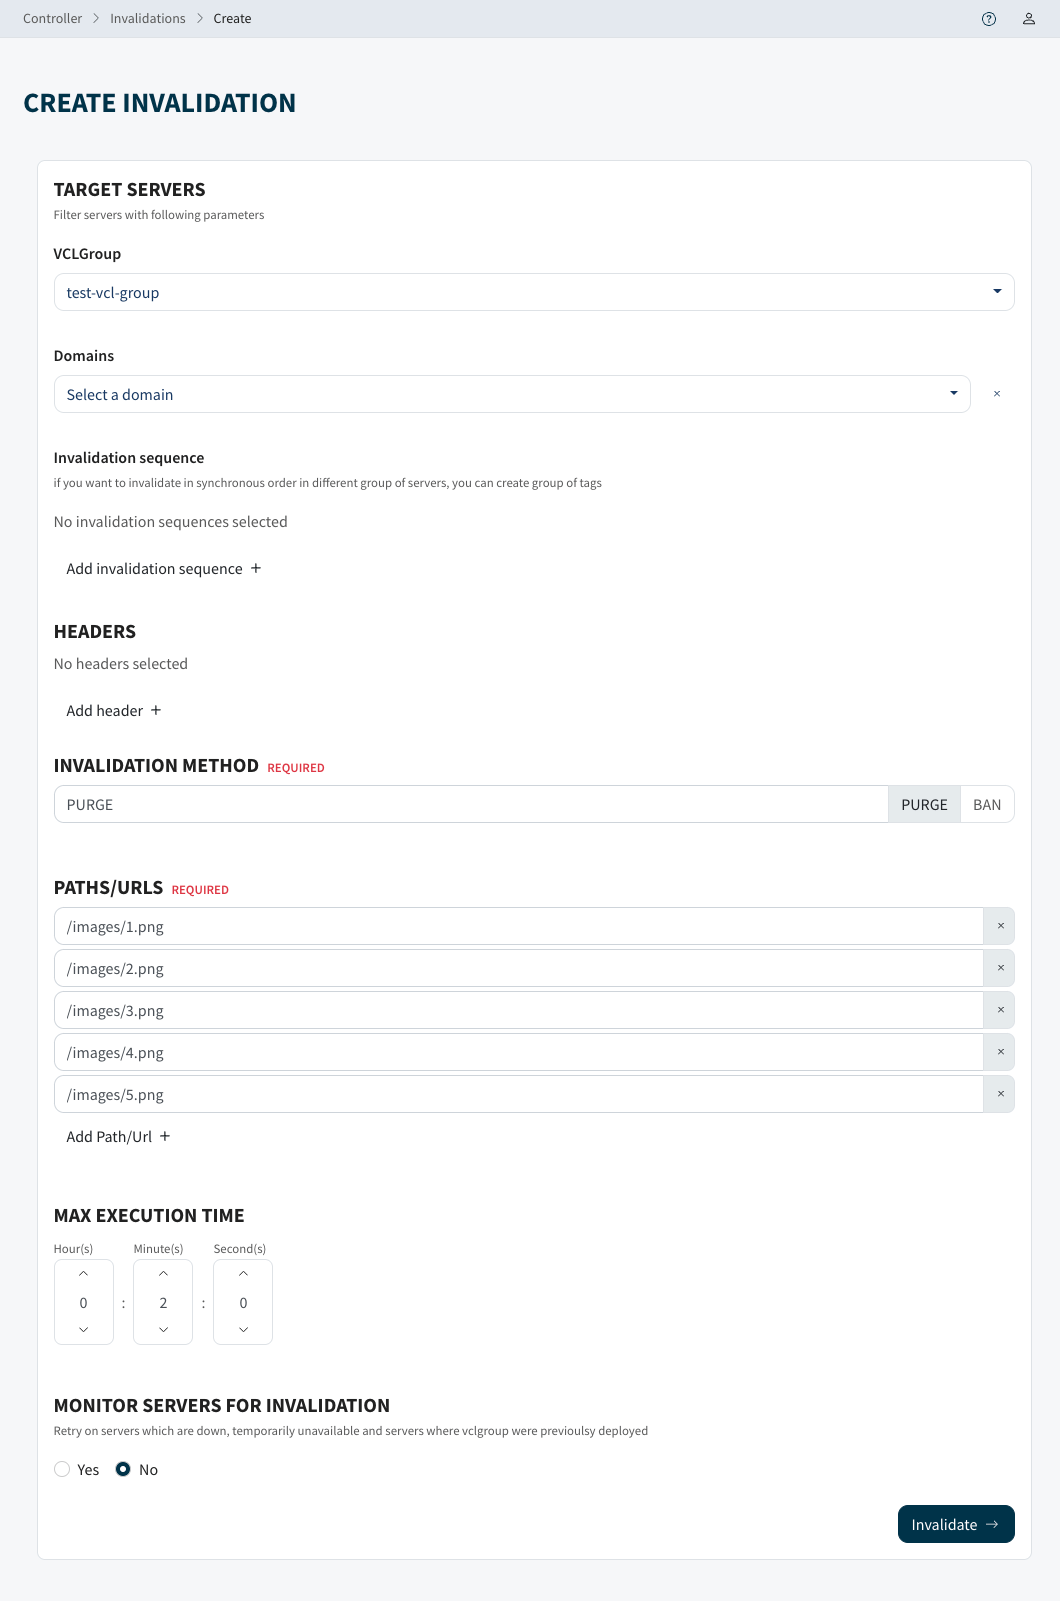
| Option | Description |
|---|---|
| VCLGroup | Defines the VCLGroup to invalidate, the Varnish Controller will send the purging request to all agents connected to the VCLGroup. |
| Invalidation method | Defines the HTTP method, it needs to correspond with the method you defined in your VCL. Here we use the method PURGE. |
| Paths | Defines the paths to invalidate, each path on a new line. |
The CLI and the UI use the API of the controller to send invalidations. There is also the possibility to send in the purging request directly to the API instead and integrate it with for example your CMS or other pipeline. To achieve the same PURGE request as the CLI you can send in the following API request to the API-GW. More examples.
POST /api/v1/invalidations

{
    "method": "PURGE",
    "paths": ["/images/1.jpg", "/images/2.jpg"],
    "vclGroup": {"id": 1},
}
In this example we have a root deployed VCLGroup deployed to 2 agents. The VCLGroup has ID: 2. When invalidating a root deployed VCLGroup the Varnish Controller does not know what domains are running. Therefore it is required to add domains to the invalidation command.
$ vcli inv new --vg 2 -d fqdn=example.org -f ./paths.txt -m PURGE
This invalidation request will be send to all agents that have VCLGroup 2 deployed, the Varnish Controller Agent will send a HTTP request for each path with the example.org domain to Varnish with the defined HTTP method (in this case PURGE).
| Argument | Description |
|---|---|
--vg 2 |
Defines the VCLGroup ID to invalidate, the Varnish Controller will send the purging request to all agents connected to the VCLGroup. |
-d fqdn=example.org |
Defines domain to send the PURGE requests for. You can also use pre-defined domains from the Varnish Controller by specifying the domain ID -d id=1 |
-f ./paths.txt |
Defines the path to the paths file. In the paths file you’ll need to define the paths to invalidate, each path on a new line. |
-m PURGE |
Defines the HTTP method, it needs to correspond with the method you defined in your VCL. Here we use the method PURGE. |
Go to the Invalidations page and click the button New invalidation.
PURGE.Invalidate button.Within a few seconds or less depending of the size of invalidation you will see if it succeeded or failed. To inspect why it failed, click the invalidation request. You will see the error code or possible error message.
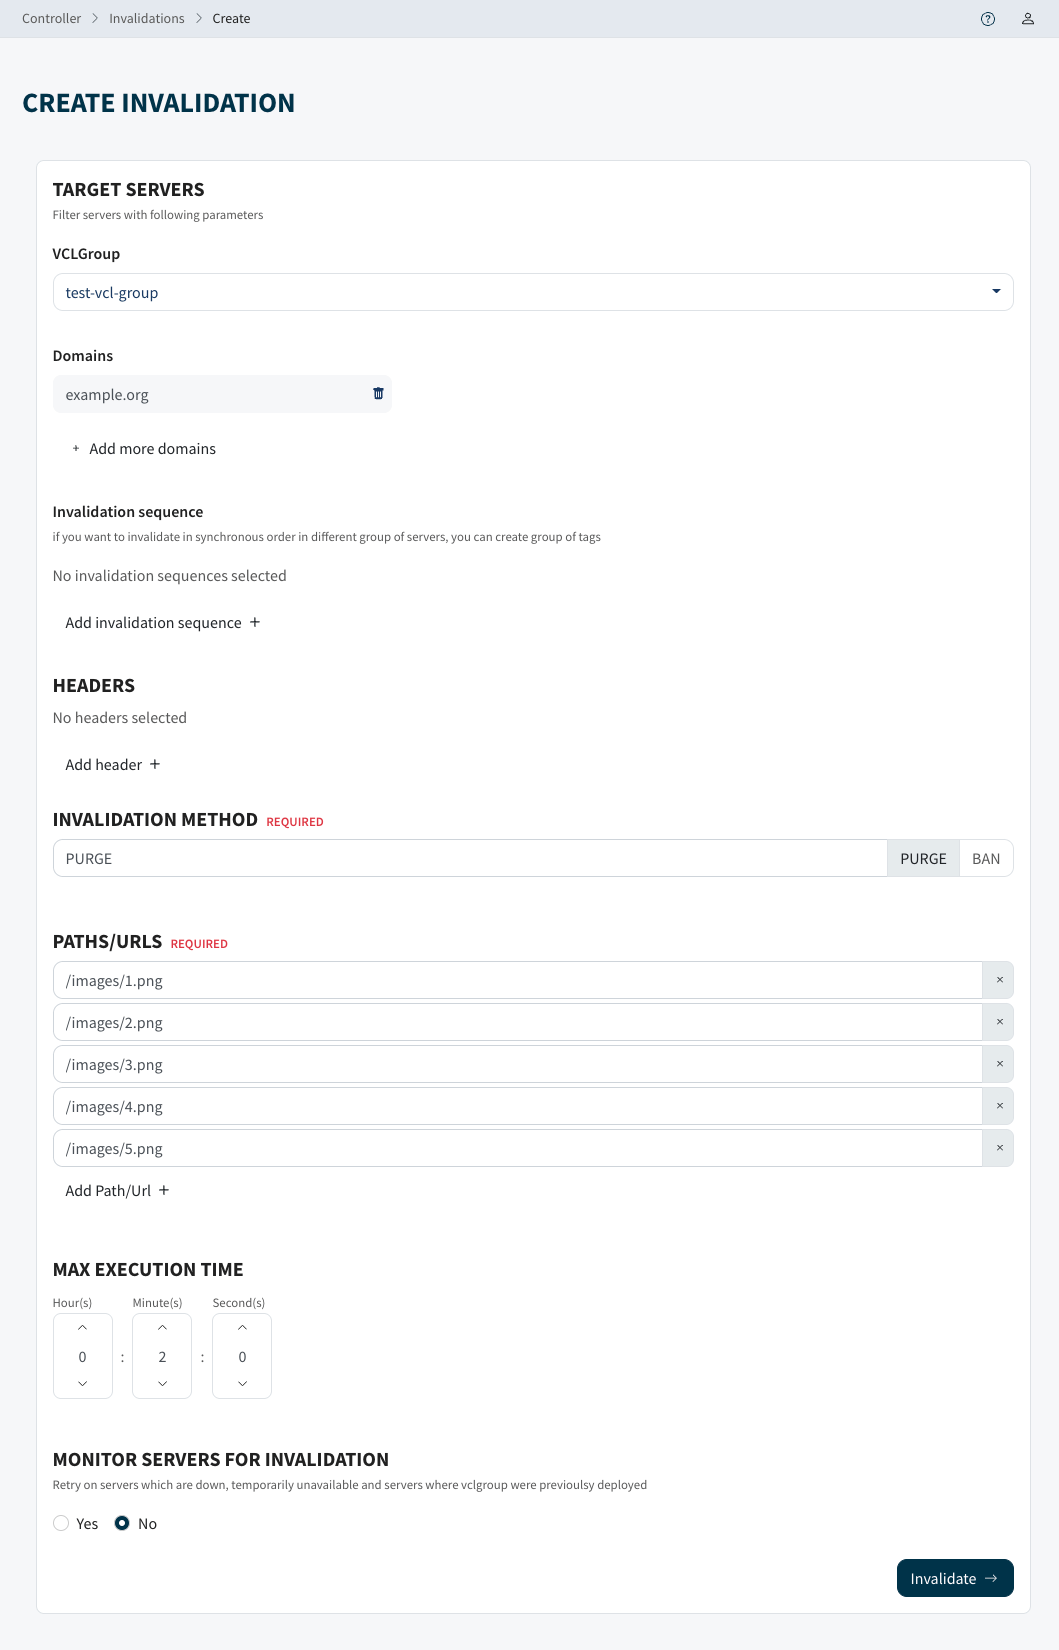
| Option | Description |
|---|---|
| VCLGroup | Defines the VCLGroup to invalidate, the Varnish Controller will send the purging request to all agents connected to the VCLGroup. |
| Domains | Defines domain to send the PURGE requests for. You can either select domains or enter the FQDN manually. |
| Invalidation method | Defines the HTTP method, it needs to correspond with the method you defined in your VCL. Here we use the method PURGE. |
| Paths | Defines the paths to invalidate, each path on a new line. |
The CLI and the UI use the API of the controller to send invalidations. There is also the possibility to send in the purging request directly to the API instead and integrate it with for example your CMS or other pipeline. To achieve the same PURGE request as the CLI you can send in the following API request to the API-GW. More examples.
POST /api/v1/invalidations

{
    "method": "PURGE",
    "paths": ["/images/1.jpg", "/images/2.jpg"],
    "domains": {"fqdn": "example.org"},
    "vclGroup": {"id": 2},
}