Varnish Controller
Each organization can be configured with an Identity Provider. This chapter will describe how to set up a very basic Keycloak installation via a Docker container for test purposes.
Keycloak can integrate with LDAP, AD, Github, Google, etc. as third-party authentication providers. Note that authorization cannot be configured in a third-party provider since Varnish Controller has its own authorization system.
For Microsft Entra users please see Microsoft Entra.
For development purposes it is recommended to start Keycloak in development mode. This can be done with the following command:
docker run -d -p 8080:8080 --name keycloak -e KEYCLOAK_ADMIN=keycloak -e KEYCLOAK_ADMIN_PASSWORD=test quay.io/keycloak/keycloak:latest start-dev
This will spin up a Docker container with keycloak, setting administrator username to keycloak and password test. It will
start listening on localhost:8080.
To run Keycloak in production it is mandatory to setup HTTPS certificates and keys. There is good documentation on how to do this on Keycloaks documentation
You can run Keycloak in docker as well on production though it is highly recommended to specify an external database that is persistent in this case. Keycloak has support for PostgreSQL so you could use the same database server as you are using for the Varnish Controller.
http://localhost:8080/admin/ in the web browser. Login with keycloak and password test.master and click the Create realm button.UI_URL with the URL the UI is reachable on.The redirectUris specify the URLs that are allowed to authenticate as a redirect URL. All other URLS will be ignored.
{
	"realm": "demo",
	"enabled": true,
	"users": [
		{
			"username": "demo",
			"enabled": true,
			"credentials": [
				{
					"type": "password",
					"value": "test"
				}
			],
			"realmRoles": ["user"]
		}
	],
	"roles": {
		"realm": [
			{
				"name": "user",
				"description": "User privileges"
			},
			{
				"name": "admin",
				"description": "Administrator privileges"
			}
		]
	},
	"defaultRoles": ["user"],
	"clients": [
		{
			"clientId": "demo-client",
			"enabled": true,
			"publicClient": false,
			"clientAuthenticatorType": "client-secret",
			"secret": "b124d51e-93e8-48c0-85cd-803657765040",
			"redirectUris": [
				"http://0.0.0.0:8002/api/v1/orgs/*",
				"http://UI_URL/api/v1/orgs/*"
			]
		}
	]
}
IDP Settings can be configured within the organization.

# Add IDP to the org (id 1 here, replace client-secret with your client-secret)
# The URL is the one for Keycloak's OIDC (OpenID Connect) path.
vcli idp add --org 1 --base-url http://localhost:8080/realms/demo/.well-known/openid-configuration --client-id demo-client --client-secret b124d51e-93e8-48c0-85cd-803657765040
In Varnish Controller v6.6.0 and above, roles can be configured in the IDP settings, by mapping the UID within the claims to the role ID. This means that all users logging in with the same unique UID will receive the corresponding role.
The identifier is the key that the controller searches for within the claims containing the user’s UIDs,
resolving to the corresponding role. In Keycloak, this is typically the roles field,
while in Microsoft Entra, it could be groups or roles, depending on the configuration,
See Microsoft Entra for specifics.

vcli idp update 1 --identifier roles
The directory connection is responsible for mapping the directory groups UIDs to specific roles. Given the complexities of directory services, where users can belong to multiple groups, the order of UIDs is important. If a user is connected to multiple matching UIDs, the first UID in the UID connection will be used for role matching.

vcli idp update 1 --uid-role broker:1,CustomRole:2
Login attempts without a role can be accepted or rejected based on the configuration settings. By rejecting such attempts, you ensure that users without a matching UID in the Active Directory connections are unable to log in, while allowing will give the logged in user default permissions when logging in.

# Default false
vcli idp update 1 --role-required=true
Log in using VCLI, specify organization name and make sure to use --idp to specify that we should use IDP for login.
# Login using IDP to our organization called "neworg"
vcli login -o neworg --idp
Endpoint: http://localhost:8002
Go to the URL below and login:
http://localhost:8080/realms/demo/protocol/openid-connect/auth?client_id=demo-client&redirect_uri=...

Waiting 60sec for access...
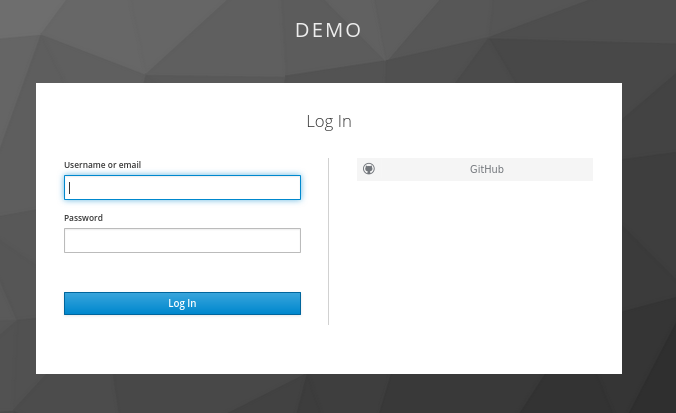
Click the given link and log in via the Keycloak login form that is shown in the browser.
On a successful login, Keycloak and the Varnish Controller exchange access and refresh tokens automatically. You can close the window that displays the access and refresh tokens. The CLI will print a success message or timeout message if no successful login occurred within 60 seconds.
Login successful.
If this is the account’s first login and no role is assigned, the account will be granted basic permissions by default. Extended permissions can be added later by the organization administrator or system administrator.
See authorization examples how to add permissions.