 Search
Notes
The Varnish Controller supports OpenID Connect logins through Keycloak, but also direct login with OpenID Connect (OIDC) towards Microsoft Entra (Azure Active Directory). Direct OIDC login requires configuration of Microsoft Entra to retrieve the right URLs and details for the Varnish Controller.
Before we start configuring in Microsoft Entra, we need to create an organization in the Varnish Controller. As a system administrator navigate to Organizations in the left hand side of the screen. Create a new organization (or select an existing one).
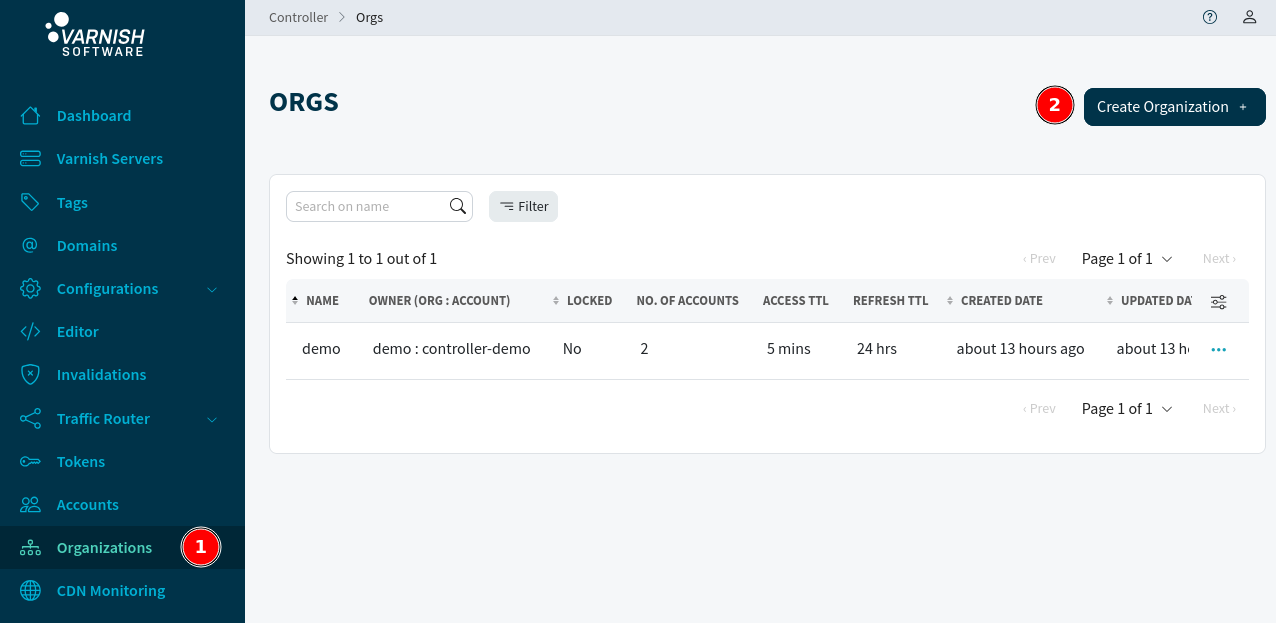
For now give the organization a name and hit Create. The organization name is used in the login screen later when your users are logging in into the Varnish Controller. After creation, you are redirected to the edit page of this organization. We need to find the ID of the organization, this is used in the next step.
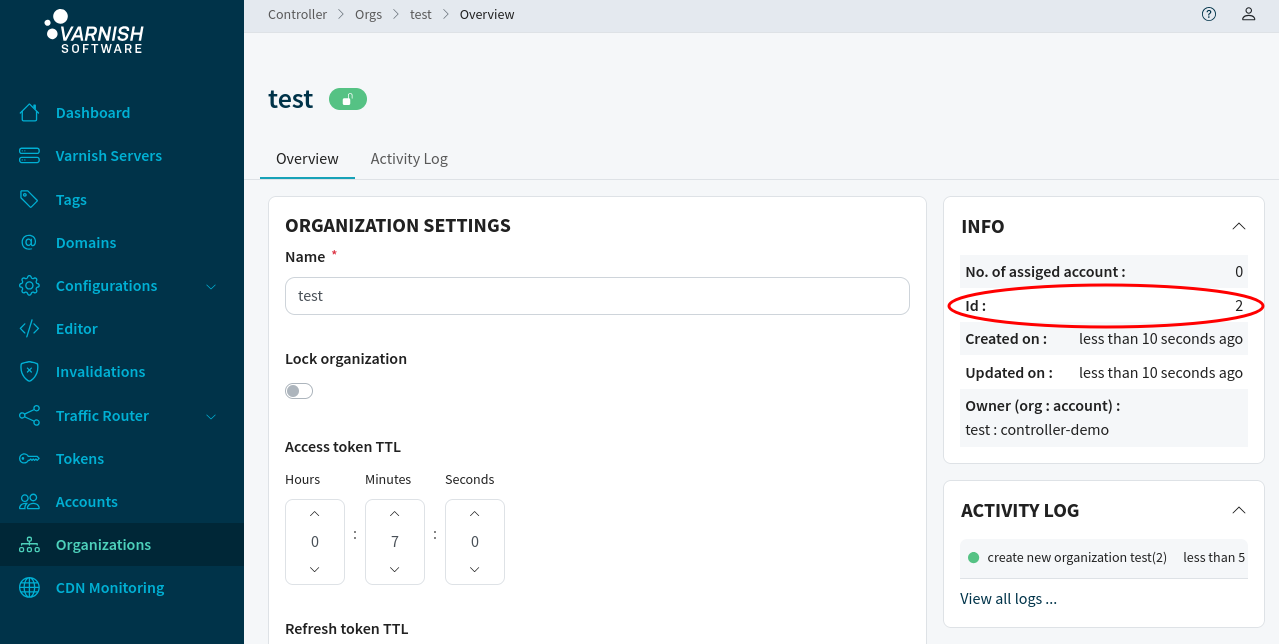
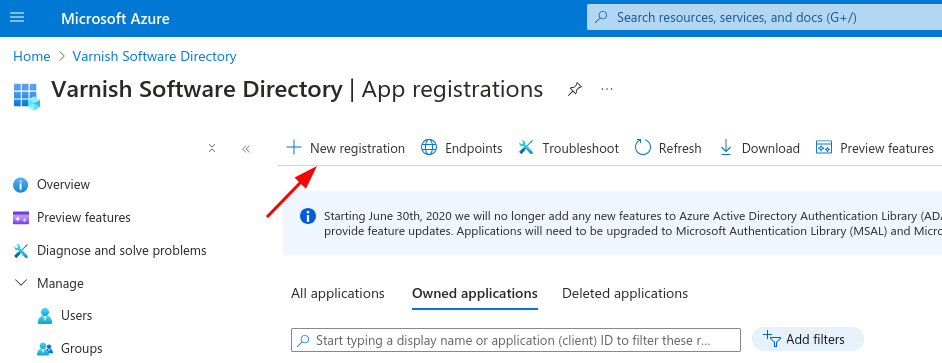
Login at the Azure Portal and navigate to Microsoft Entra ID. In the left hand menu under the Manage item navigate to App Registrations. At this page we create a new registration:
Varnish Controller - Login Example.Single tenant option for authentication as we only want users from our Directory to be able to login.Web in the dropdown and enter a redirect URL for our application, enter the following URL: <API_GW>/api/v1/orgs/<ORG_ID>/callback. Replace <API_GW_HOST> with the public URL of the API-GW and <ORG_ID> with the ID of the organization that will be used for authentication.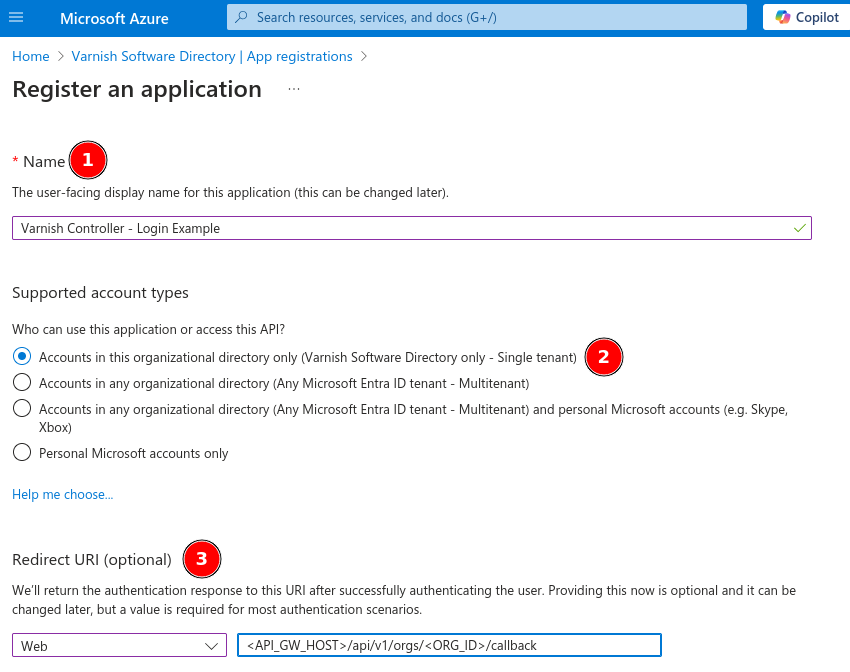
You will be redirected to your newly created Application.
Manage to AuthenticationAdd URI<UI_HOST>/api/v1/orgs/<ORG_ID>/callback. Replace <UI_HOST> with the public URL of the API-GW and <ORG_ID> with the ID of the organization that will be used for authentication.Implicit grand and hybrid flows we need to check the checkbox for Access tokensSave button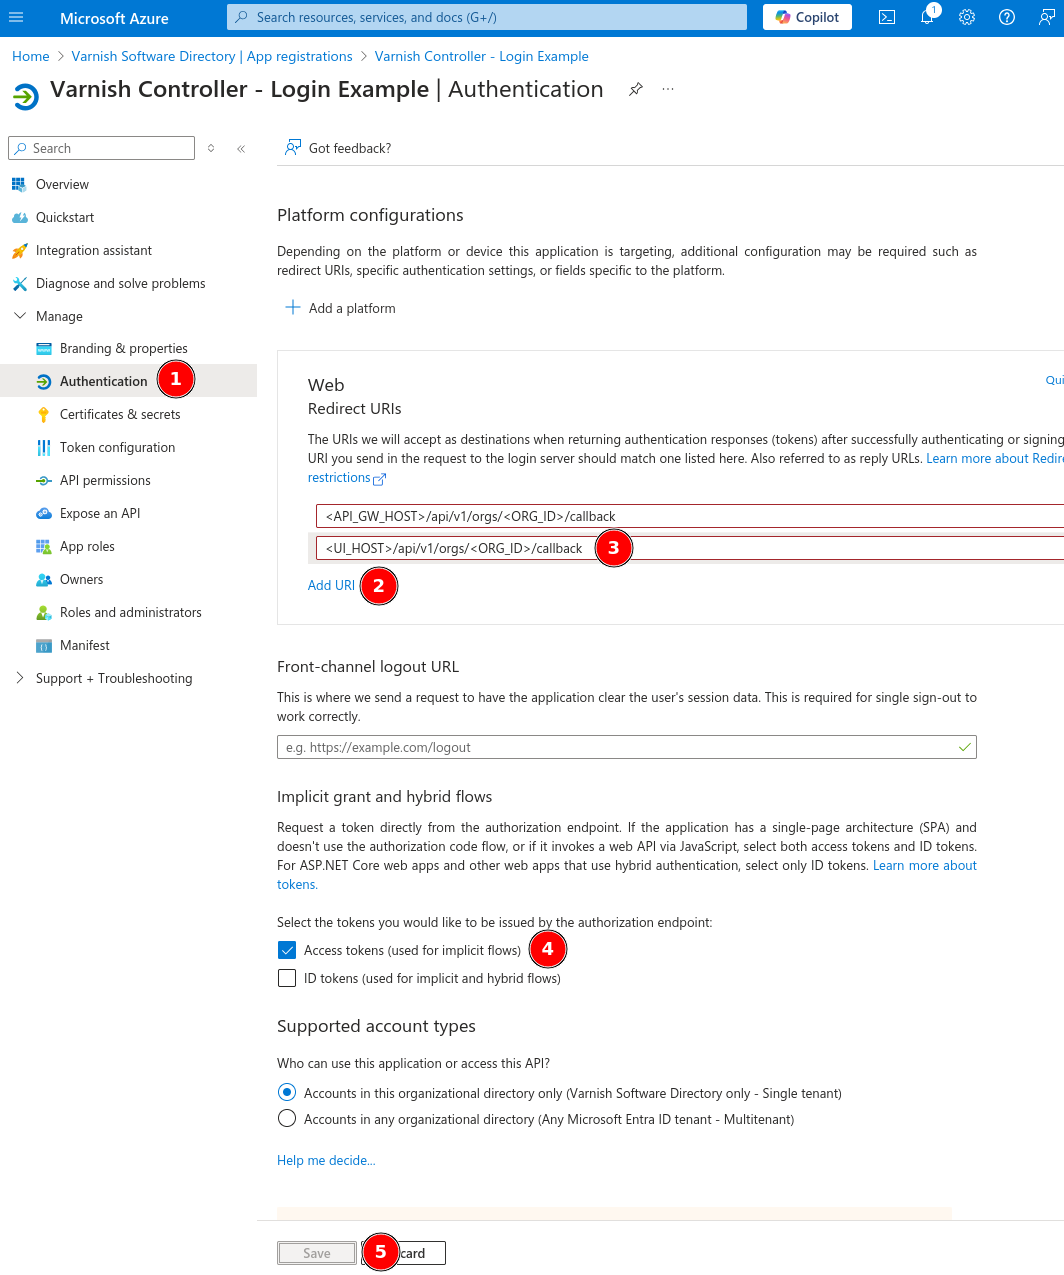
For the Varnish Controller to be able to parse information out of the access token we need to add our own scope. If this step is skipped, the Varnish Controller is not able to parse the authentication details and will be unable to create the IDP account.
Manage to Expose an APIAdd a scopeSave and continue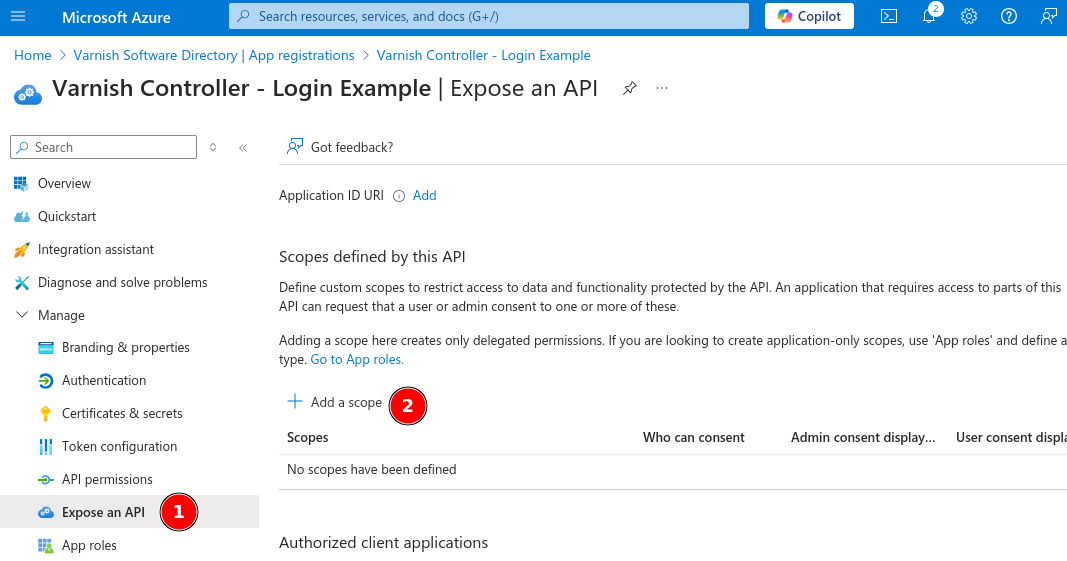
Varnish-ControllerWho can constent?, select Admins and usersVarnish Controller accessAllows the app to have Varnish Controller accessState should be EnabledAdd scope at the bottom of the screen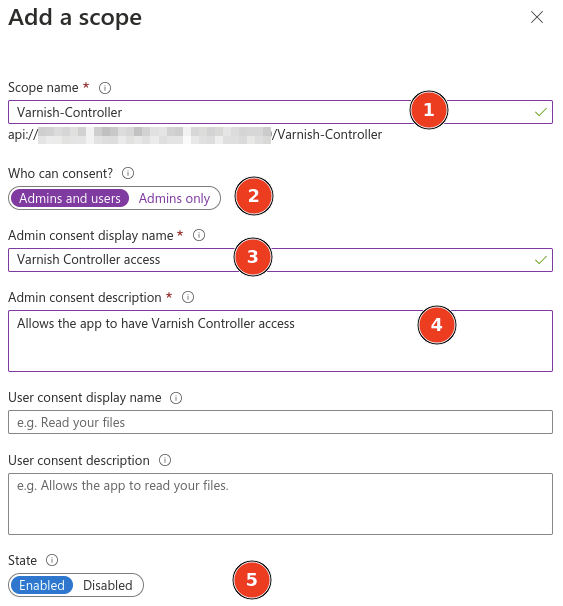
Next we need to setup the API permissions to allow the Varnish Controller to refresh the authentication tokens and retrieve the required information of the user trying to login.
Manage to API permissionsAdd a permissionMicrosoft Graph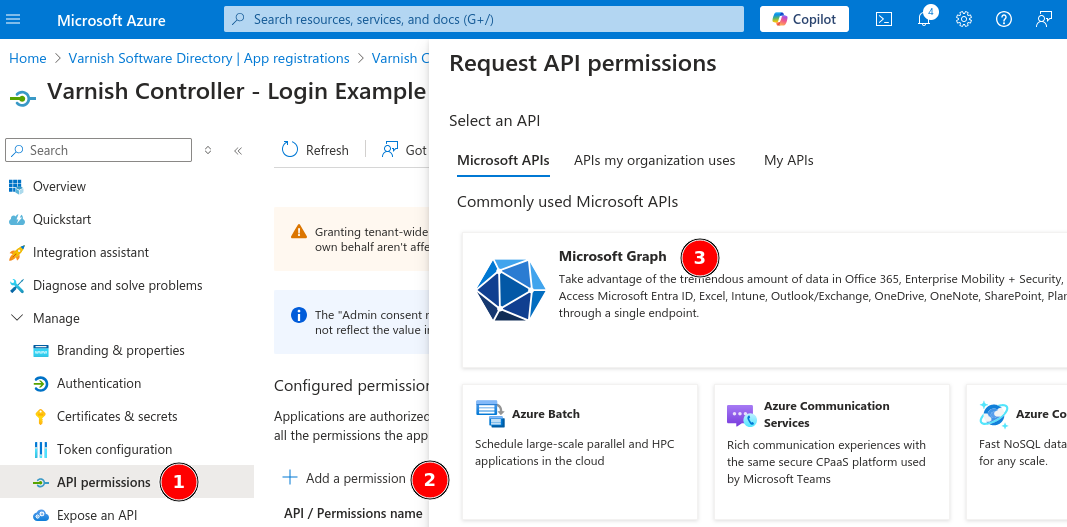
Delegated permissionsOpenId permissions; email, offline_access, openid and profile should be enabled.Add permissions at the bottom of the screen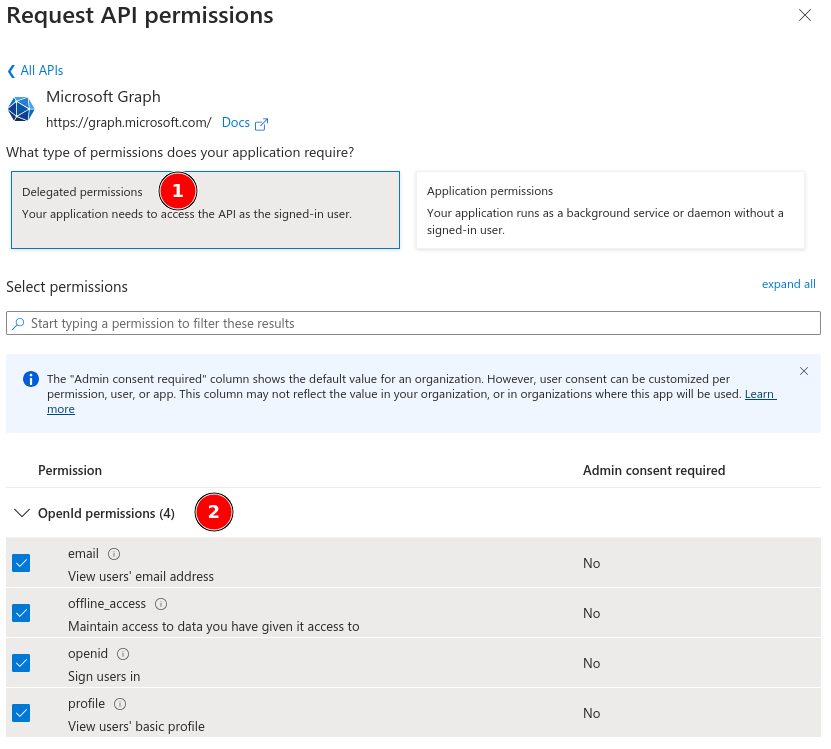
Add a permission againMy APIsVarnish Controller - Login Example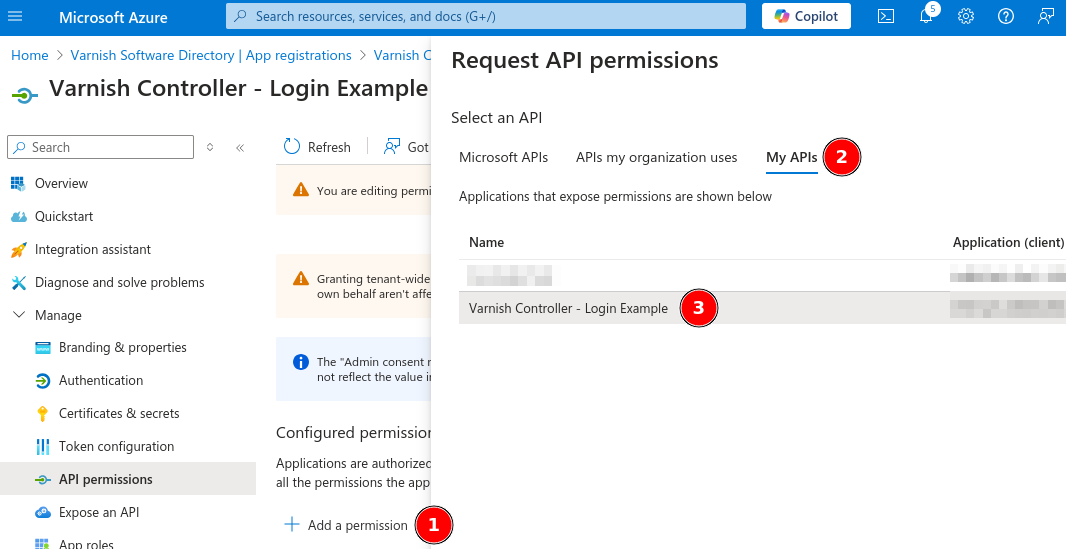
Varnish-Controller permissionAdd permissions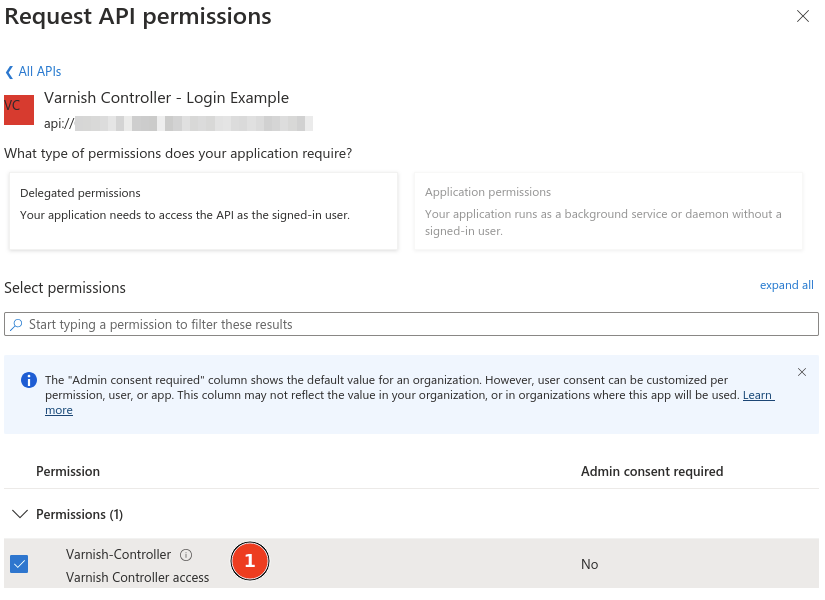
Manage to Token configurationAdd optional claimAccess for the token typeemail and preferred_usernameAdd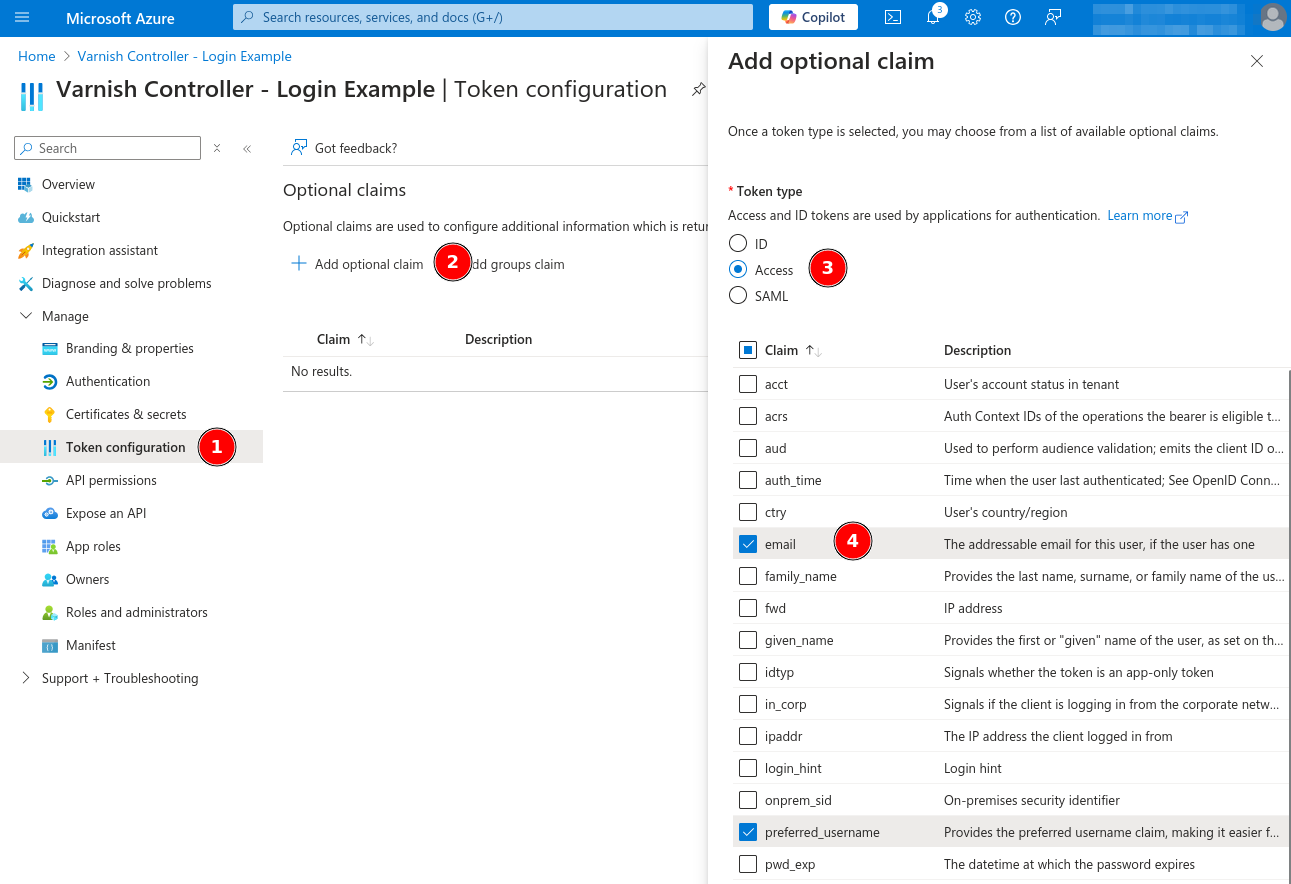
The Varnish Controller will communicate with the Azure API, this API connection needs a Client Secret to allow the Varnish Controller to make authentication requests. This client secret is only shown once! Store it somewhere safe!
Manage to Certificates & secrestClient secrets click on New client secretVarnish ControllerAddValue column. This Value is only shown once!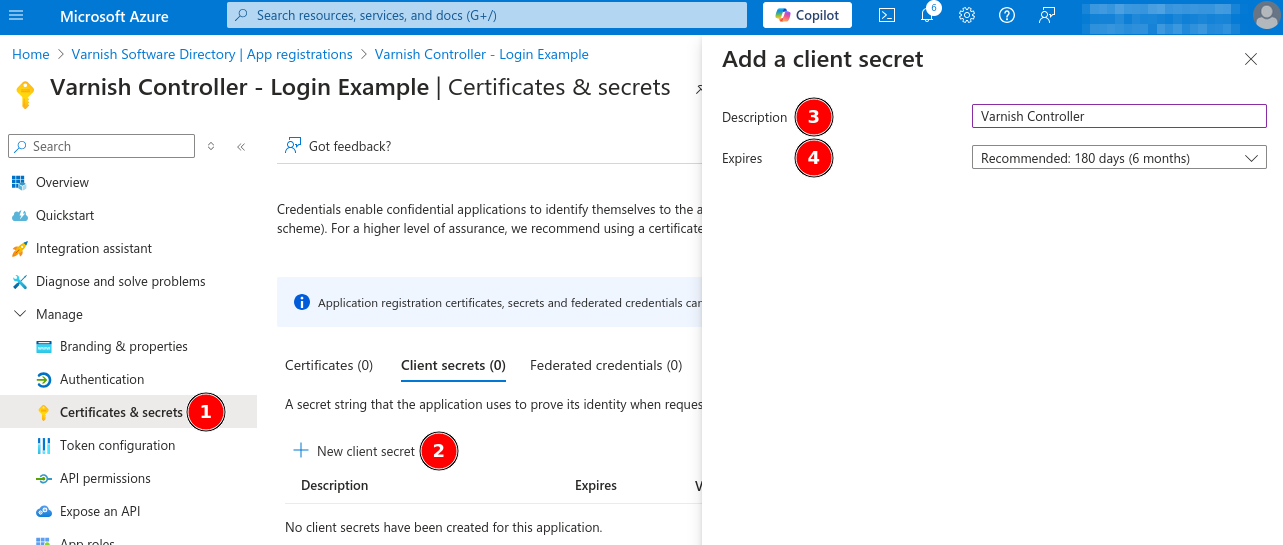

Now it is time to retrieve the final details of our connection. We have the client secret from the previous step, now we need the client ID and the OIDC manifest URL.
OverviewApplication (client) ID and save itEndpointsOpenID Connect metadata document URL and save it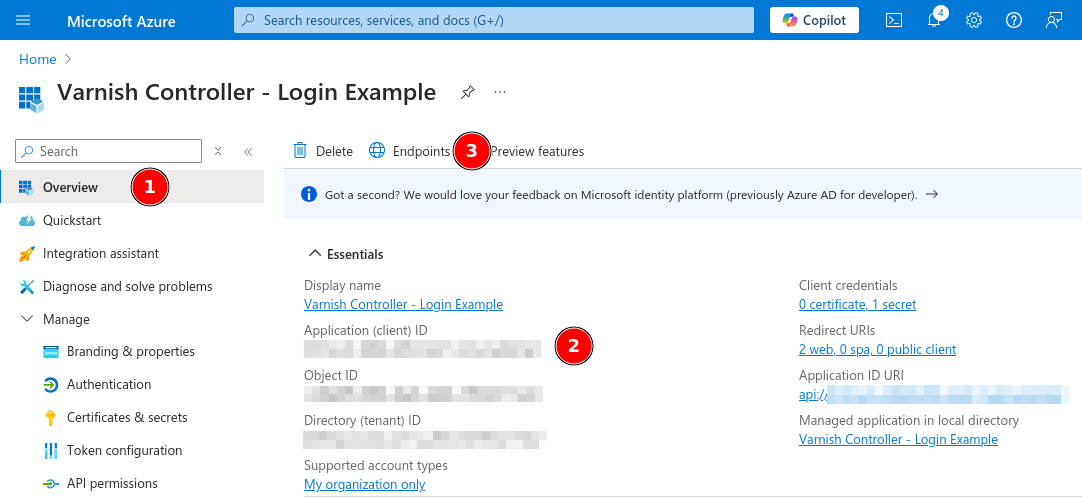
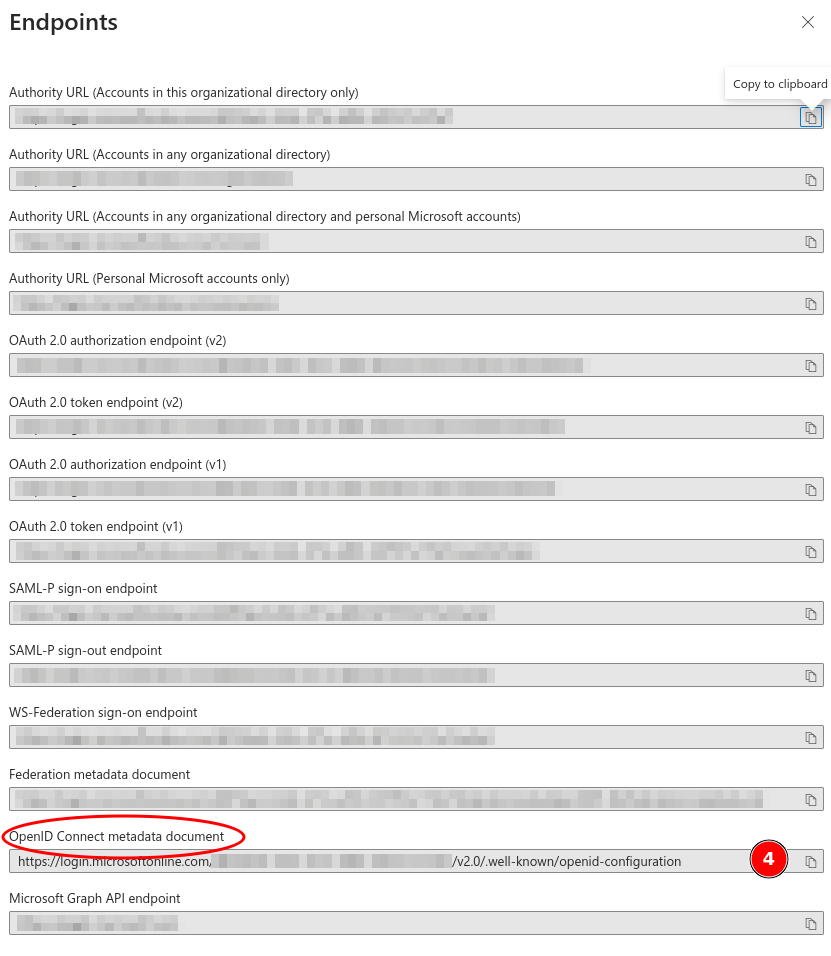
Login into the Varnish Controller again and edit the organization that we created in the beginning.
IDP ConfigurationBase URL enter the OpenID Connect metadata document URL we just copiedClient ID enter the Application (client) ID we just copiedClient Secret enter the Client Secret we generated previouslyoffline_access <CLIENT_ID>/.default. Replace the <CLIENT_ID> with the Application (client) ID we just copied.Save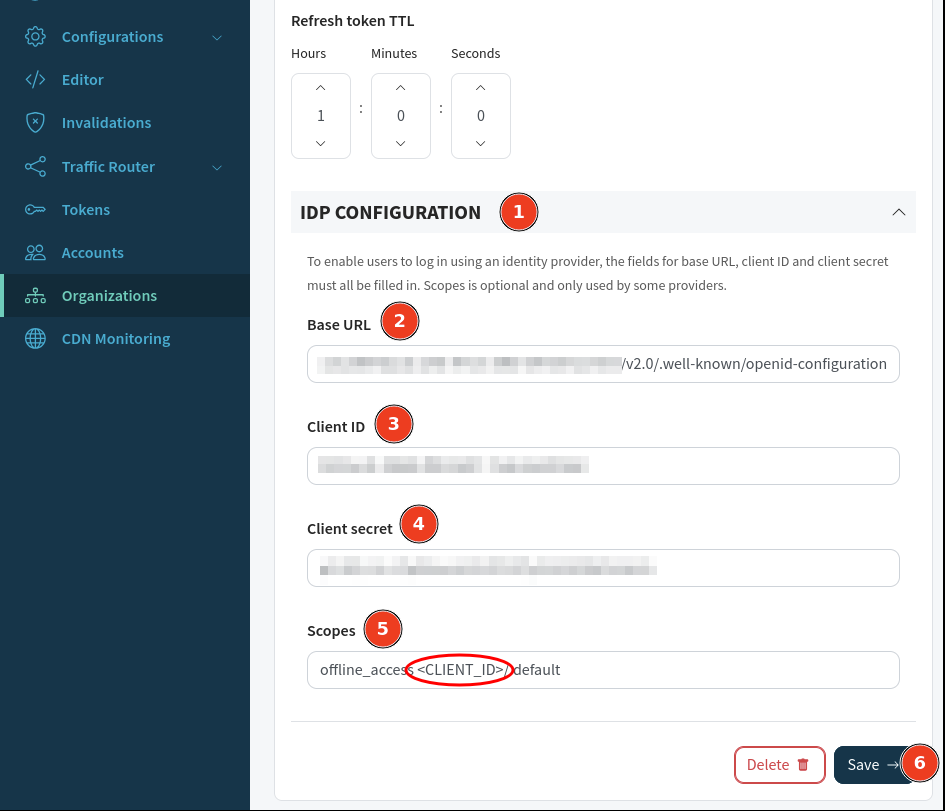
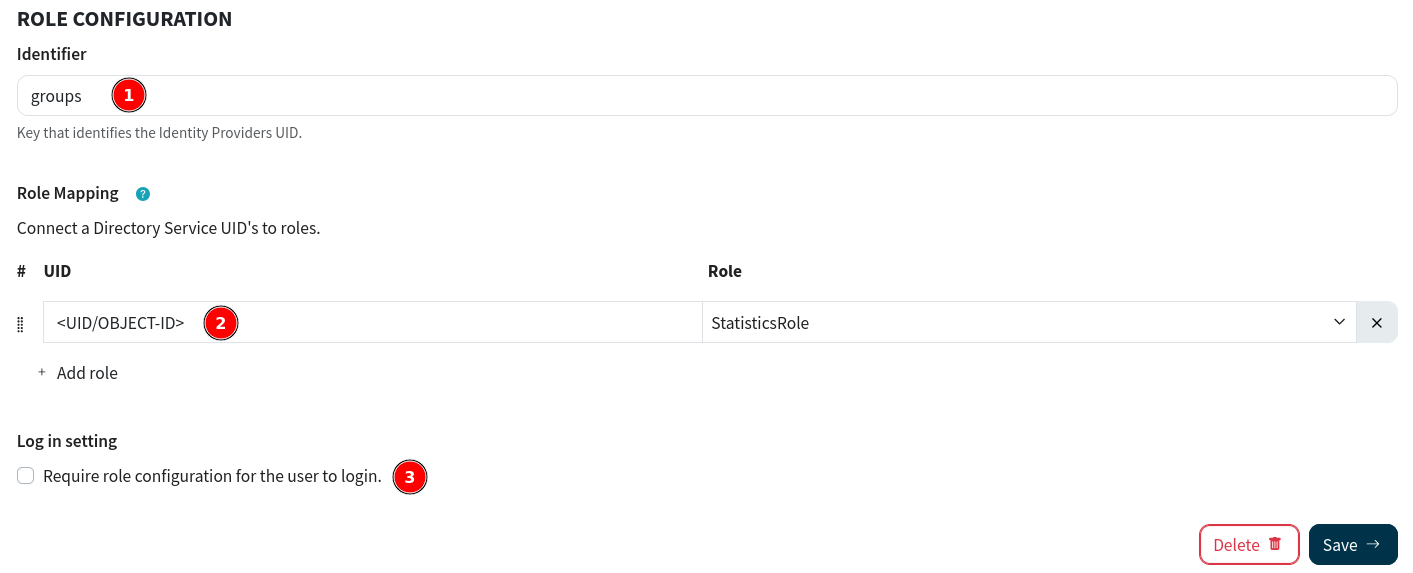
A group’s UID can be mapped to a role within the controller.
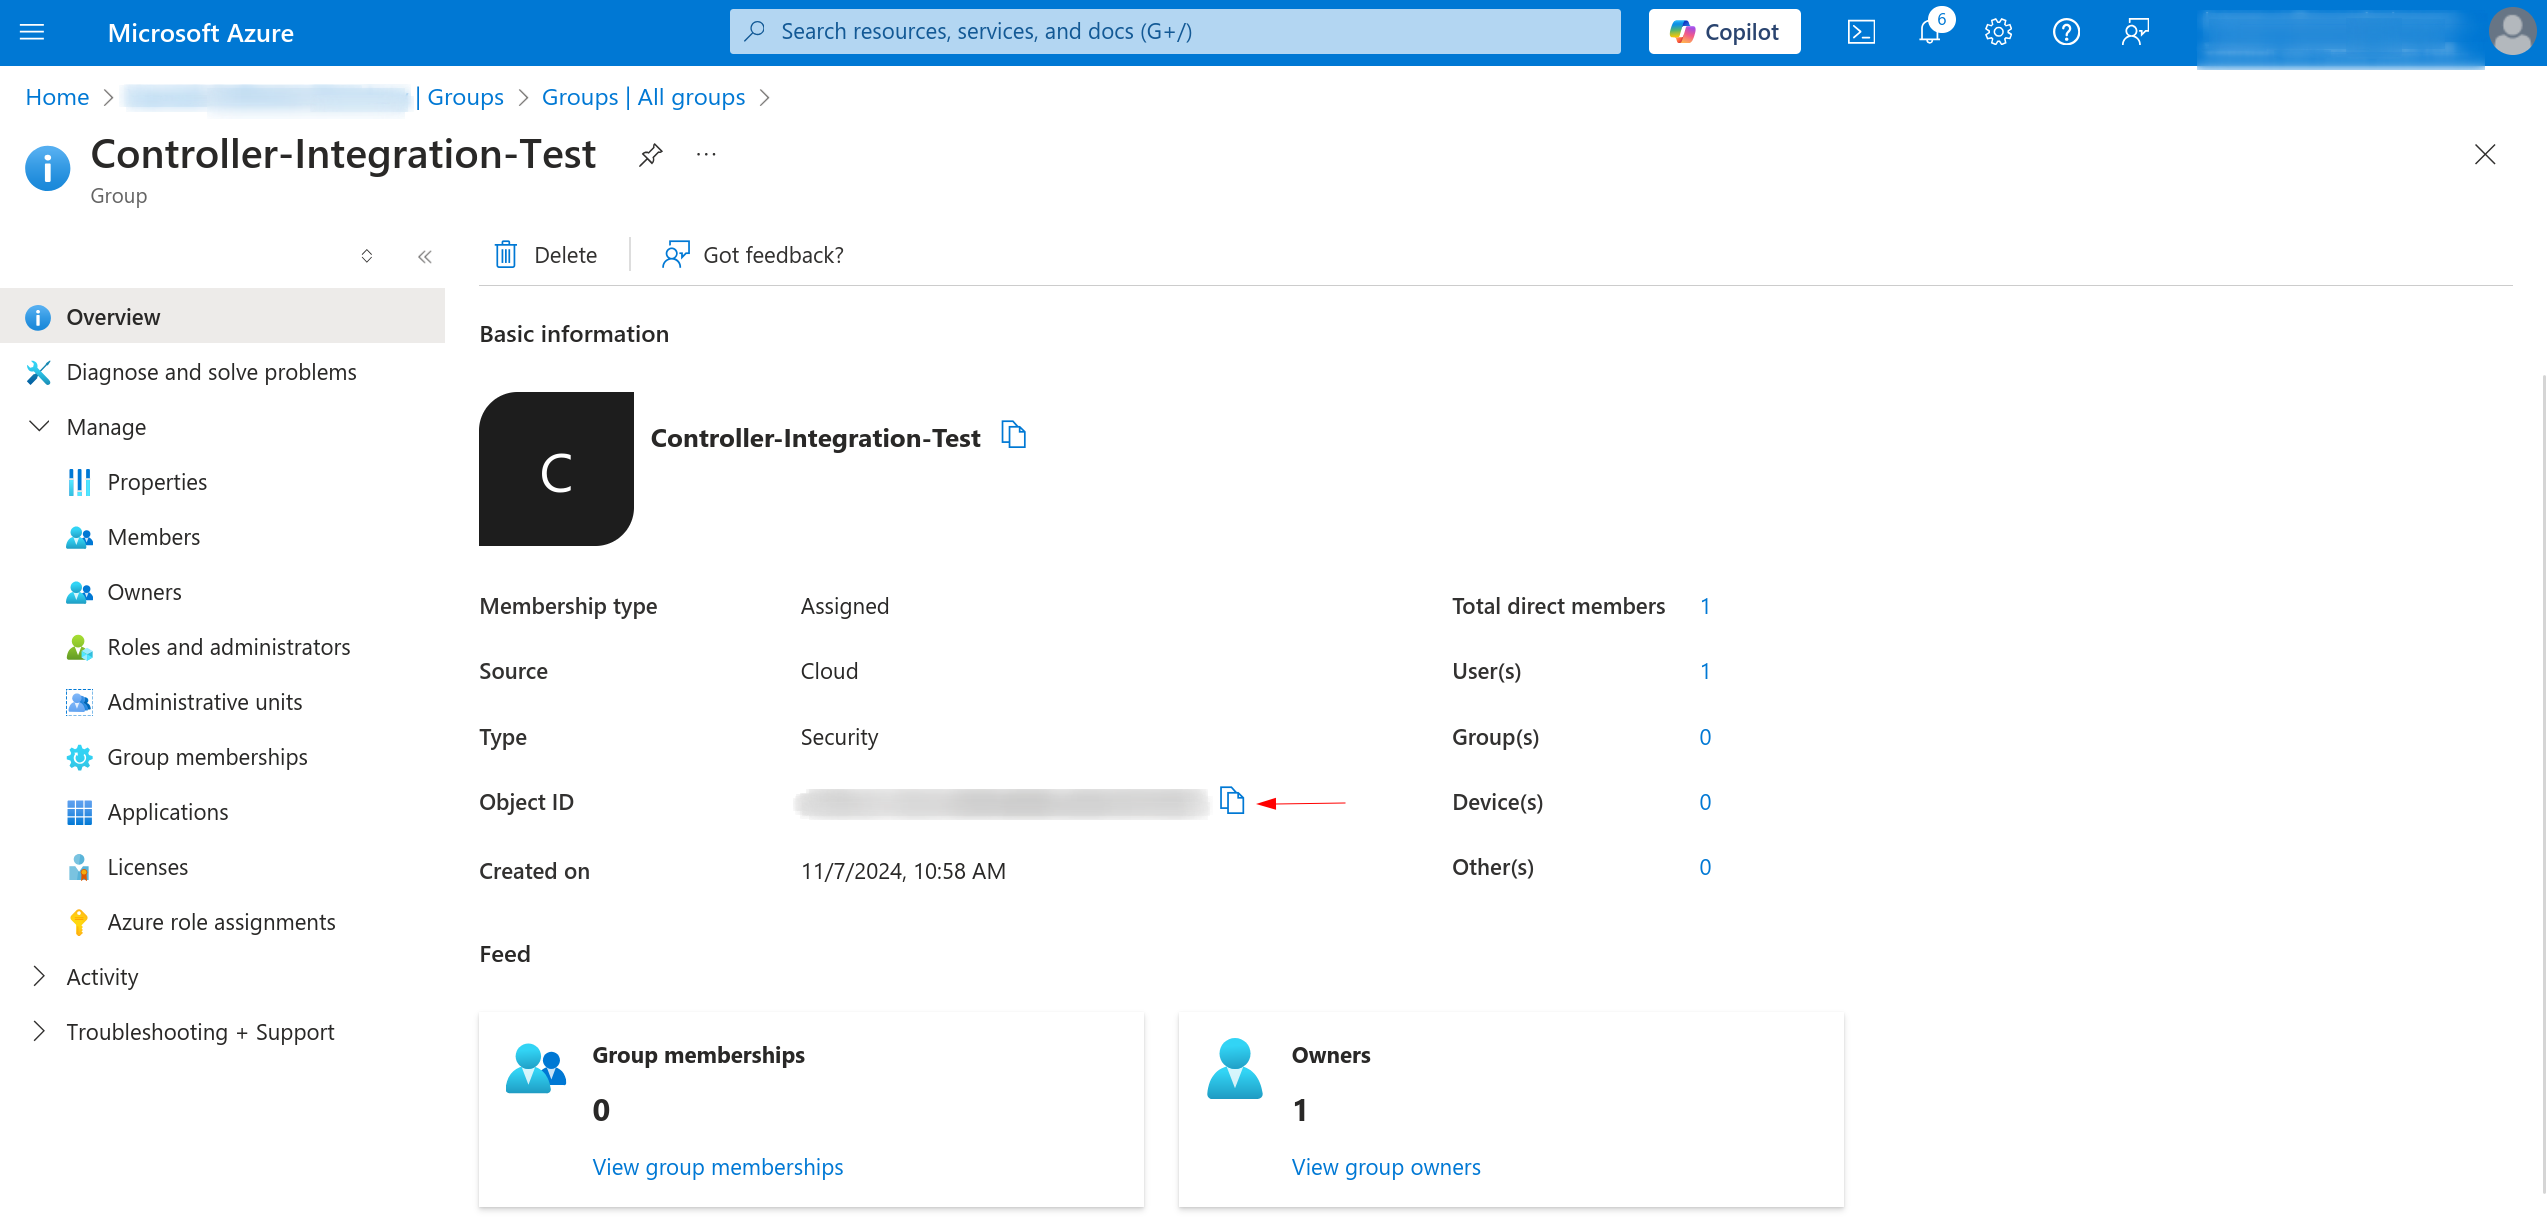
In Entra, access is typically configured using Groups. The first step is to locate the UID so it can be properly configured within the controller.
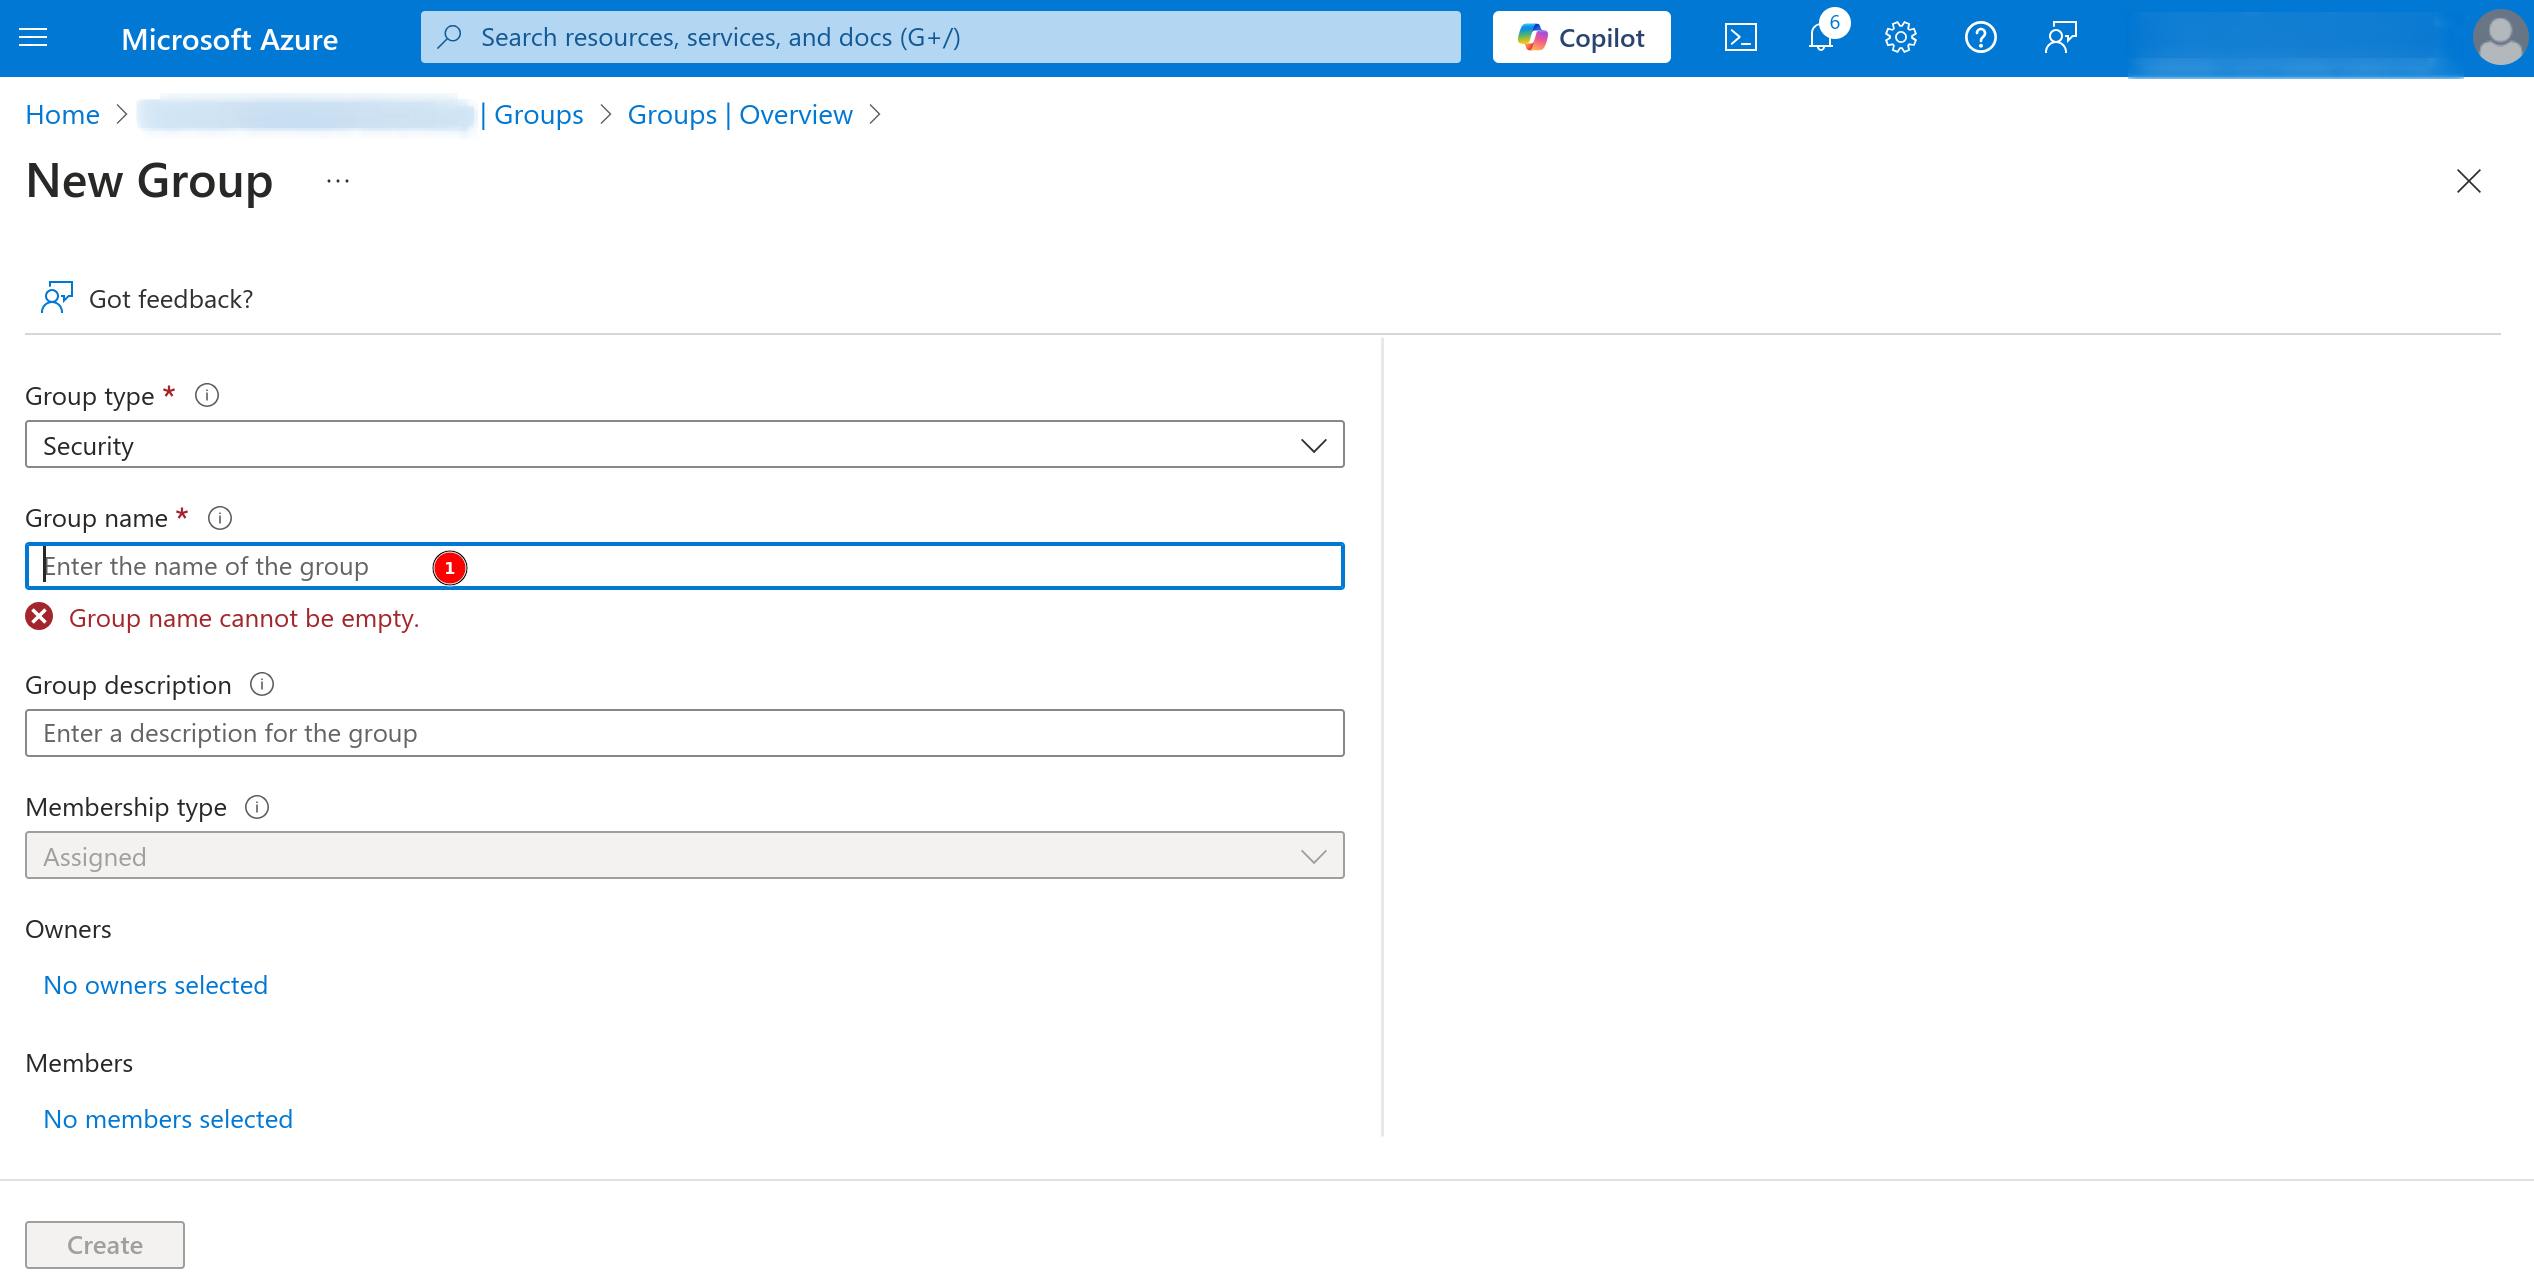
The object ID for the group needs to be used in the UID configuration. Create the group if it doesn’t already exist.
If a group doesn’t already exist, it needs to be created.
Save the Object ID for configuration within the controller, once everything is setup.
Enabling group claims allows the controller to retrieve UIDs associated with the groups key.
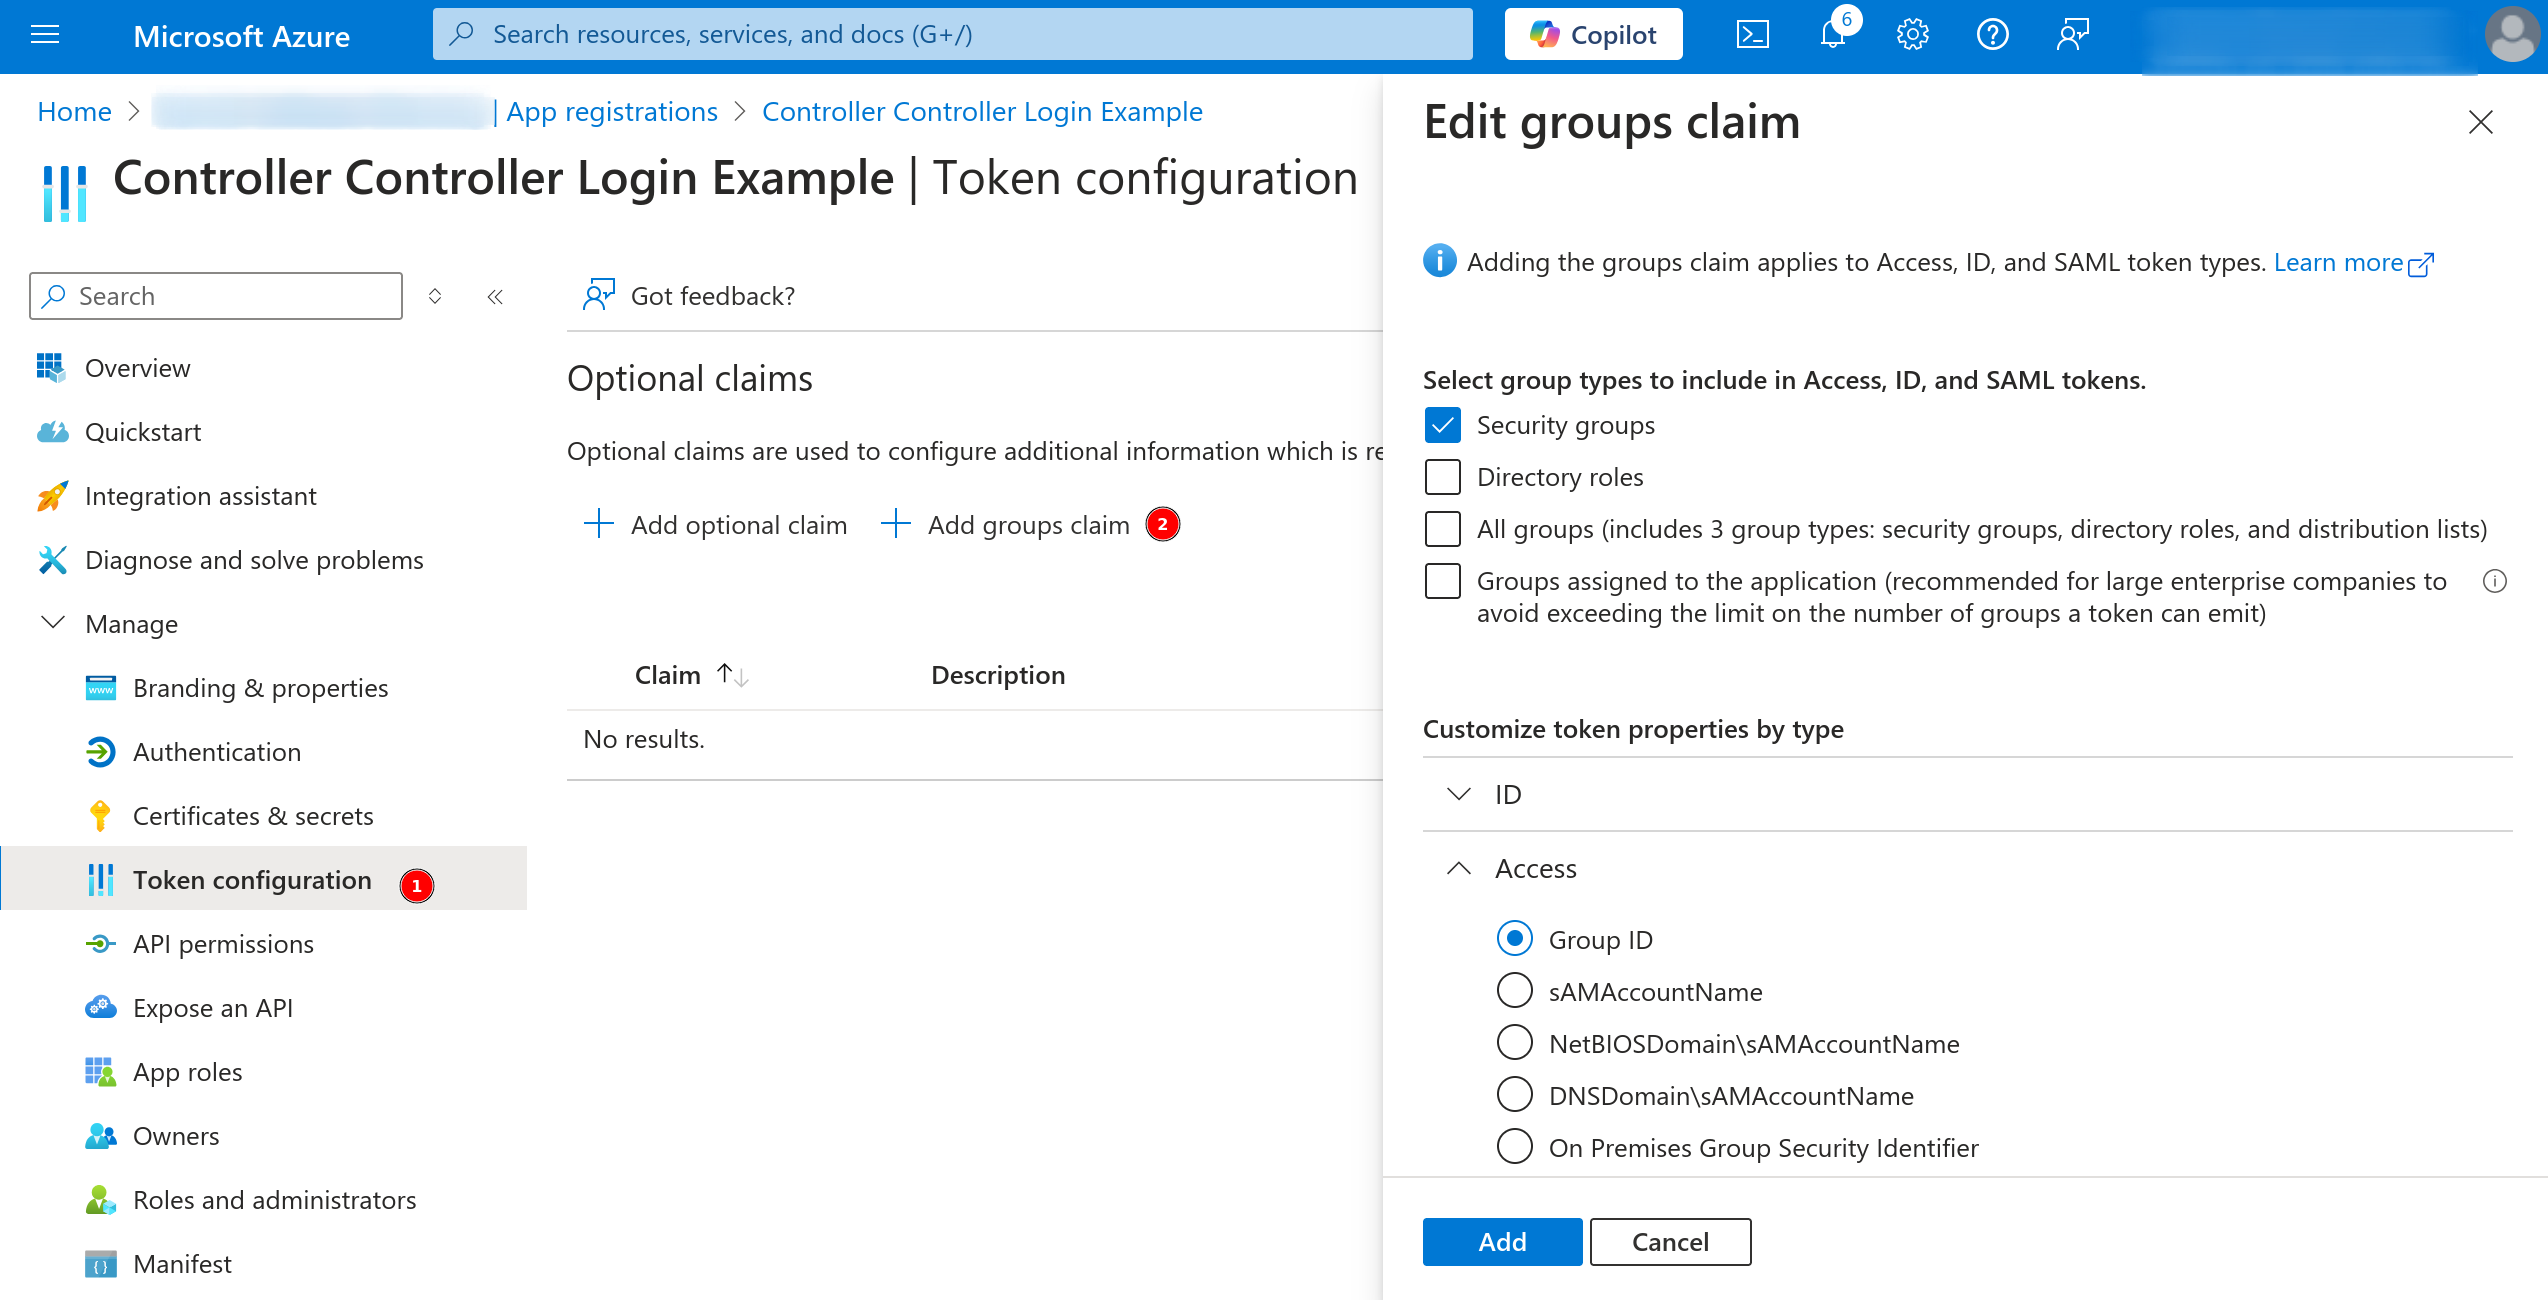
Once the UID is identified, the next step is to configure it within the controller. In the IDP settings, there are three key fields:
The UID needs to be mapped to a specific role within the controller.
Now everything should be configured!
Ensure you are not already logged in into the Varnish Controller.
Log in with identity provider.Continue, this will open a new window.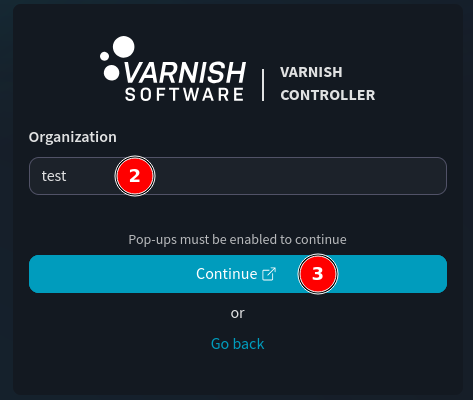
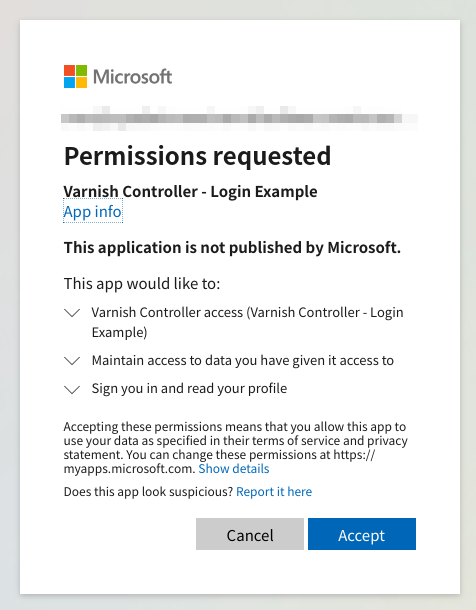
A new window will appear from Microsoft. Enter your Microsoft Entra login details and login. Microsoft will ask for consent for the permissions we have configured (The Varnish-Controller access, the email address and the preferred_username). Accept these permission requests. The user is now successfully created and authenticated through Microsoft Entra.
