 Search
Note: This tutorial is written from a perspective where the VCLGroups are deployed and the Traffic Router is setup correctly for routing traffic.
The option to drain traffic from specific Varnish nodes from the Traffic Router could be beneficial
when performing maintenance on specific Varnish nodes. The stop routing option of the agent will
remove the agent from the Traffic Router, ensuring no new clients are being routed to that Varnish
node.
When stop routing is enabled the Varnish node will still be able to serve traffic, this option does
not remove any deployed VCLGroups. This is important as some clients might still need content to be
served, specially in case of DNS routing where for the time of the TTL of the DNS record the client
will request content from that specific Varnish node. It is important to monitor the traffic to the
Varnish node with for example a Dashboard in the UI or with Varnishstat to make sure no traffic is
coming to the node anymore.
In the CLI we can stop routing to one or more agents with 1 single stop-routing command. The command
requires at least a filter to be set or a list of agent IDs.
# We want to stop routing to agents with id 3 and 4
$ vcli agent stop-routing 3,4

# OPTIONALLY:
# We could stop routing to all agents with tag id 1
$ vcli agent stop-routing -f tags.id=1
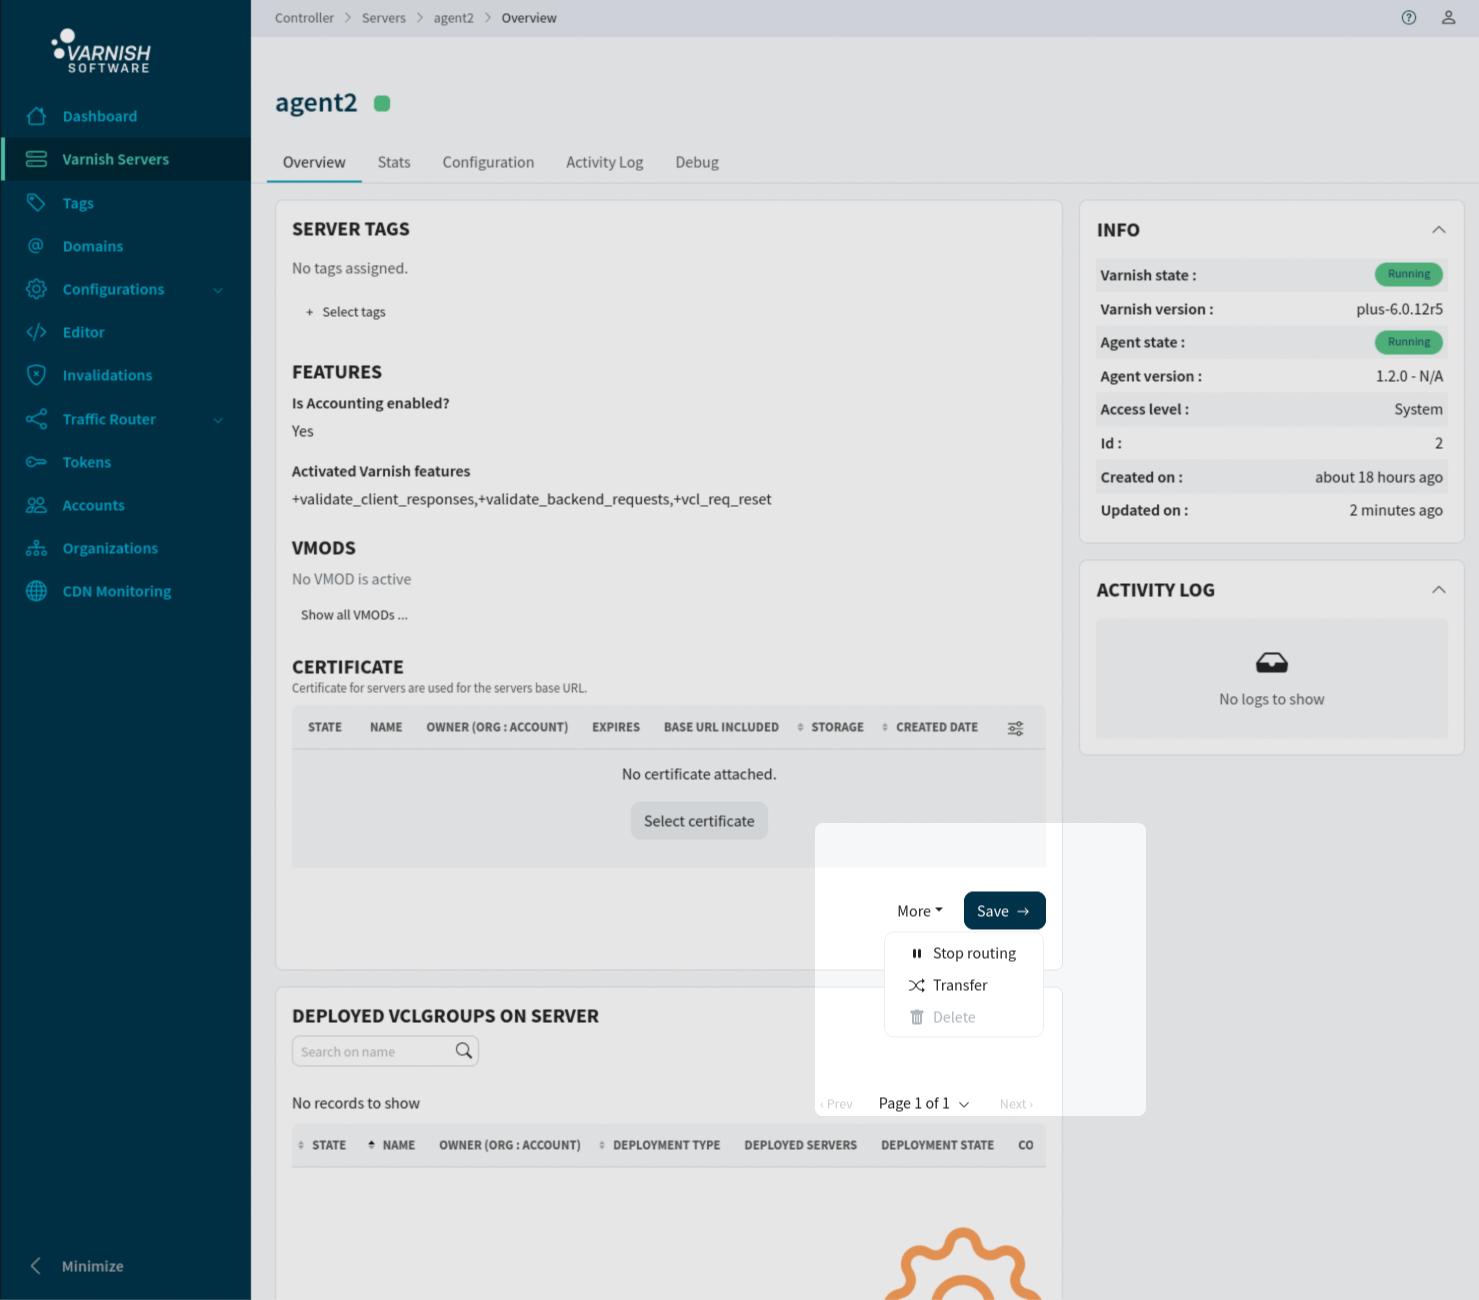
In the UI we can stop routing to one agent at a time from every individual agents overview page /servers/<AGENT-ID>.

In the API we can stop routing to one or more agents with 1 single routing/stop PUT request. The request
requires at least a filter to be set or a list of agent IDs.
In the examples two values need to be replaced:
<ACCESS_TOKEN> Needs to be replaced with the access token that was returned from the authentication request. Click here for more information<API_GW_URL> Needs to be replaced with the URL of your API-GW, for example http://localhost:8002.# We want to stop routing to agents with id 3 and 4
[Headers]
Authorization: Bearer <ACCESS_TOKEN>
PUT <API_GW_URL>/api/v1/agents/routing/stop?id=3,4
# OPTIONALLY:
# We could stop routing to all agents with tag id 1
[Headers]
Authorization: Bearer <ACCESS_TOKEN>
PUT <API_GW_URL>/api/v1/agents/routing/stop?tags.id=1
To enable the Varnish nodes in the Traffic Router again you can use the resume routing option. The
command and request supports the same filters as for stop routing.
In the CLI we can resume routing to one or more agents with 1 single resume-routing command. The command
requires at least a filter to be set or a list of agent IDs.
# We want to resume routing to agents with id 3 and 4
$ vcli agent resume-routing 3,4

# OPTIONALLY:
# We could resume routing to all agents with tag id 1
$ vcli agent resume-routing -f tags.id=1
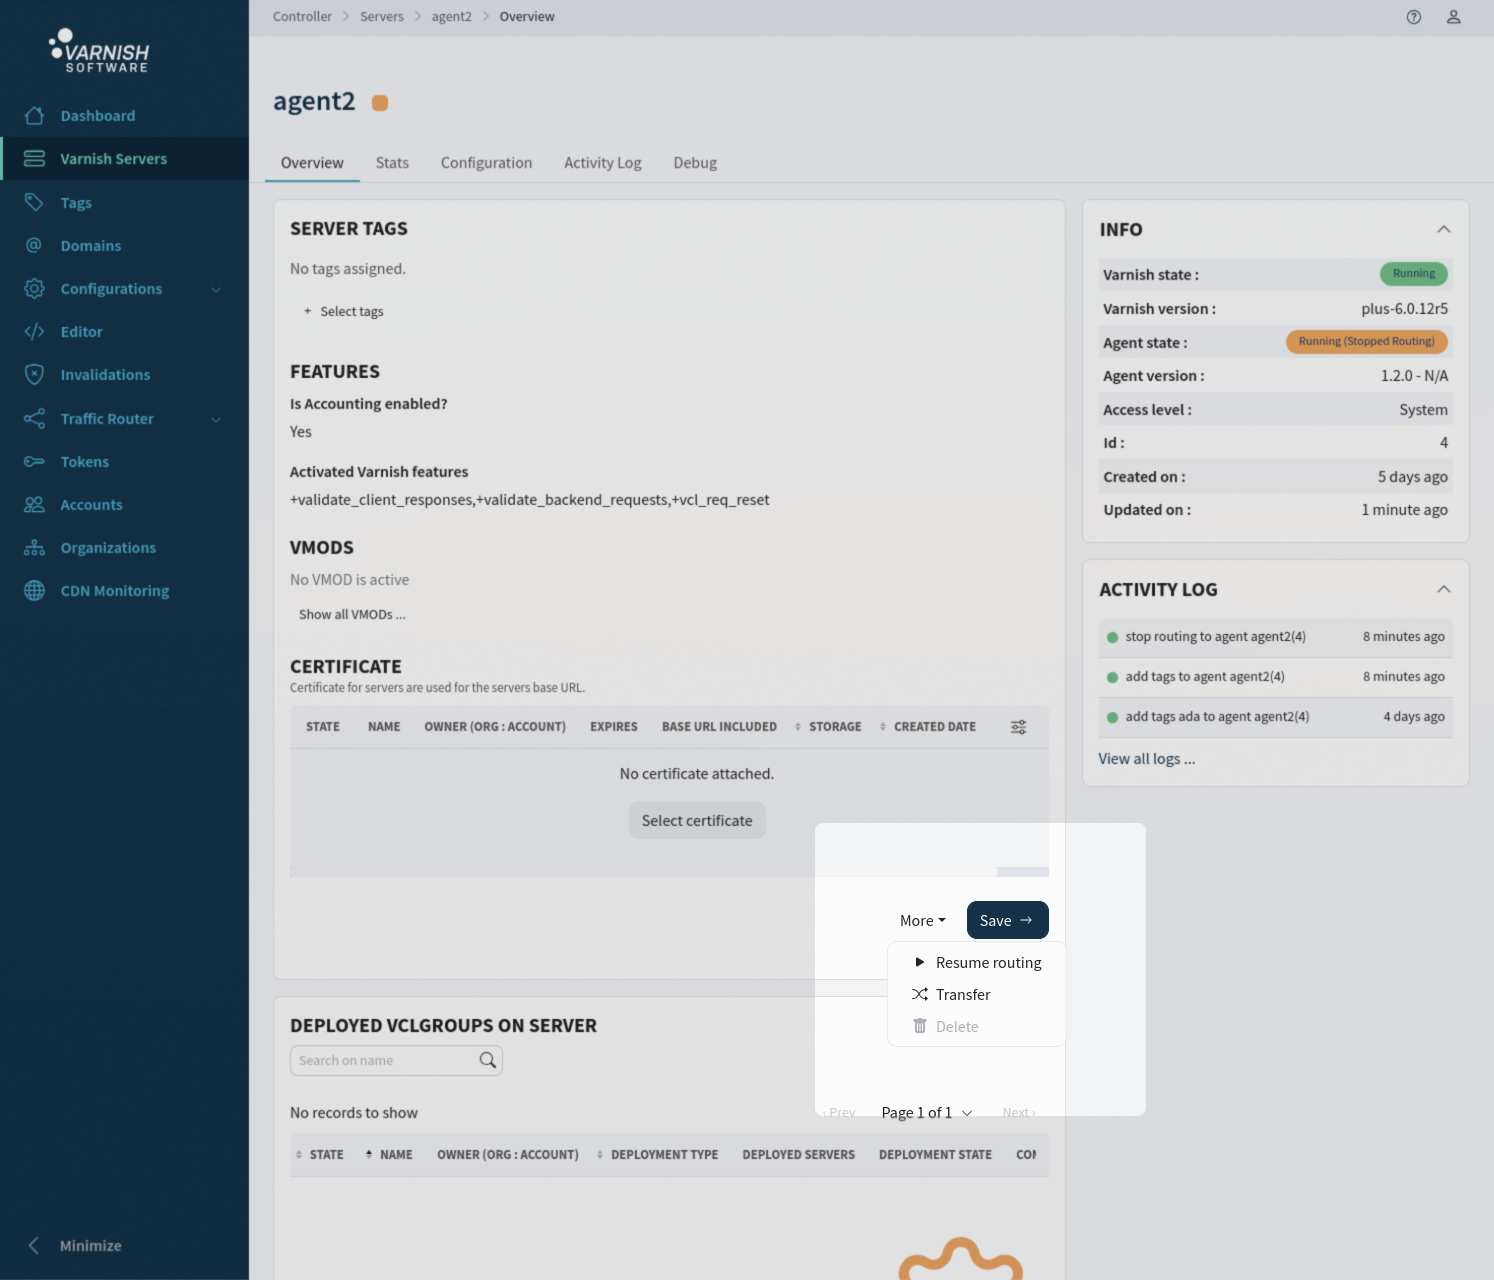
In the UI we can resume routing to one agent at a time from every individual agents overview page /servers/<AGENT-ID>.

In the API we can resume routing to one or more agents with 1 single routing/resume PUT request. The request
requires at least a filter to be set or a list of agent IDs.
In the examples two values need to be replaced:
<ACCESS_TOKEN> Needs to be replaced with the access token that was returned from the authentication request. Click here for more information<API_GW_URL> Needs to be replaced with the URL of your API-GW, for example http://localhost:8002.# We want to resume routing to agents with id 3 and 4
[Headers]
Authorization: Bearer <ACCESS_TOKEN>
PUT <API_GW_URL>/api/v1/agents/routing/resume?id=3,4
# OPTIONALLY:
# We could resume routing to all agents with tag id 1
[Headers]
Authorization: Bearer <ACCESS_TOKEN>
PUT <API_GW_URL>/api/v1/agents/routing/resume?tags.id=1